Item comparison with Nexmosphere's BLE pickup sensors
In this tutorial we will use Nexmosphere's XM-350 modular controller with EM-f8 expansion module and 4 pieces of XF-P3N pick-up sensors.
Setup sensor
- Connect the controller to the device you wish to use.
- Go to Home page right-click on the LG screen then navigate yourself to Manage screen >> Device Properties >> Set sensor configuration
- In the
Sensor configfield insert the following configuration
Sensor configuration
{
  "services":[
    {
      "uid":"nexmosphere",
      "type":"GENERIC",
      "settings":{
        "rules":[
          {
            "pattern":"(\\w\\d{3}\\w)\\[(\\d*)]\r\n",
            "idGroupIndex":1,
            "valueGroupIndex":2
          },
          {
            "pattern":"(\\w\\d{3}\\w)\\[(TR|TD)=UID:([A-Za-z0-9]*)]\r\n",
            "idGroupIndex":1,
            "eventGroupIndex":2,
            "valueGroupIndex":3
          },
          {
            "pattern":"(\\w\\d{3}\\w)\\[(\\w*)=([A-Za-z0-9]*)]\r\n",
            "idGroupIndex":1,
            "eventGroupIndex":2,
            "valueGroupIndex":3
          }
        ]
      },
      "connection":{
        "port":"3",
        "parity":0,
        "baudrate":115200,
        "dataBits":8,
        "stopBits":1,
        "flowControl":0
      }
    }
  ]
}
After you sat the configuration, enable the Show console window on your device, when you interact with the board it will show the actual sensor's ID, Event and Value, which will be needed in content creation.
Content
In this content you will need a main page and 15 different pages.
Check the events and values you can receive from the pickup sensors.
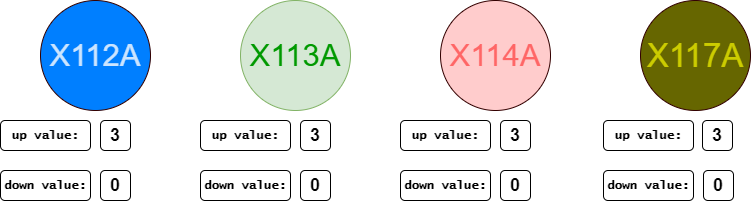
In this content the events and values are the following.
 |
|---|
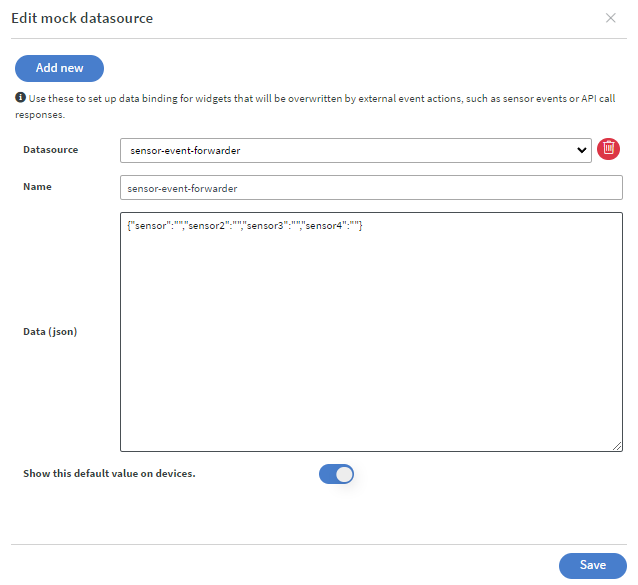
Mock datasource
- In the editor create a mock datasource in base data path modal of the properties >> content tab.
- This will track the actual state of the sensor.
{"sensor":"","sensor2":"","sensor3":"","sensor4":""}
 |
|---|
After you created a Mock datasource, save it then navigate yourself to properties >> content >> edit sensor events
- Switch on the
Allow specifying sensor valuesandAllow specifying sensor idsoptions on the bottom of the modal.
 |
|---|
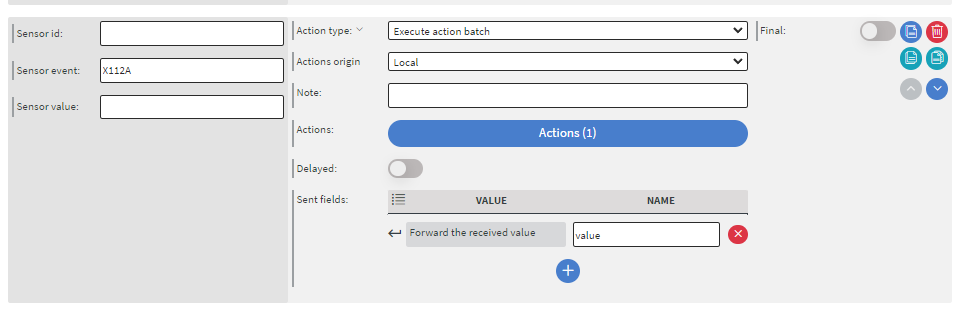
- Create an action batch then in the
sent fields, select theReceived valuethen as a name, enter value (because we want to overwrite one of the value of the mock datasource). - As a sensor event, define one of the pickup sensor's event.
- Leave the other fields empty.
 |
|---|
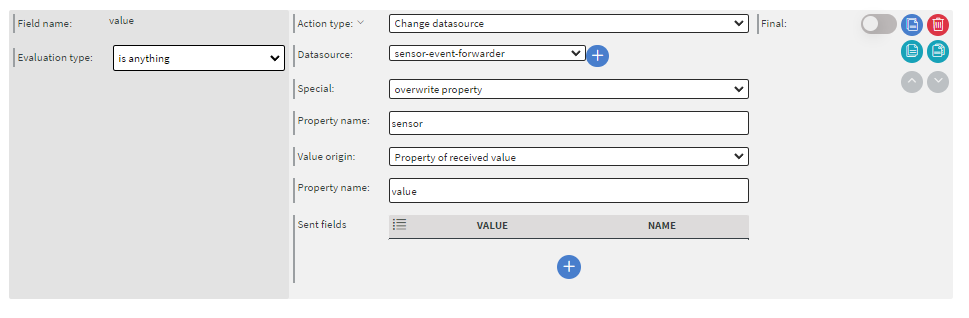
- After it is done click on the
Actionsbutton, as an action type selectChange datasourcethen select the previously made mock datasource. - Select the overwrite property and as a property name, enter one of the row name from the mock. Here we used the first one (
"sensor":"") - Under the field name on the left set the evaluation type to is anything,because we want to capture everything from the indexed sensor.
 |
|---|
Repeat it until every value of the mock datasource has been used, but make sure you use different property names, otherwise every single event will overwrite the same indexed value in the datasource.
If you have more than 4 events incoming (more than 4 sensors), you have to add a new row to the mock datasource (like "sensor5":""), and a new action batch with the defined sensor event in the edit sensor events modal.
-
After you finished the settings in Edit sensor events modal, then navigate yourself to edit datasource events modal.
- Here you can create action batches to separate the actions by the incoming event numbers.
-
Create the first action batch.
-
As a
bound valueselect the mock datasource
 |
|---|
- then as
evaluation typeselect has changed anything.
 |
|---|
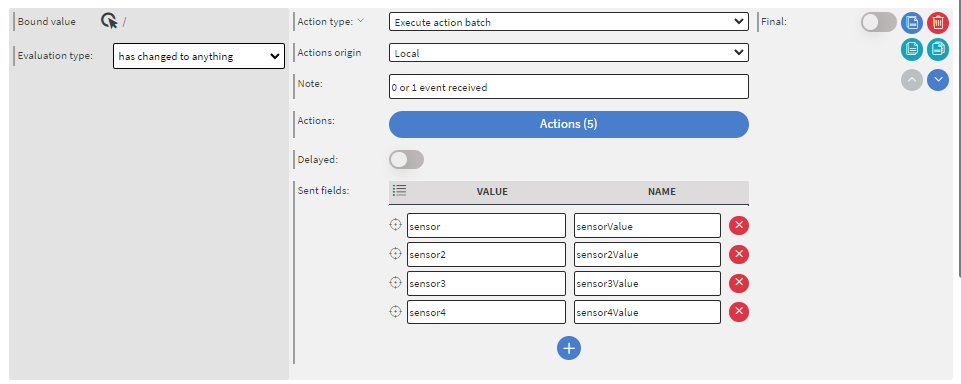
- In
sent fieldsselect theproperty of received valuefor 4 times then fill it with the values from the datasource, because they will define which action will be executed. - If you finished, click on the
Actionsbutton then add a new action.
|
|---|
- value 3 will come if you pick up the sensor, and when you put it down then it will be 0.
- this is the evaluation we will use to define which page must be shown.
- Create an action for each option when only 1 event received
BLUE EVENT RECEIVED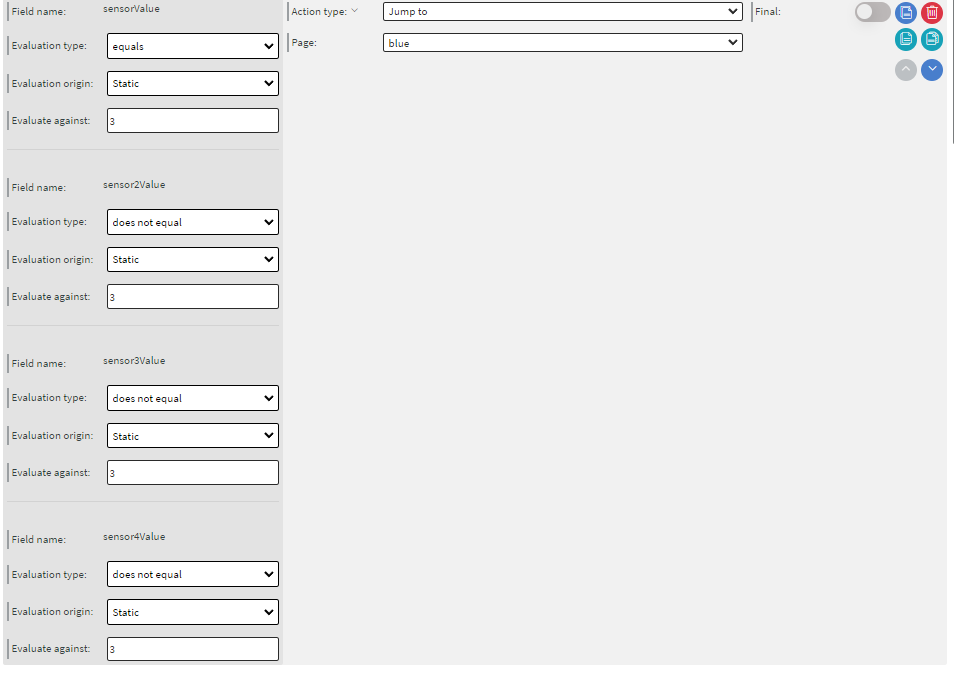 | GREEN EVENT RECEIVED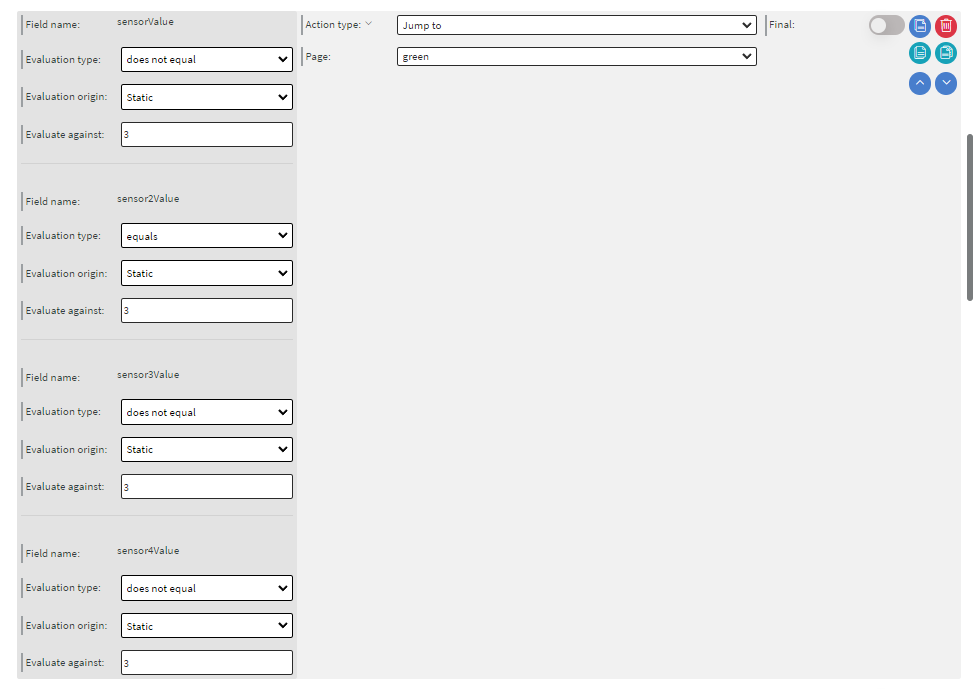 | RED EVENT RECEIVED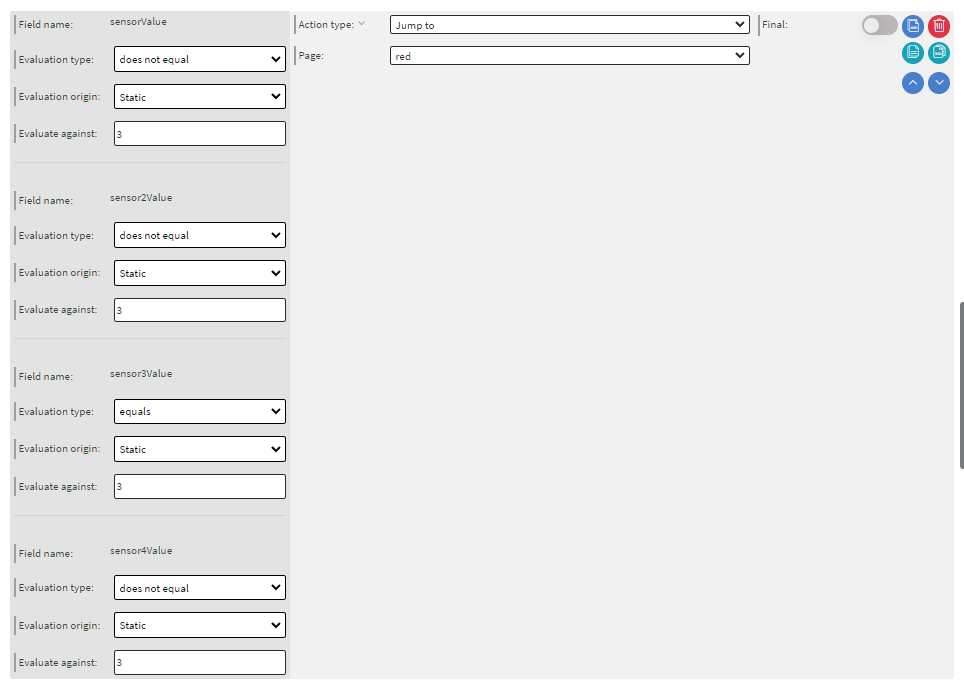 | YELLOW EVENT RECEIVED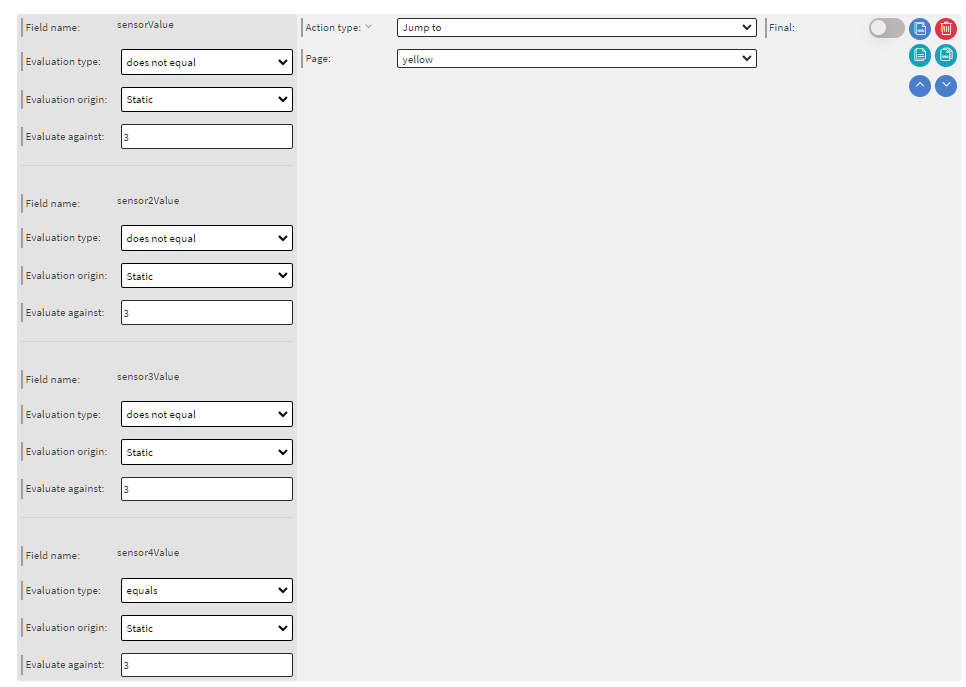 |
|---|
- Create an action when no event received (it will jump back to the main page.)
NO EVENT RECEIVED |
|---|
- Create an action batch with the same method then create actions for each option when 2 events received at the same time
BLUE + GREEN EVENTS RECEIVED | RED + GREEN EVENTS RECEIVED | YELLOW + RED EVENTS RECEIVED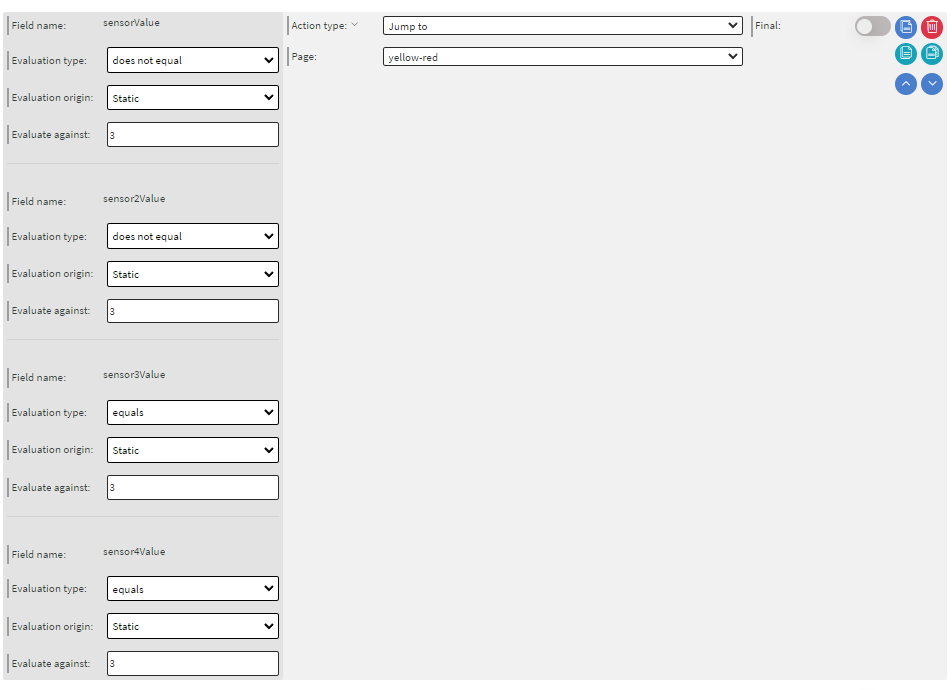 |
|---|---|---|
BLUE + YELLOW EVENTS RECEIVED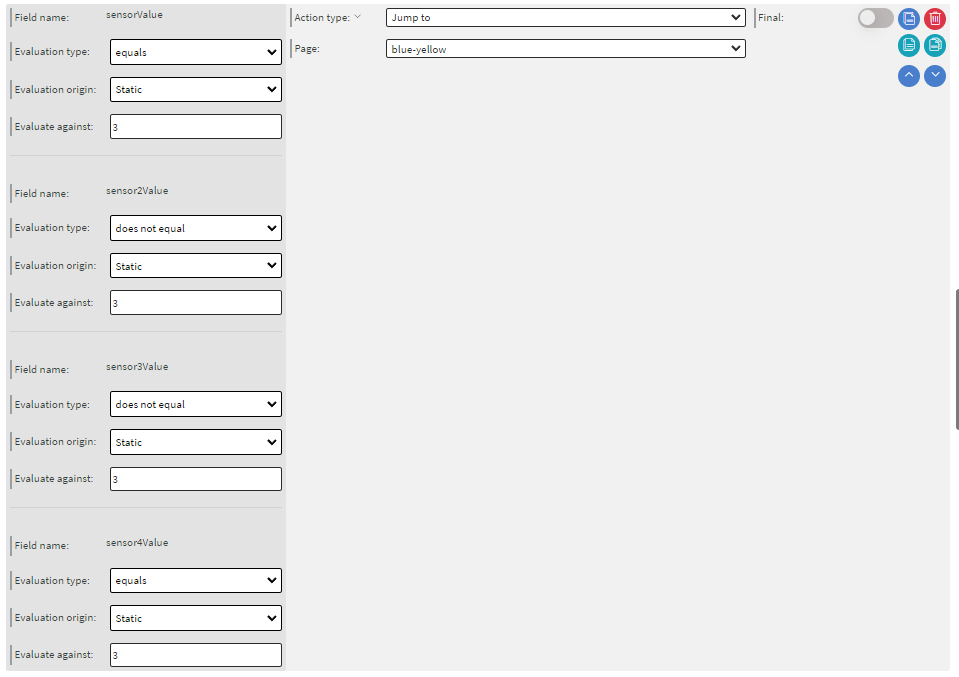 | BLUE + RED EVENTS RECEIVED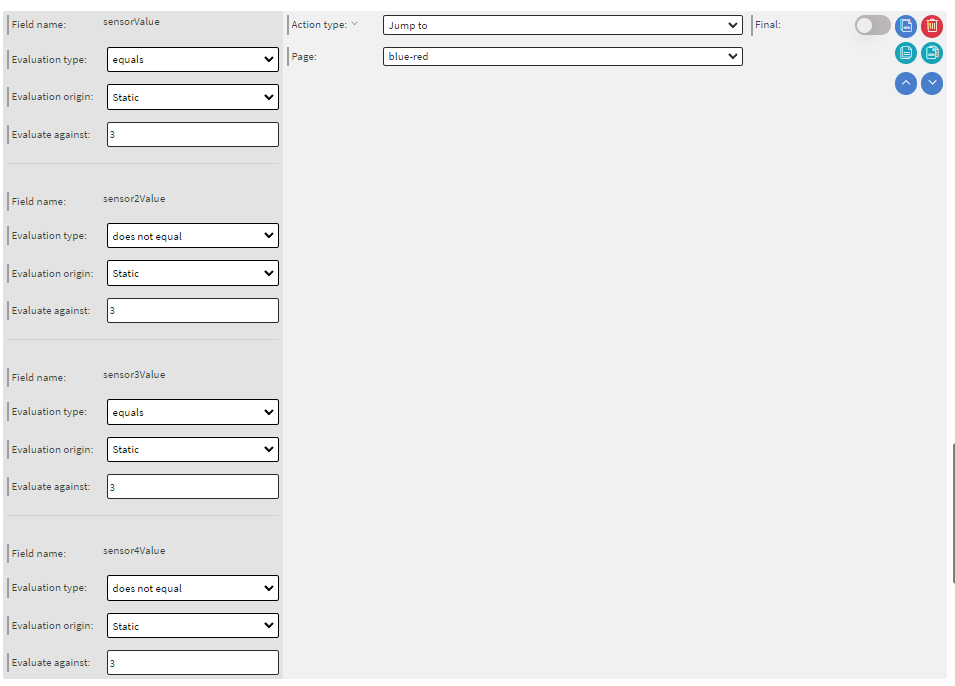 | YELLOW + GREEN EVENTS RECEIVED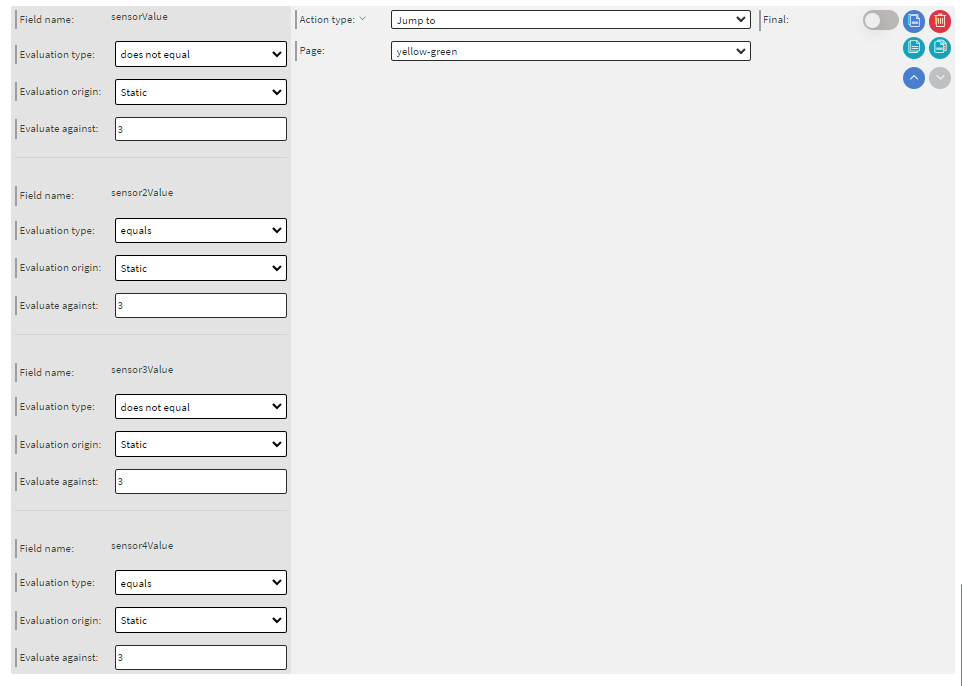 |
- Create an action batch with the same method then create actions for each option when 3 events received at the same time
YELLOW + RED + GREEN EVENTS RECEIVED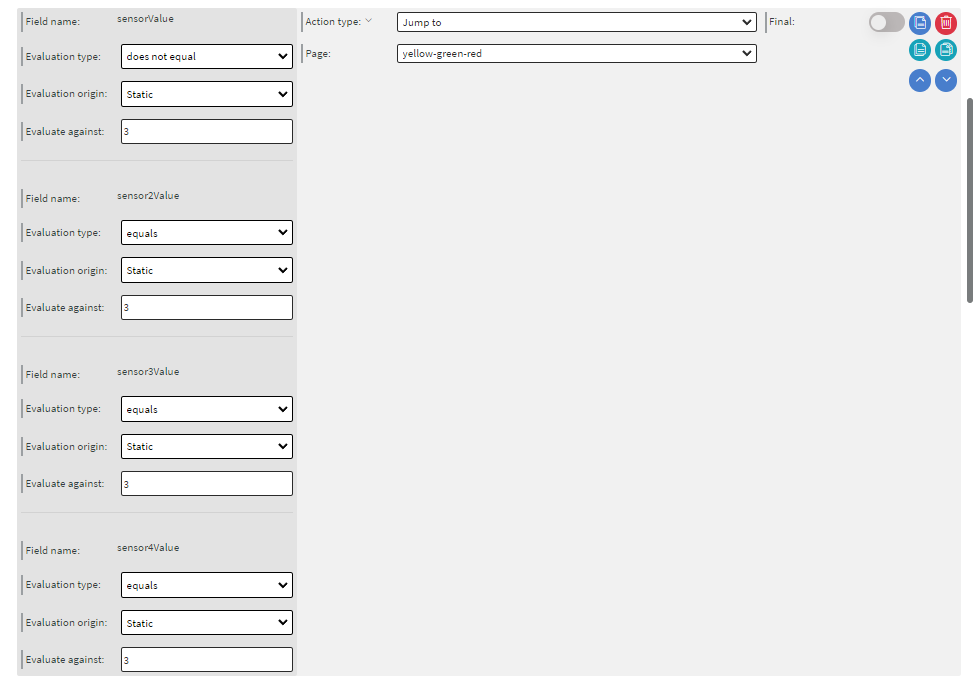 | BLUE + RED + GREEN EVENTS RECEIVED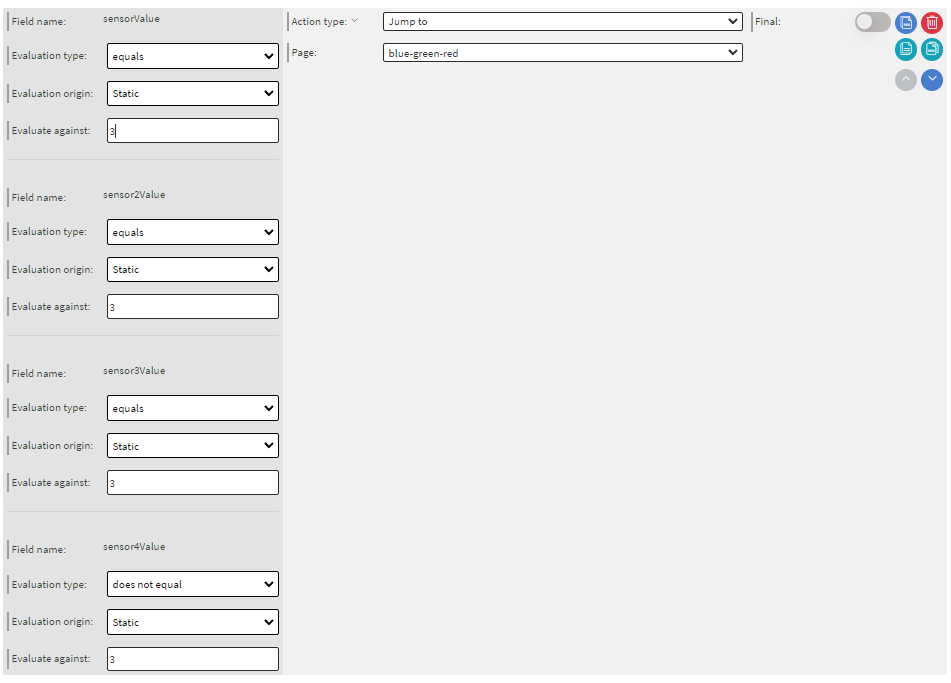 |
|---|---|
YELLOW + RED + BLUE EVENTS RECEIVED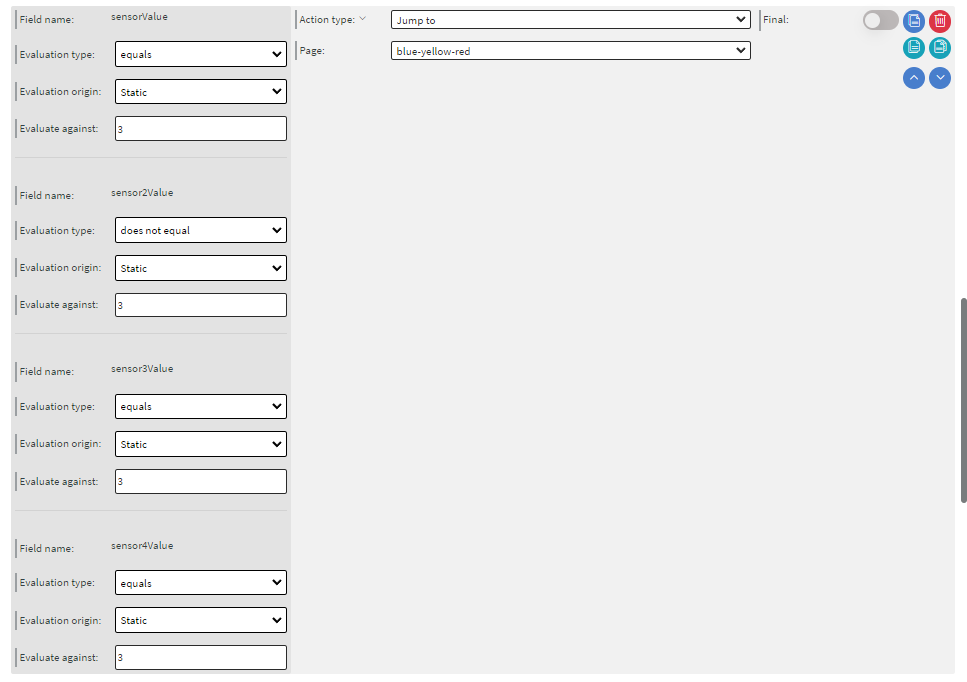 | YELLOW + GREEN + BLUE EVENTS RECEIVED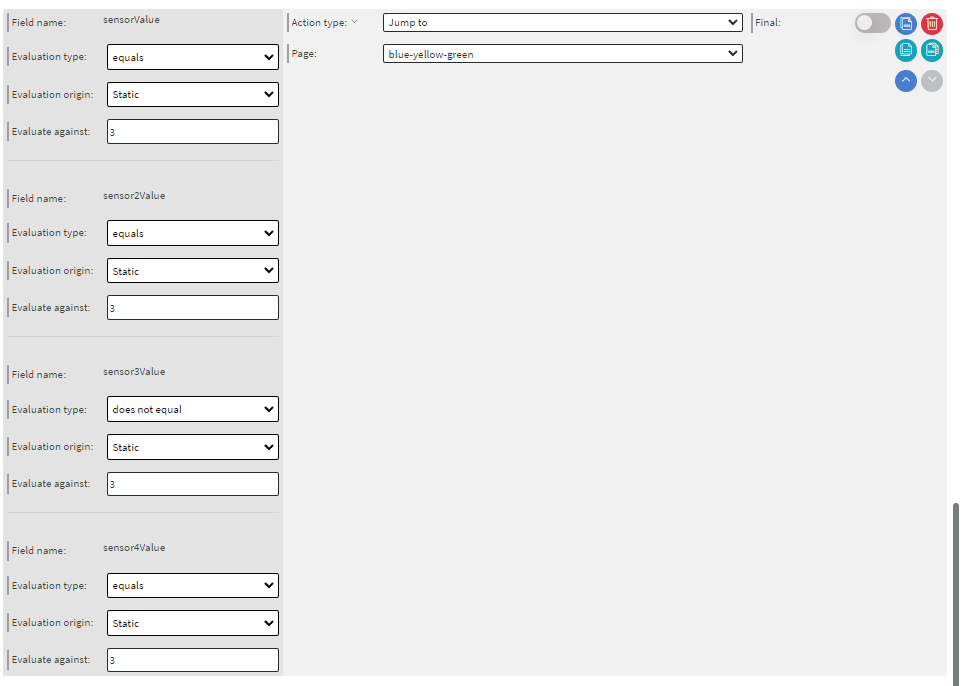 |
- Create an action batch with the same method then create actions for each option when all events received at the same time
YELLOW + RED + BLUE + GREEN EVENTS RECEIVED |
|---|
After you created all the actions, save it, save the content, then try it out
