Installation on BrightSign using BSN Cloud
This article shows you how to install the Wallboard application on your BrightSign device using BSN cloud.
Table of Contents
Introduction
BSN.cloud is a cloud-based device management interface by BrightSign. It enables users to remotely manage and troubleshoot their BrightSign devices without the need of an on-site technician. If you need to install applications at scale on hundreds of devices at once, there is no quicker alternative than BSN.cloud.
Creating a BSN.cloud Account & Network
- Navigate to BSN.cloud and click register at the bottom, then fill out your details.
- Confirm your registration in the email you receive.
- After logging in to BSN.cloud it will ask you to create your first network.
Create a Setup file
Setup files are configuration templates that you can apply on the listed devices in your provisioning list.
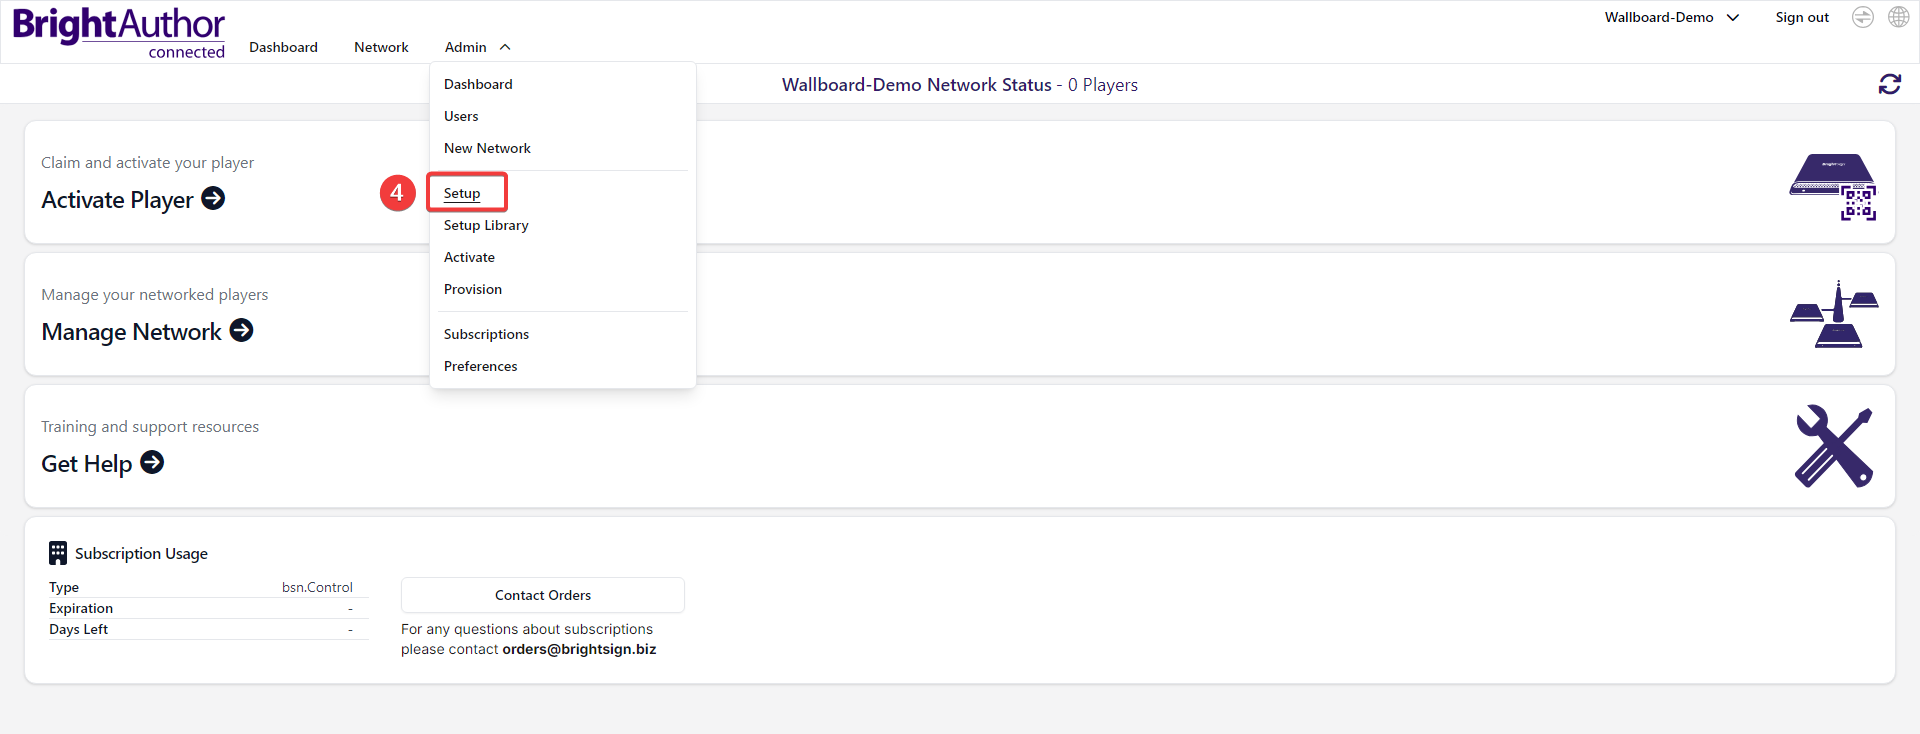
- Go to Admin > Setup to create a Setup file where you can pre-define all the settings that will be applied to your devices.
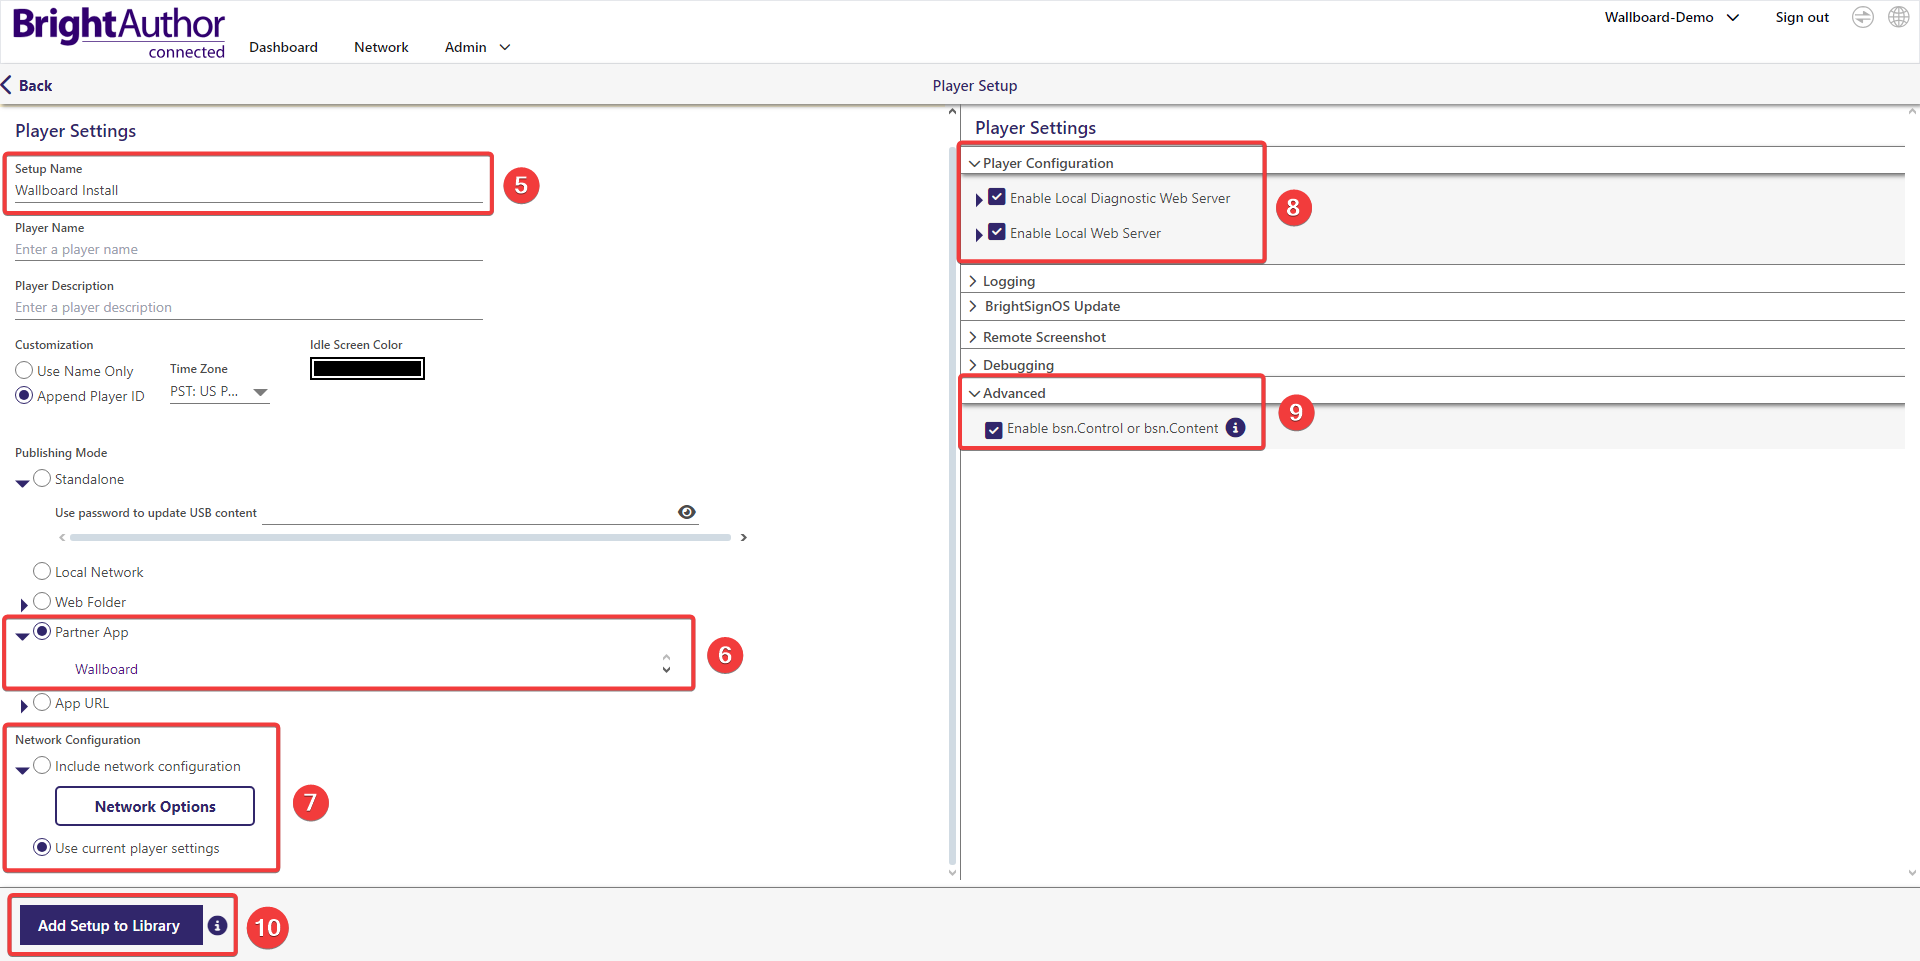
- Fill out your Setup Name.
- Select Wallboard as Partner App (You have to click View All to find it).
If you use a partner server(not _editor.wallboard.us), choose App URL instead and paste in the https://YOURSERVERURL/api/storage/update/jscore/brightsign/autorun.zip url where you have to replace theYOURSERVERURLpart with the server URL you want to register the device on. - Set up network configuration. (If you want to use wifi, select Include network configuration then click Network Options and go to the Wireless tab where you can provide your network SSID and password. Optionally you can give your device a Static IP Address by disabling DHCP and filling out the details.)
- Enable Local Diagnostic Web Server and Local Web Server.
- Enable bsn.Control or bsn.Content.
- Click Add Setup to Library
Add Device to Provisioning List & Apply Setup File
A Provisioning List is a list of devices that you would like to add to your network and assign setup files to.
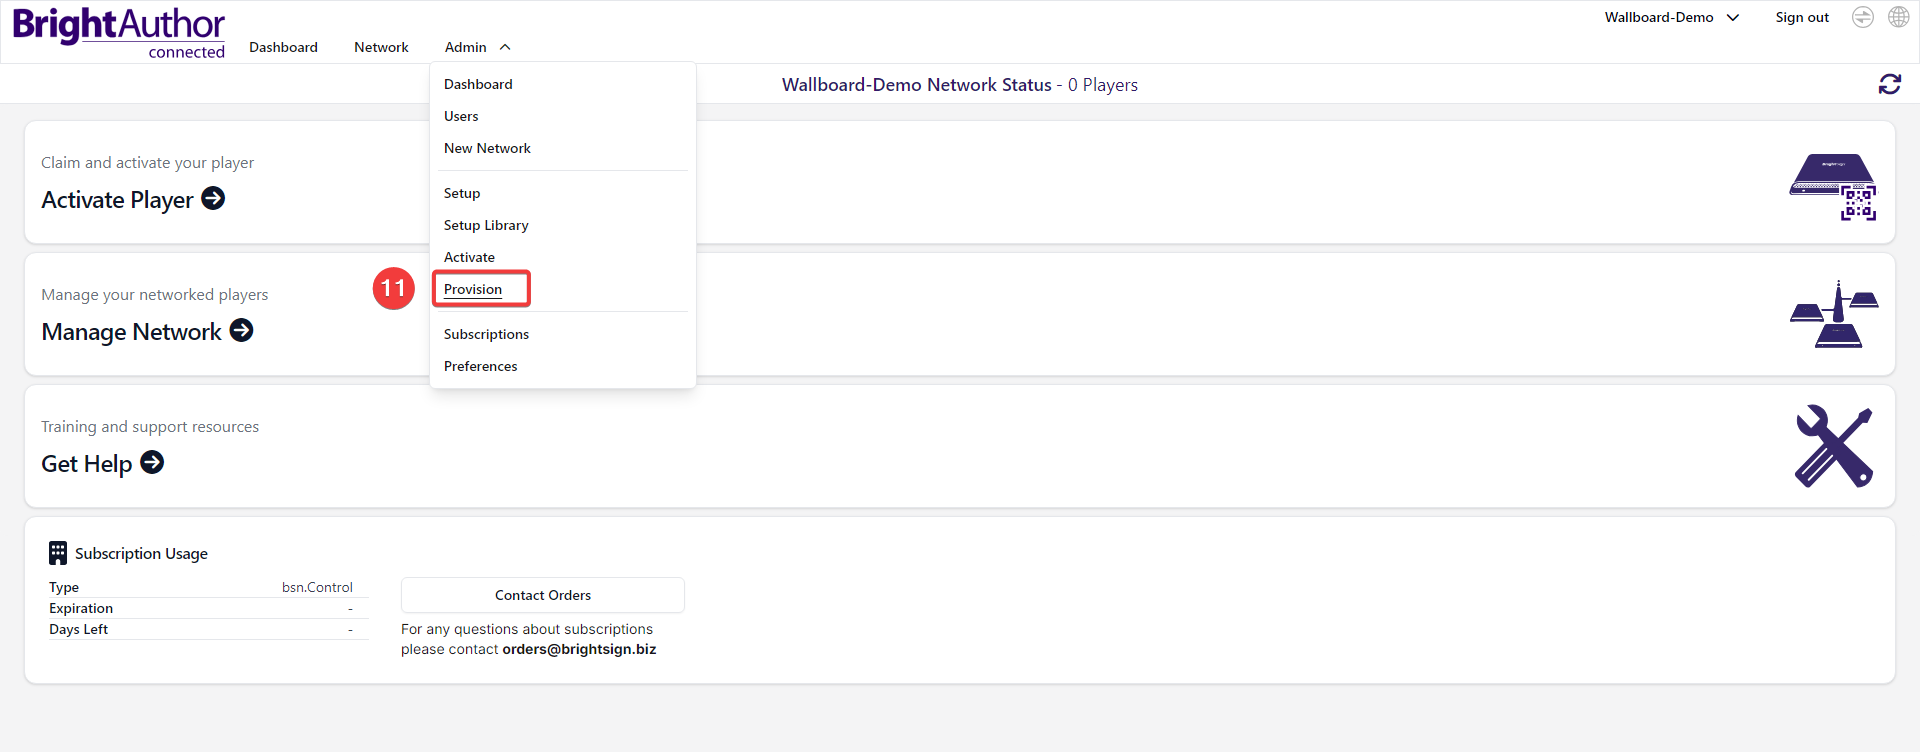
- Go to Admin > Provision to add your devices to the Provisioning List.
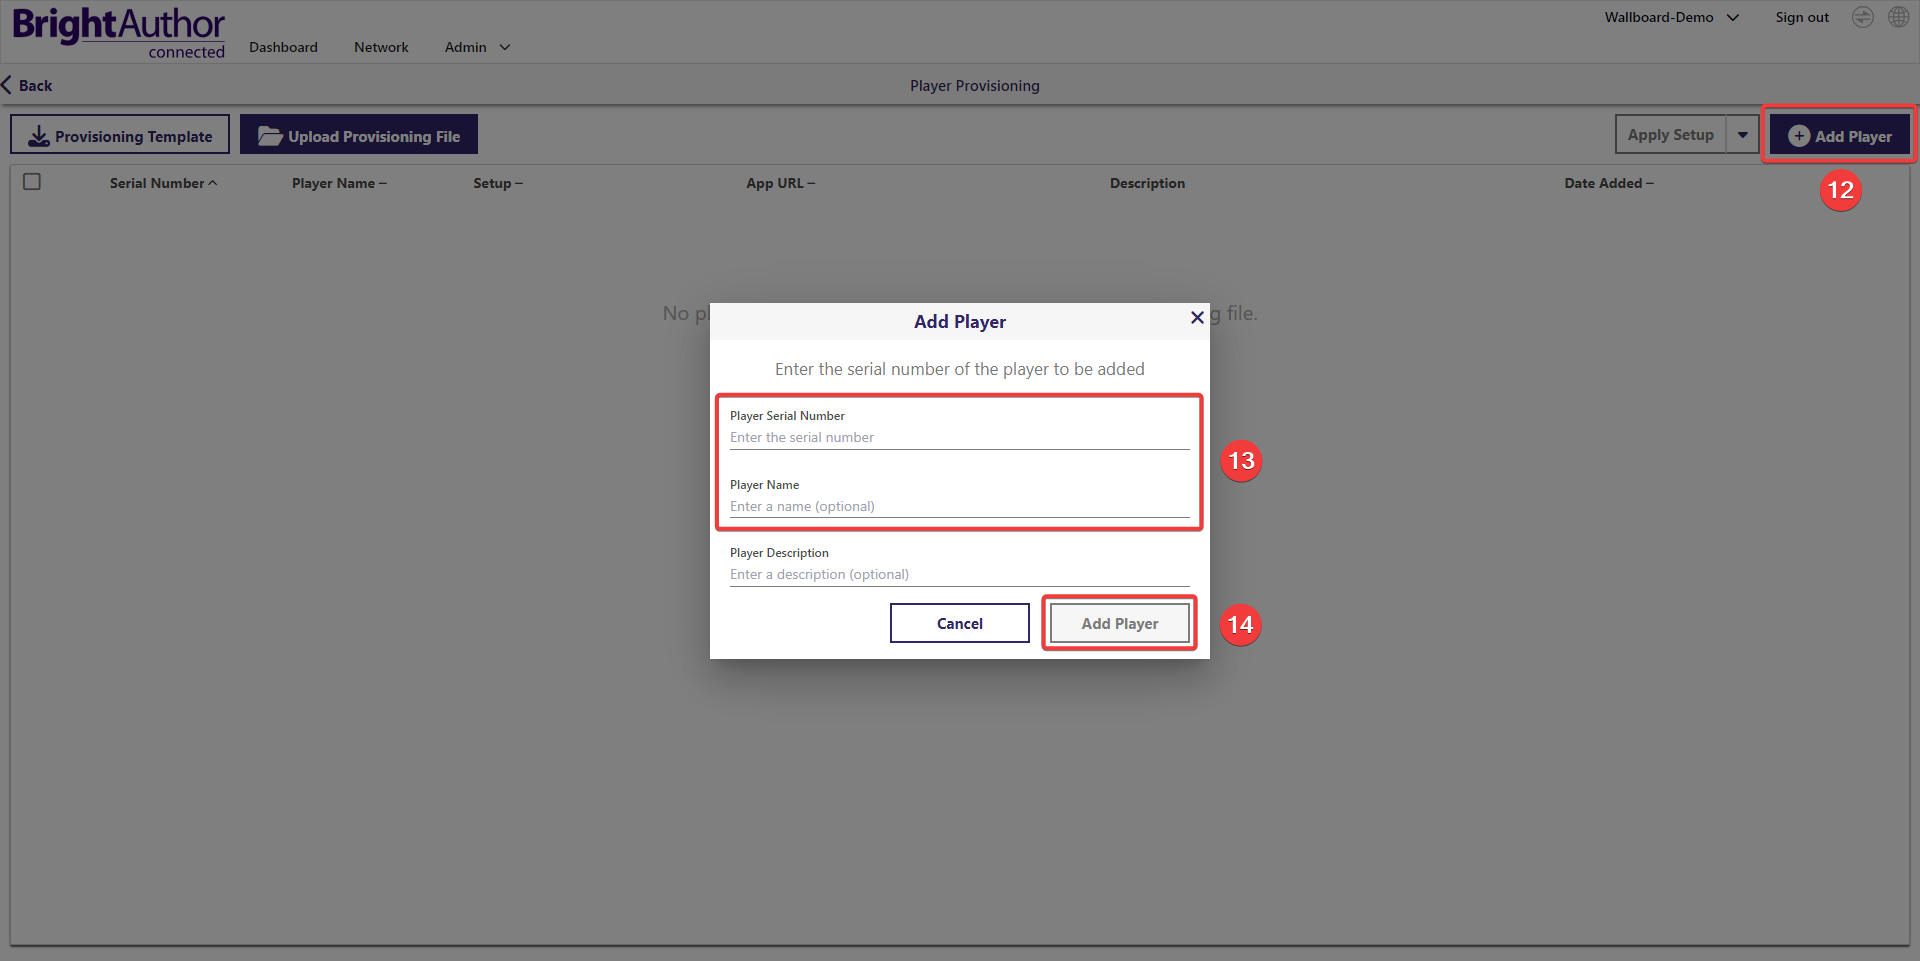
- Click Add Player.
- Enter the Serial Number and Name of your device. You can find the serial number on the back of the device written on a label.
- Click Add Player.
Initiating the Provisioning Process
Once you have listed all the devices in the Provisioning List it's time to assign the setup we previously created to these devices.
Assigning a Setup to a Provisioned device makes
the device use the settings defined in your Setup File when it enters a Provisioning Cycle.
BrightSign players trigger a Provisioning Cycle after booting up the device ONLY if the SD card in the device is fully wiped with no data on it.
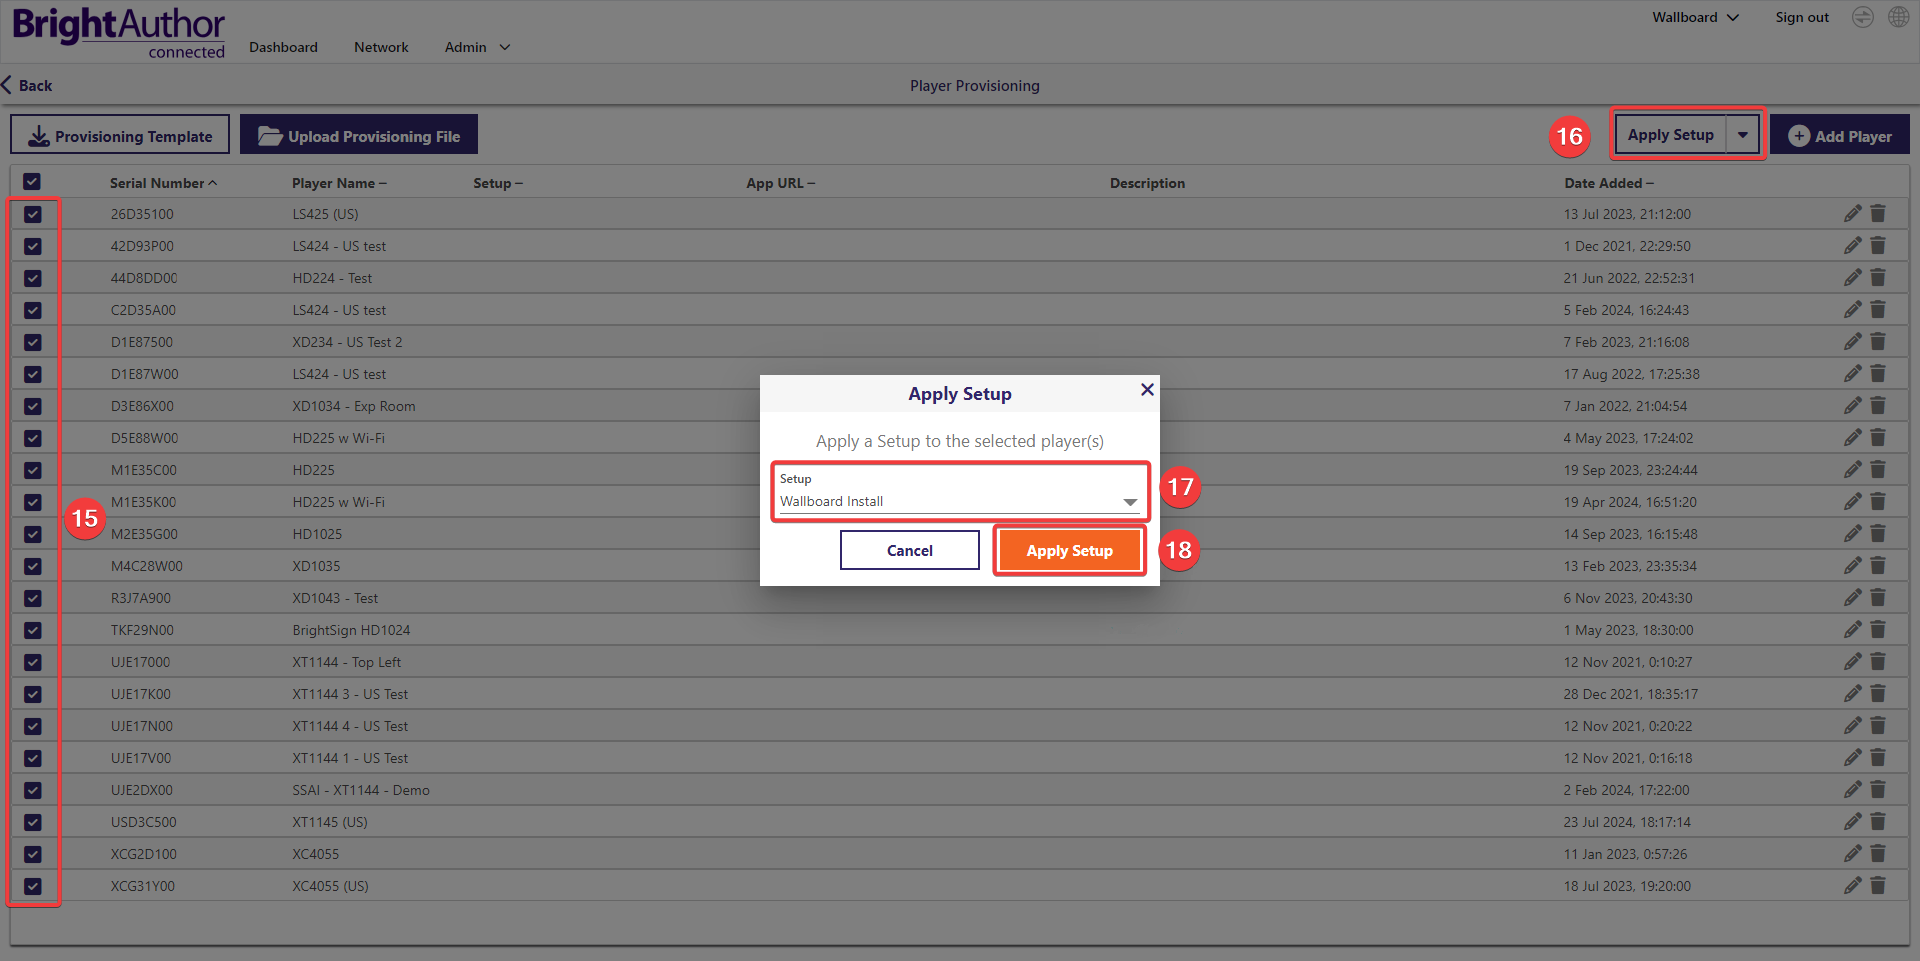
- Select all the devices you want to assign the setup to using the checkboxes.
- Click Apply Setup.
- In the popup select the Setup File you created.
- Click Apply Setup.
Pre-Registering Your BrightSign in Wallboard
Now with everything set up you can pre-register your devices in the editor so you don't have to wait for each device to generate an activation code. This is useful because you can prepare everything in advance before the device even comes online like the assigned content, rotation, working hours etc.. Easiest method is to create a Device Profile in the editor and during pre-registering select this device profile.
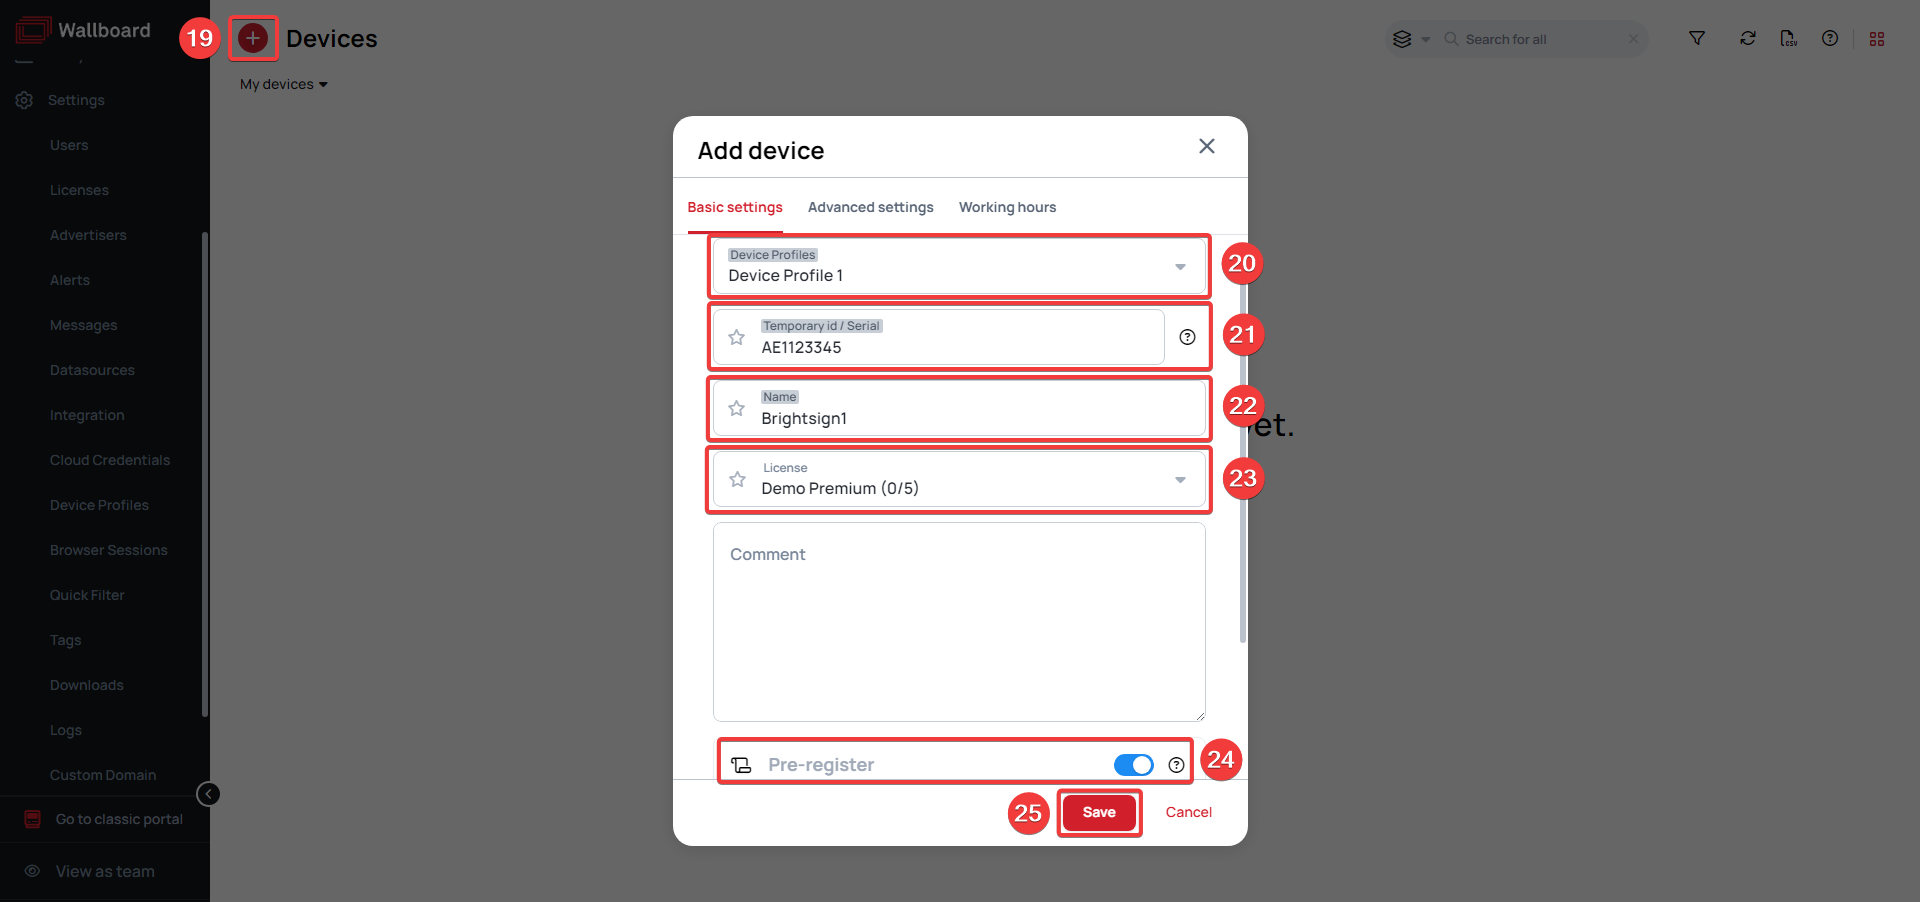
- Click Add device.
- (Optional) Select Device Profile.
- Enter the device's Serial Number.
- Enter the device's Name.
- Choose license.
- Enable Pre-register toggle.
- Click Save.
All that's left to do is to boot up your BrightSign device with a blank SD card and wait for it to provision. After provisioning your device will automatically appear in the editor where you pre-registered it!
Other scenarios
1. Device is already connected to BSN.cloud and needs to be reprovisioned
If your device is already connected to BSN.cloud and you've applied a new setup to it, you need to reprovision it in order for changes to take place.
To do that follow these steps:
- Log in to BSN.cloud and find your device under the Network tab.
- Click the gear icon that can be found on the left side of the Player ID column for each device. This will take you to the Embedded Web Server of that specific device.
- Go to the Control tab and click Reprovision at the bottom.
- The device will reboot with the setup you've newly applied in BSN.cloud.
2. Reprovisioning doesn't begin automatically
If you're having trouble connecting your device to BSN.cloud, you can connect to it via IP address from the same local network and format your SD card to ensure the provisioning cycle begins when you boot up your device the next time.
To connect to your BrightSign device do the following:
- Find the IP address of your device. You can do this by using a network scanner tool.
- Enter the IP address into your browser's address bar.
- You will be asked to provide a username and password. The username will be
adminand the password is theserial numberof your device. - Once you've logged in, go to the Diagnostics tab and click Disable Autorun. This will ensure the currently running application is stopped (The device will reboot).
- Next, click Format Storage to clear the contents of the SD card.
- Give your device another reboot (Control tab > Reboot). The provisioning should begin if you've configured it correctly through BSN.cloud.
3. Application is pointing to the wrong URL
If the Wallboard application on your BrightSign device points to the wrong server URL, you have to run a script that will clear the registry file from your device that tells it which server the application should connect to.
- Download the autorun script by clicking here.
- Find you device's IP address by using a network scanner tool.
- Enter the IP address into your browser's address bar.
- You will be asked to provide a username and password. The username will be
adminand the password is theserial numberof your device. - Go to the Diagnostics tab and click Format Storage.
- Go to the SD tab, click Browse and upload the file you downloaded in step 1.
- Go to the Control tab and click Reboot.
- Your device will now reboot and provision again. At the end of the process your device should point to the right URL.
Alternatively you can do it manually with an SD card reader connected to your PC:
- Pull the SD card from the BrightSign device and insert it into your SD card reader.
- Delete everything from the SD card then copy the autorun.brs file onto it. You can download it by clicking here.
- Insert the SD card back into the player while it's powered off.
- Power on the device.
- The device will do a reboot and provisioning cycle. At the end of the process your device should point to the right URL.
Watch YouTube tutorial video
If you have further questions please do not hesitate to contact us at support@wallboard.info.