Locking down Android application
Locking down the device means that our application will optimize the Android system for running as a digital signage device.
Only rooted devices can be locked!
What does locking down an Android device do?
- Every pre-installed application will be disabled. This means that every application, that is not needed for our application to work, will be disabled. This will grant maximum performance and stop badly behaving apps.
- The default home applications will be removed and our application will be set as the new home application. This means that every time the device starts or the Home button is pressed then our application will start.
- A new custom boot animation will be set.
- Locking down the device needs to be done only once. It will take several minutes to lock and then will reboot.
Lock / Unlock device
From 1.x UI
You are also able to Lock/Unlock a Windows device from our editor UI. On the Screen right click > Device Properties > Lock screen
- In the modal you can select to Lock or to Unlock the screen
From 2.0 UI
If you are using 2.0 UI you can also lock / unlock your device.
- You have to navigate yourself to
Devices - Then select the device you wish to lock
- It will navigate you to
Device detailswhere you have to selectSettings - Here you will find a modal called
Device, where you can adjust the device-related settings. - Find the
Lockswitch in the list to lock / unlock your device.
- If you would like to restore the device to its original state you can unlock the device.
- Unlocking will enable all applications that were disabled by the locking process and will re-set device.
During device installation
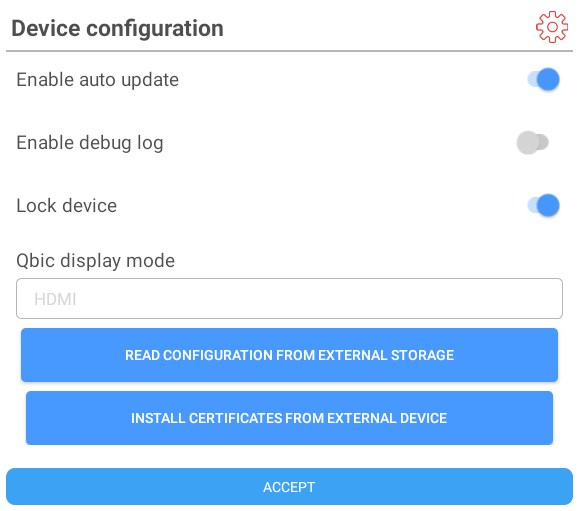
You can lock the device during installation in the configuration options.

Inside secret menu
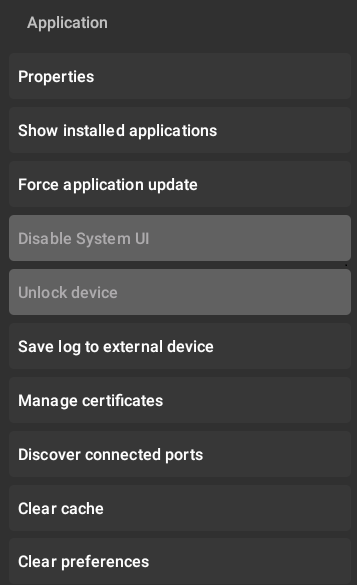
You can lock the device inside secret menu options.

For more information about Secret menu visit the following article: Android secret menus
From Wallboard Toolbox
In the Wallboard Toolbox under Device management you can lock/unlock Android devices.
- Go to Device management
- Select Lock/Unlock
- Enter your device's IP address then click
+(Make sure your device is connected to the same network as your PC where Wallboard Toolbox runs) - Select your device and click Next
- Enter your server URL (For example: https://editor.wallboard.us)
- Under Locking/Unlocking options only select Disable/Enable launcher applications for maximum compatibility with all kinds of devices
- Click Next
Your device will now start the locking/unlocking procedure. After it has been finished, you will be notified and the device will restart automatically.
Locking/Unlocking a device with the Disable System UI or Move application to the System partition selected could cause some devices to crash and need to be factory reset. Use these options at your own risk!
Locking down Android TV devices
-
Setup the Android TV device normally, and set up your Google Account.
-
Download, install and register the Android application on your CMS.
-
After the installation is complete, install ADB (Android Debug Bridge) on your computer from here: https://developer.android.com/studio/command-line/adb
-
Enable Developer Mode on the device.
- Go to Settings
- Find the About Device option, and open it.
- Click five times on the Build Number section, until the toast comes up "You are now a developer".
- In the developer options enable the USB debugging.
-
Find the IP address of the device. (It can be found in the Network and Connection settings)
-
Open Command Prompt on your computer.
-
Connect to the device via ADB with adb connect <Device's IP address> (For example: adb connect 192.168.1.101)(On some devices a dialog comes up asking for permission to create the connection between the PC and the device, press OK on the dialog)
-
In Command Prompt open the terminal of the device with adb shell
-
Backup the launcher applications.
- Find the path of the built-in launcher application with pm path com.google.android.leanbacklauncher
- Exit the terminal with the exit
- Copy the application from the device with
adb pull <Launcher path> <Path where to copy>For example:
adb pull /system/priv-app/TVLauncher/TVLauncher.apk C:\Users\User\Desktop- Redo these steps with google.android.tvlauncher application. In some cases, there are other launcher applications, disable all of them, you can find the launcher applications with the following command:
pm list packages | grep launcherThe terminal will list all launcher application, and their packages names, just copy the packages names and redo the a. b. c. steps with them
-
Remove the launcher applications from the device.
- Remove the first launcher with
pm uninstall -k --user 0 com.google.android.leanbacklauncher- Remove the second launcher with
pm uninstall -k --user 0 com.google.android.tvlauncherIf there are more, or other launcher applications on the device find them and remove them
pm list packages | grep launcher command
pm uninstall ?k ?user 0 -
Additionally, other pre-installed apps can be removed like Netflix (com.netflix.ninja), Youtube (com.google.android.youtube.tv) with
pm uninstall -k --user 0 <Package name>
For example:
pm uninstall -k --user 0 com.netflix.ninja