Creating & Managing Clients (Network Members)
Network members (Clients) are sub-customers that operate within your network structure.
- Think of them as separate units that manage their own content, users, and screens while you can access them from your main network owner (Partner) account.
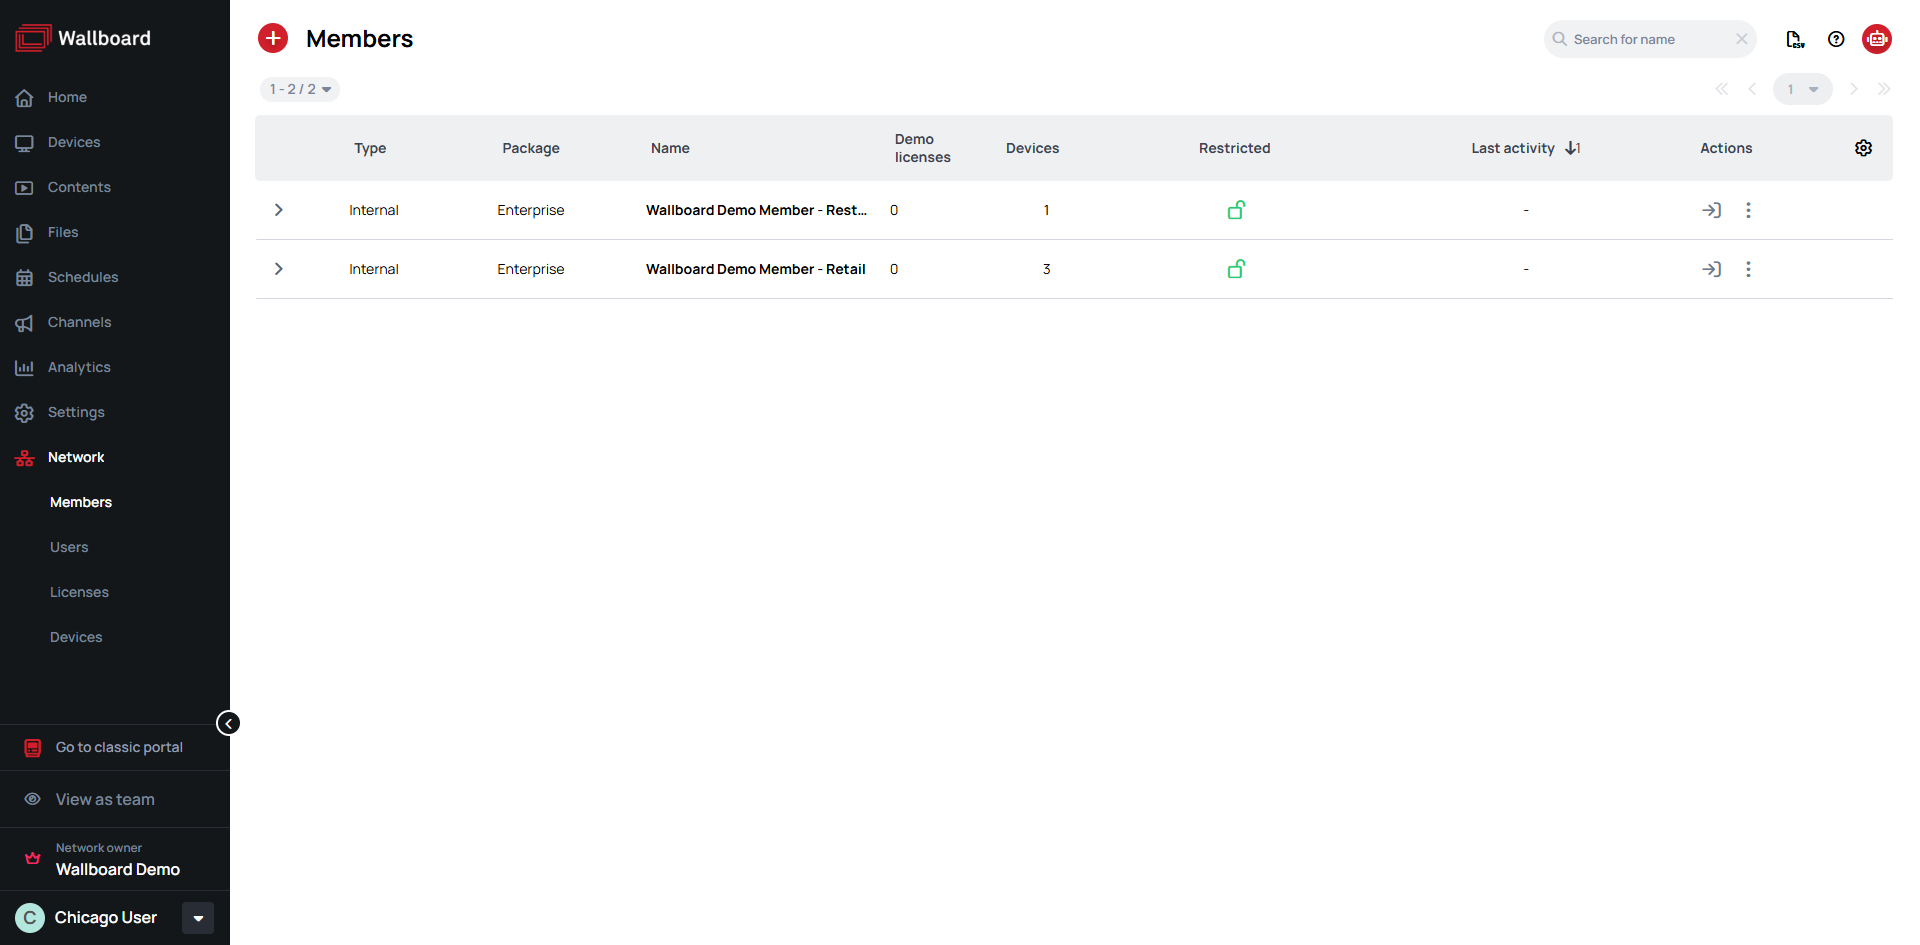
Each location (called a "member") is a completely separate workspace with its own content, devices, and users. Resources cannot be shared between members or network owner.
To share resources between locations within a single member's workspace, use the Teams feature. Teams work inside one workspace — they cannot share resources across separate members.
A member is a customer in your network, and what its users can see and do is governed by four independent controls:
- Roles — access: what a user can do. Learn more: User Roles.
- UI Profiles — visibility: what a user sees. Learn more: UI Profiles.
- Teams — scope: which resources (devices, content, folders) a user can reach. Learn more: Teams.
- Package — availability: which features exist for the member at all. Learn more: Packages.
Prerequisites
- Network Owner (Partner) account
- An Administrator user with access to network members
Creating a New Client (Network Member)
- Navigate to Network > Members
- Click the (Add) button
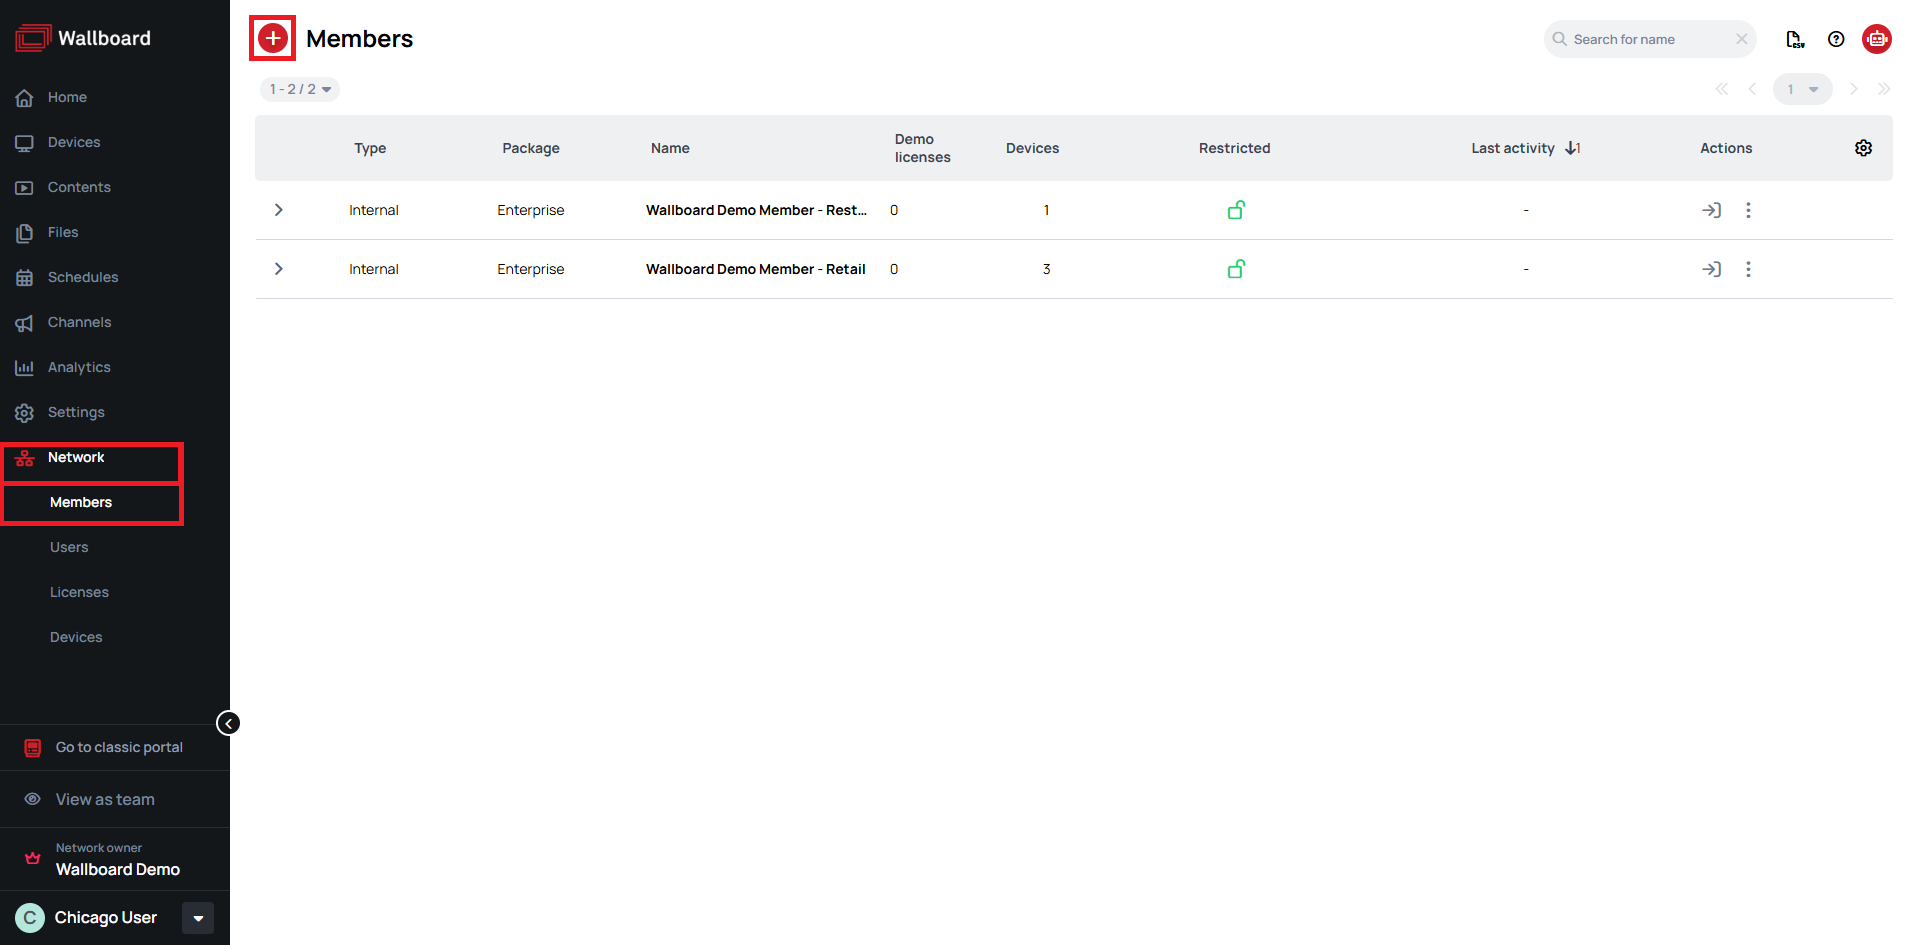
- Fill in the mandatory (marked by ) information:
- Member Name - Display name for this location
- Package Type - Select from available packages (Essential, Business, Enterprise), each offering different features for varying organizational needs
- Industry Verticals - Type of vertical the client (network member) uses
- The rest of the form details are optional
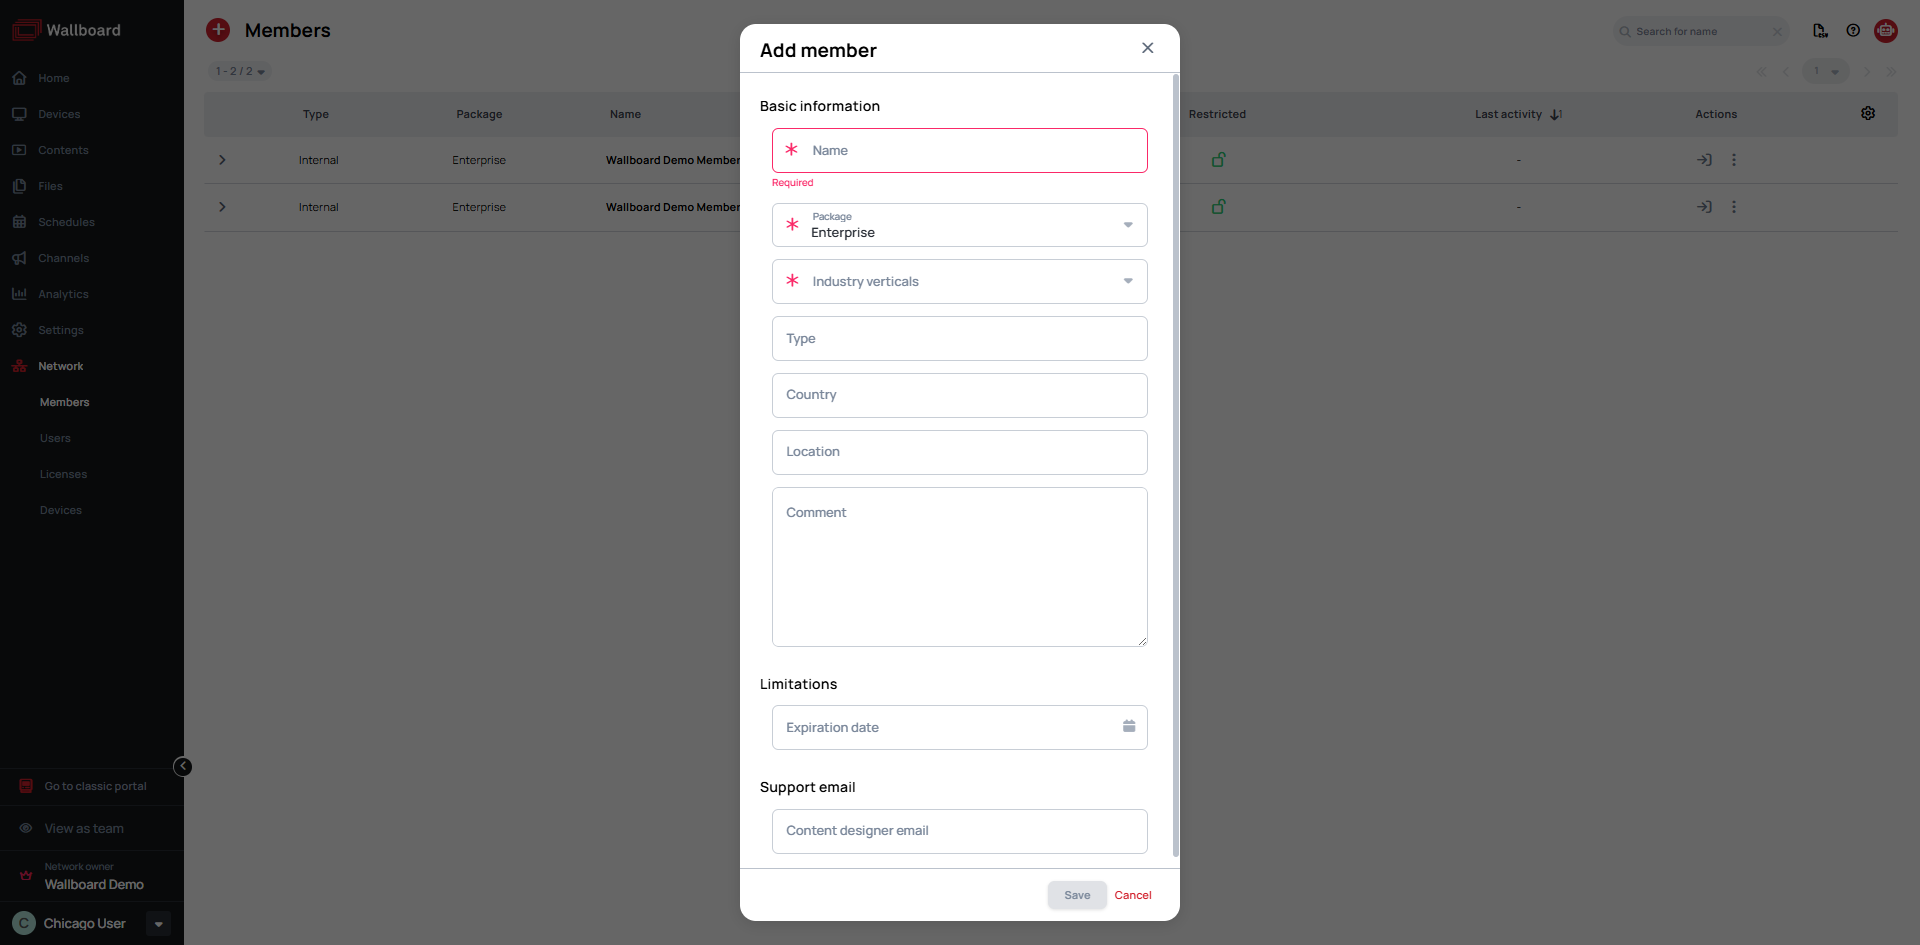
- Click Save
The new member workspace is now ready for setup.
Portal Types and Tiers
Customers are assigned package types that define their feature access and system limits, tailoring the platform experience to their specific signage needs. This approach prevents feature overload for customers requiring only essential functionality.
Learn more: Packages and License Tiers
Managing Client Information
- Go to Network > Members
- Click on the at the end of the member list item
- Click on the icon for the Edit option
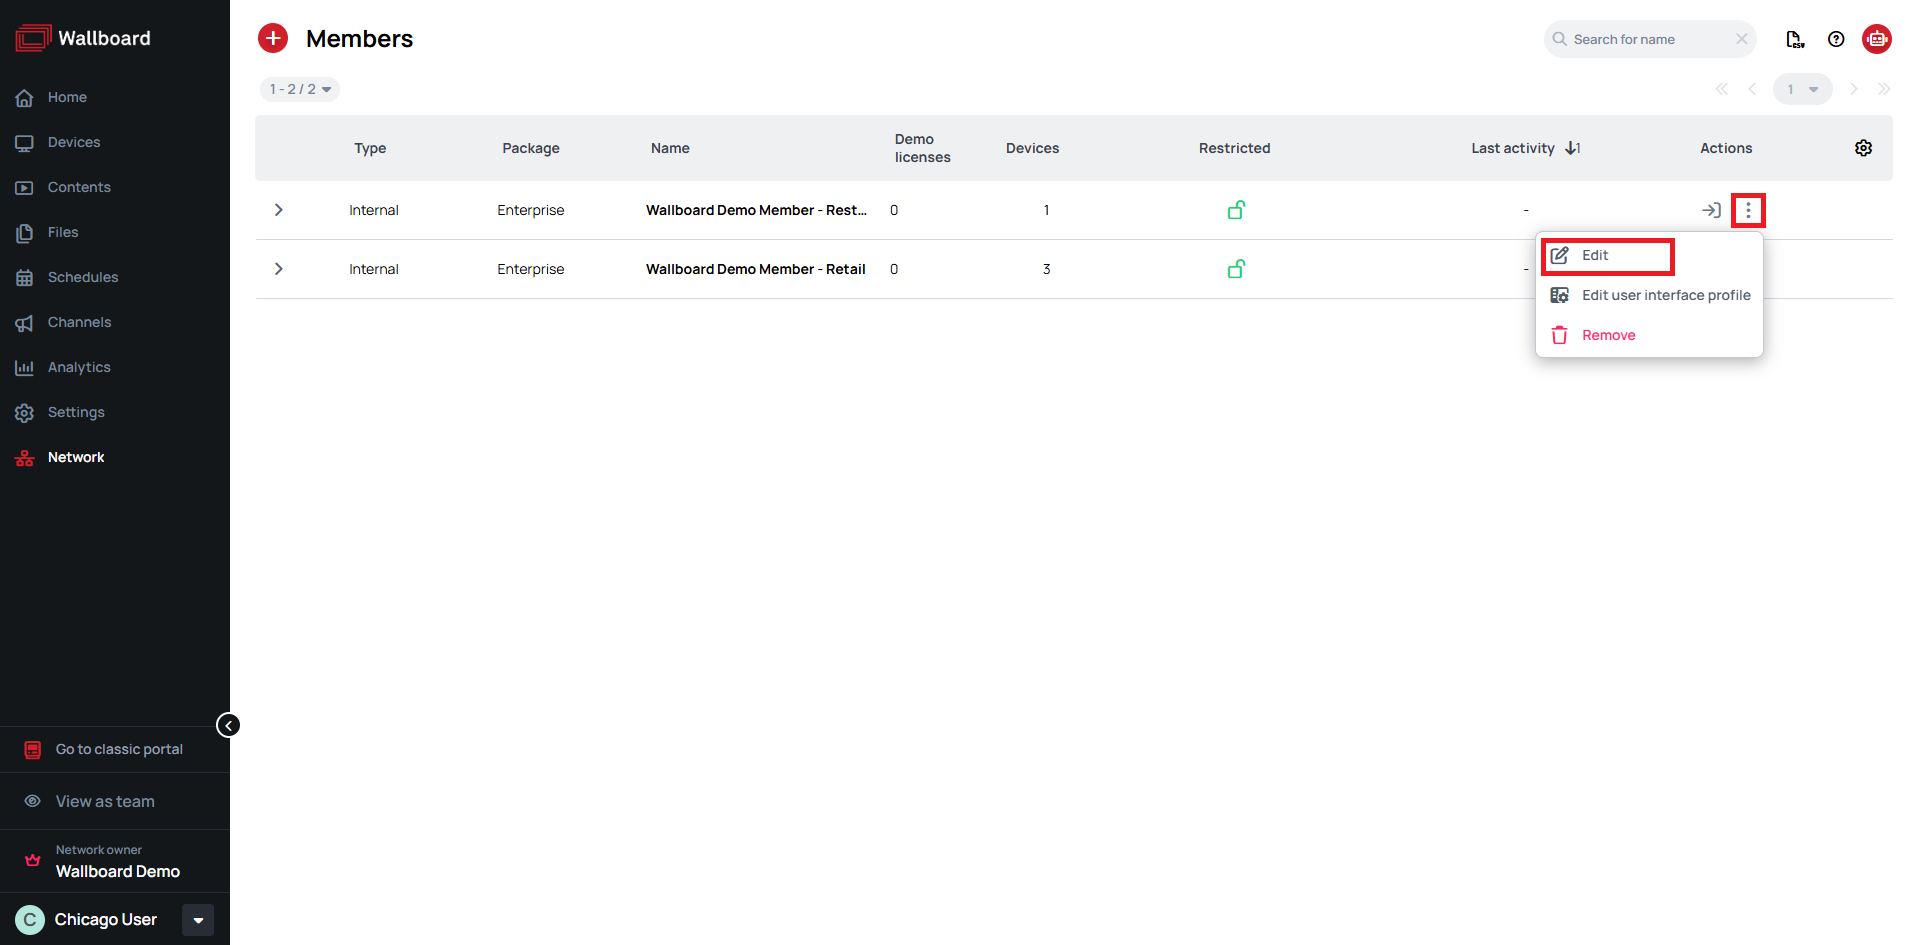
- Access member-specific information
You cannot move resources (content, playlists, devices) between members. Use Teams within a single workspace if you need resource sharing.
Available Member Actions
- Go to Member - Network Owner Administrators with Access to Network Members privilege can access member accounts for assistance or management
- Learn more: Navigating Network System
- Edit Member Details - Update member information and adjust their settings
- Edit user interface profile - Personalize how the interface looks for each member
- Learn more: User Interface Profile Settings
- Remove - Permanently delete a member from your network when no longer needed