Enter the settings menu (press the cog icon on the remote controller)
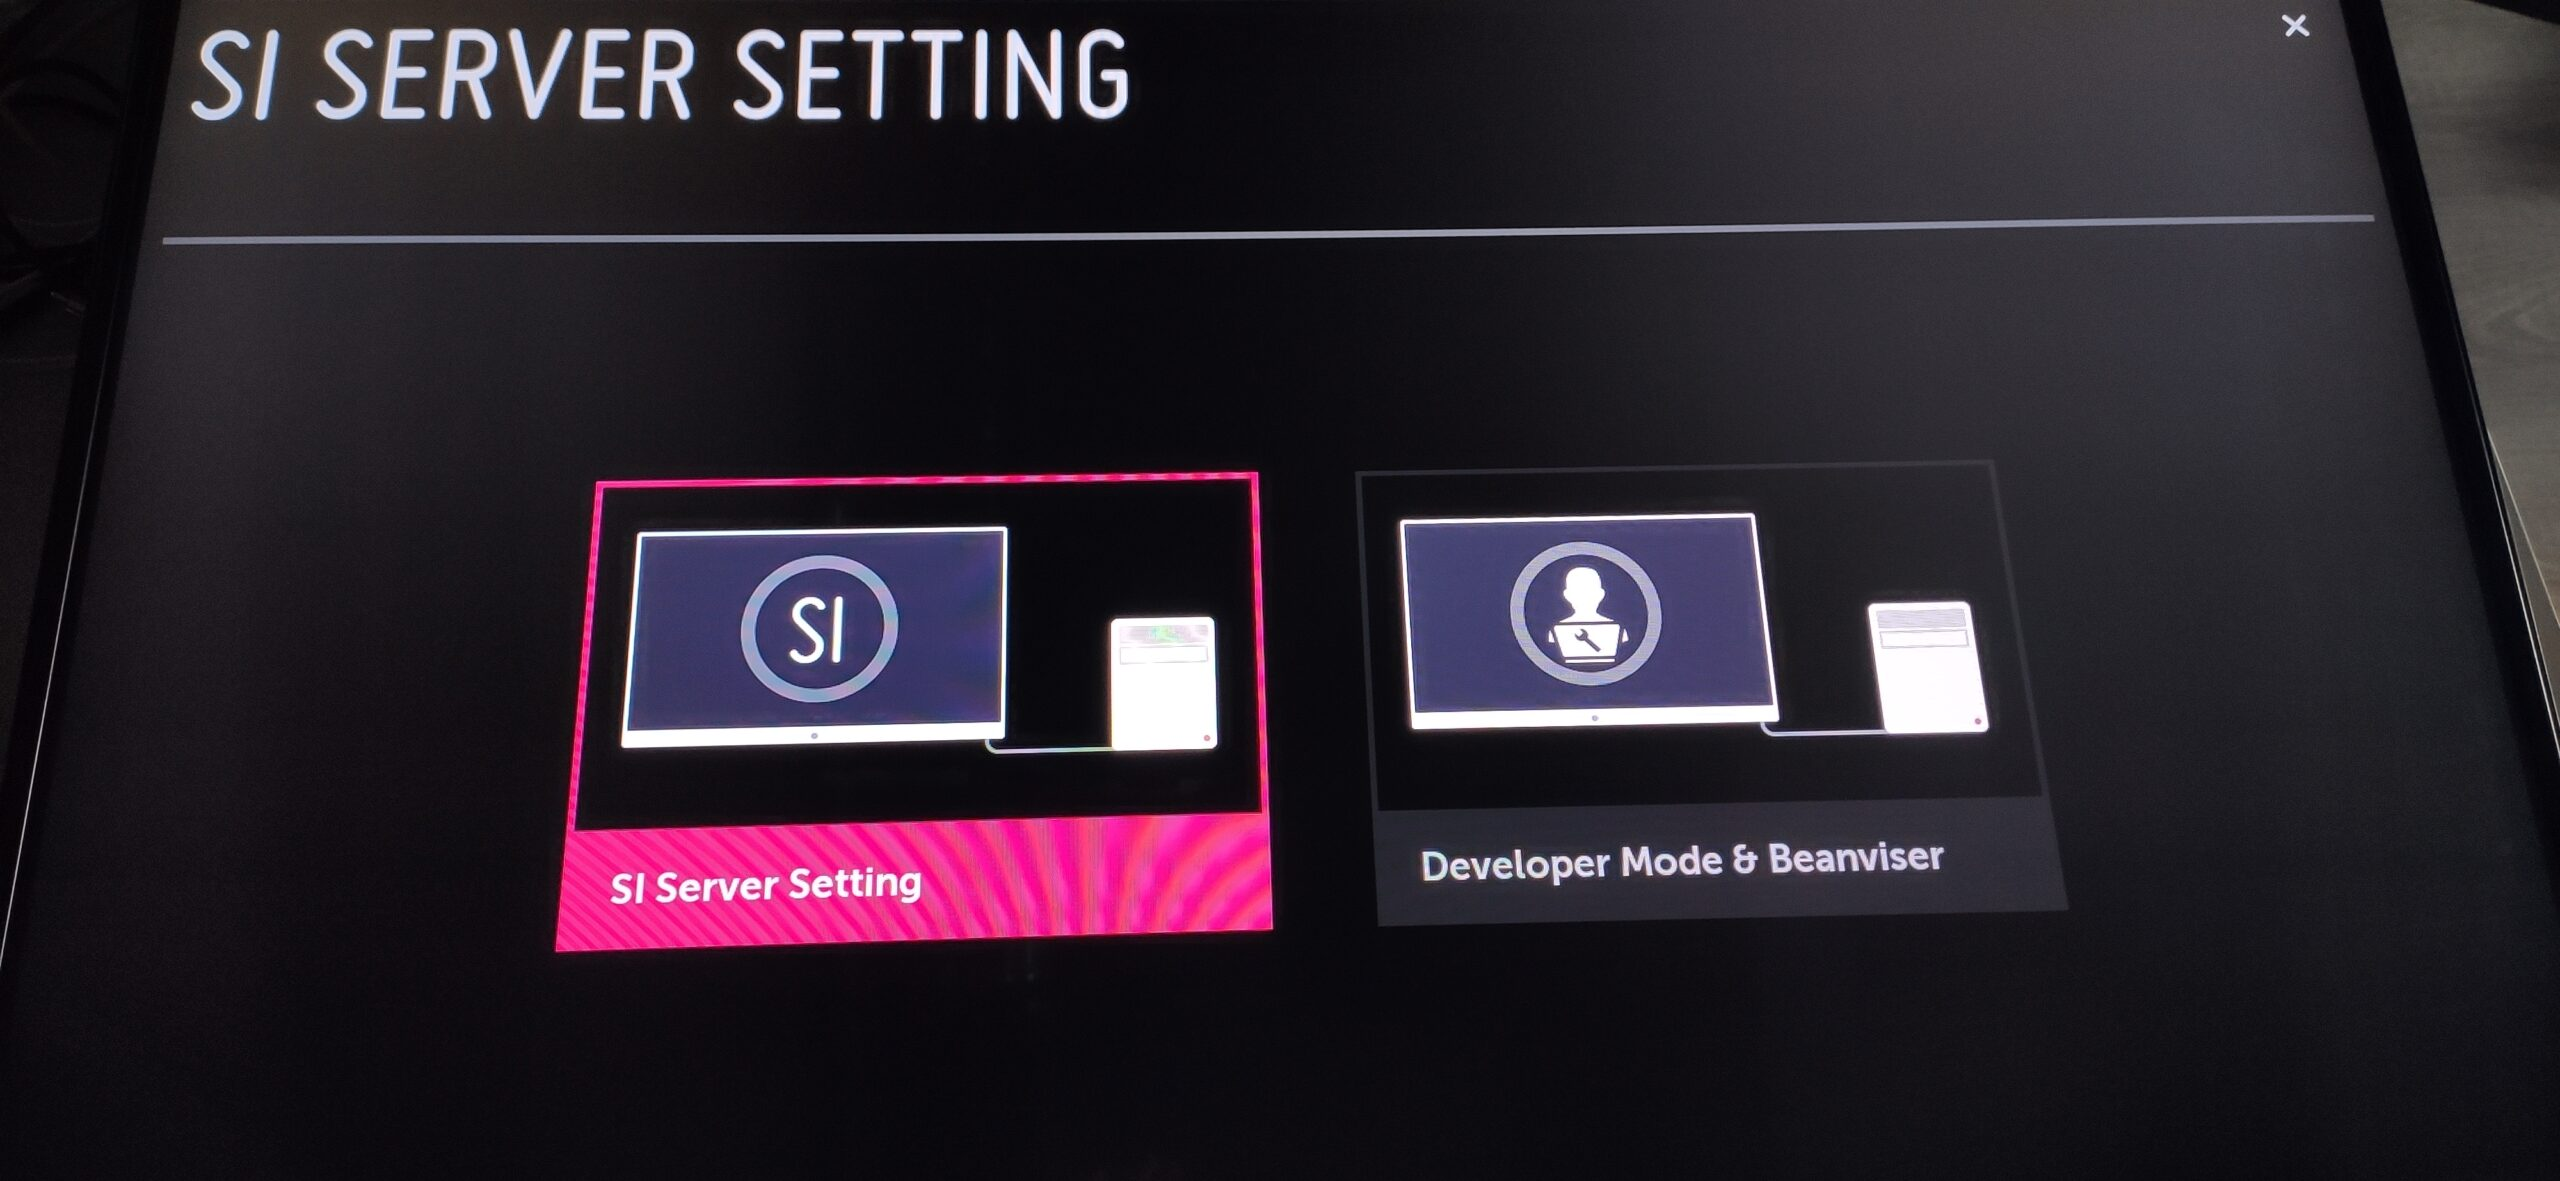
Navigate to Ez Setting -> SI Server Setting -> SI Server Setting
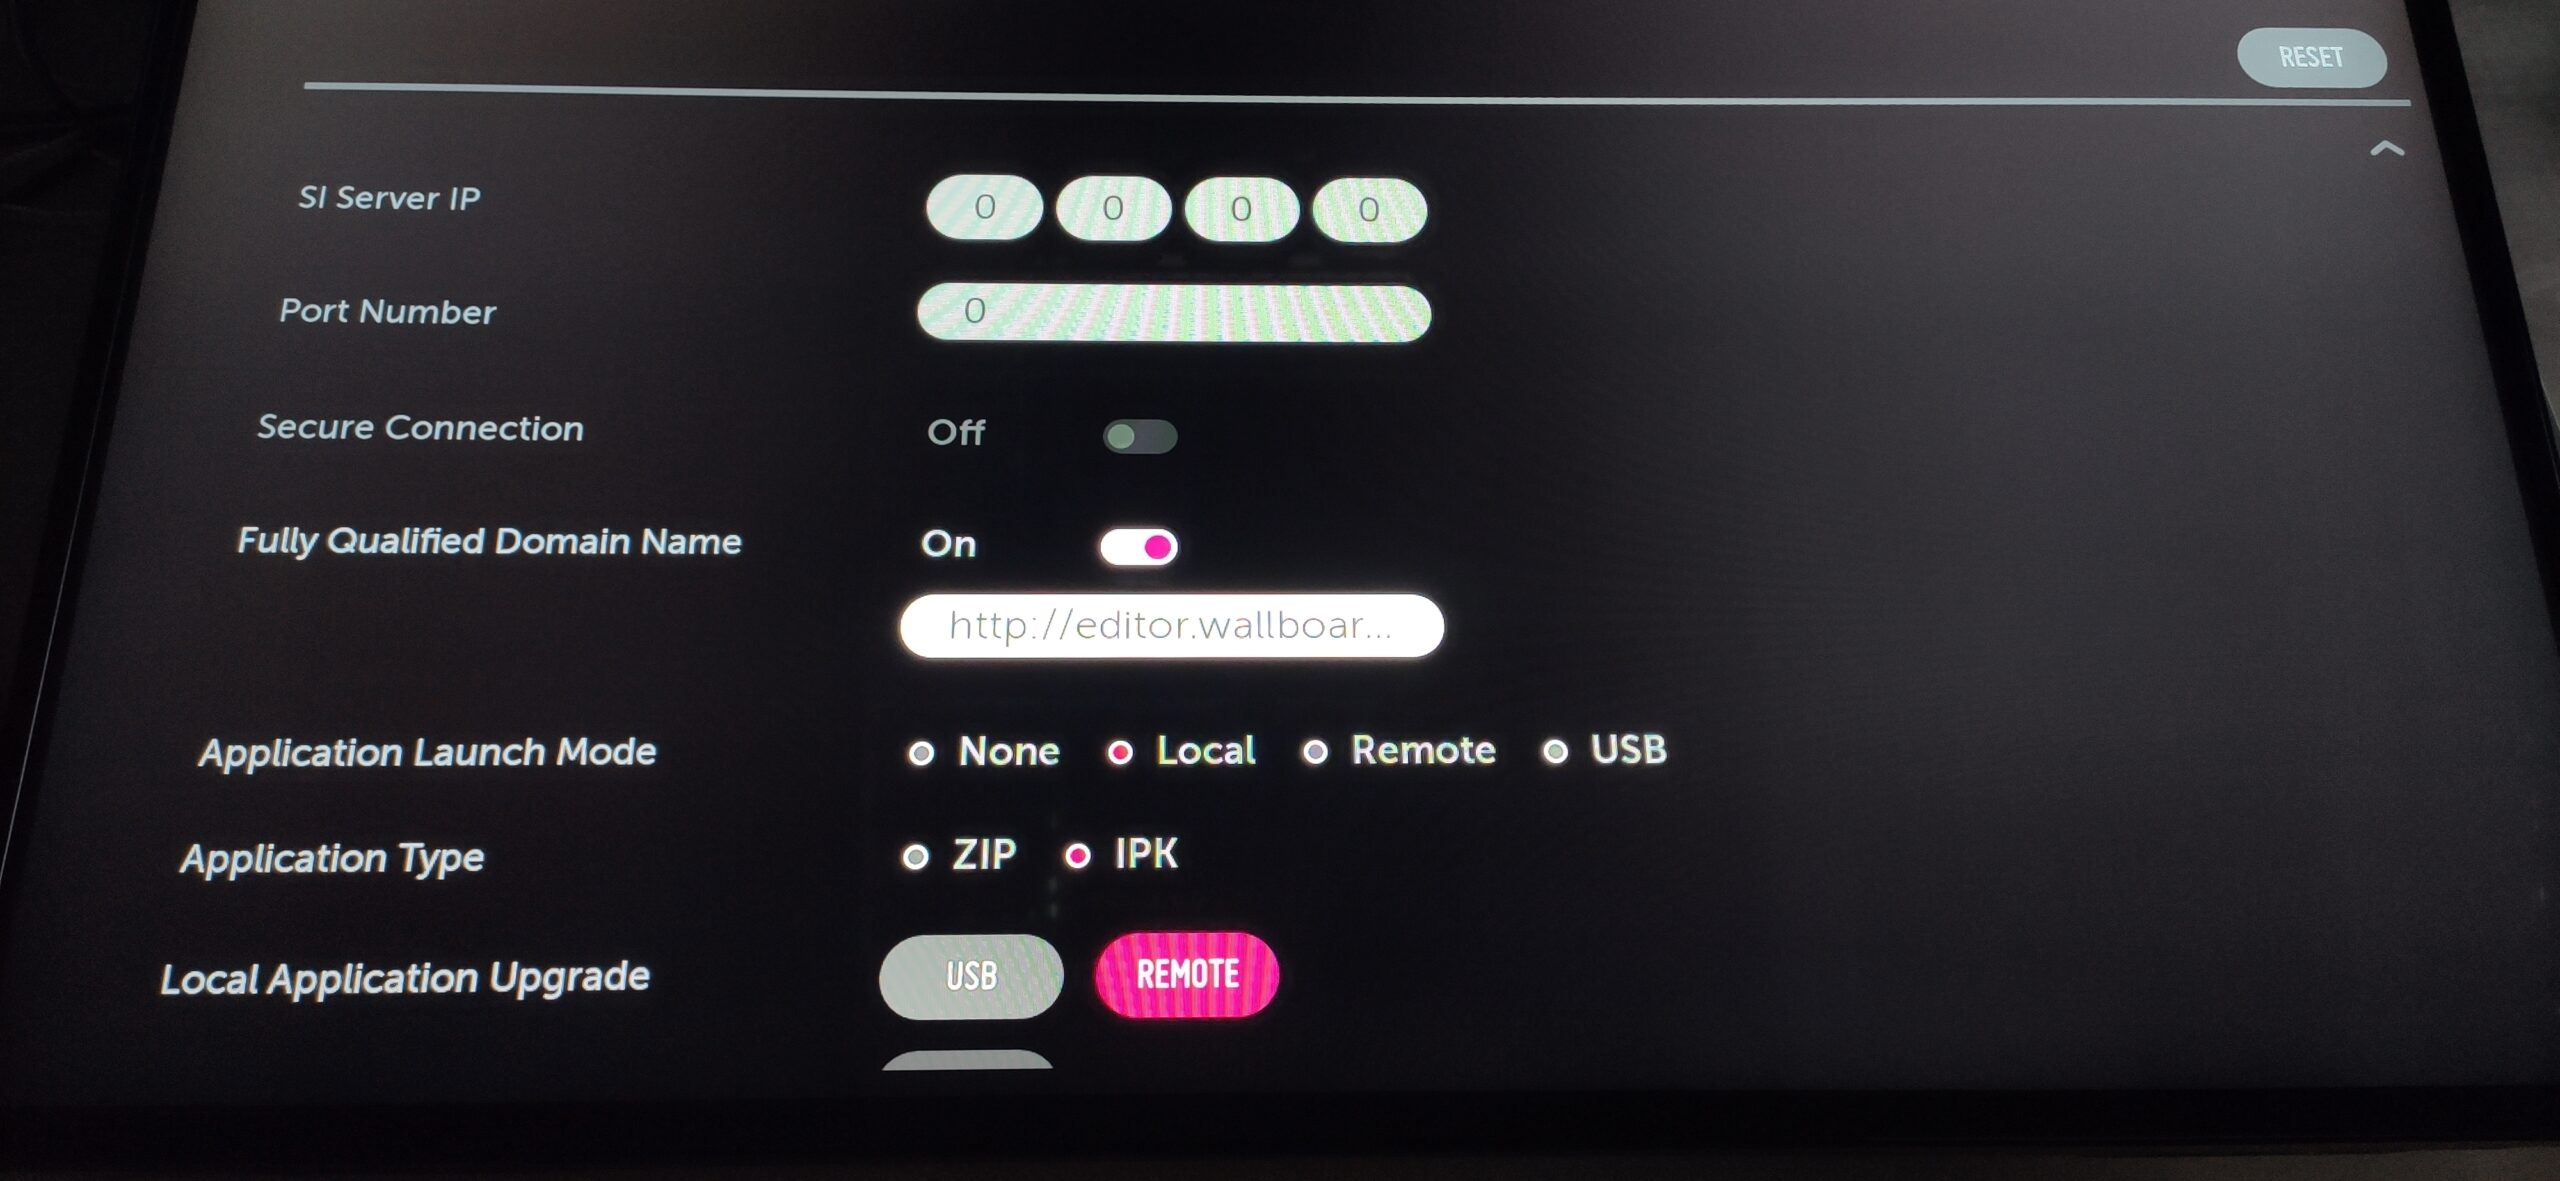
1 First, set 'Fully Qualified Domain Name' to 'On' 2. Second, enter https://example.domain.com/api/storage/update/jscore/lg/lg-client.ipk into the input field below
If you require a specific version you can achieve that by using:https://example.domain.com/api/storage/update/jscore/lg/default/version number/lg-client.ipk
The https://example.domain.com and version number should be filled out according to your server URL and desired version
3. Third set the 'Application Launch Mode' to 'Local' 4. Fourth set the 'Application Type' to 'IPK' 5. Finally set the 'Local Application Upgrade' to 'REMOTE' 6. Confirm your intent to install the application 7. If the FQDN is misspelled you will see an error message and have to modify the URL 8. After the download has finished you have to reboot the device with the power button 9. You can run the app 'Wallboard' (or your application) from the home screen (press the home icon on the remote) 10. Your application has been installed, now you have to configure it
1. Download the app from https://example.domain.com/api/storage/update/jscore/lg/lg-client.ipk to your computer
The https://example.domain.com should be filled out according to your server URL
2. Create a folder called 'application' in the root of your USB drive 3. Copy the .ipk file into this folder 4. Rename the file to 'com.lg.app.signage.ipk' 5. Insert the USB drive 6. Enter the settings menu (press the cog icon on the remote controller) 7. Navigate to 'Ez Setting' -> 'SI Server Setting' -> 'SI Server Setting
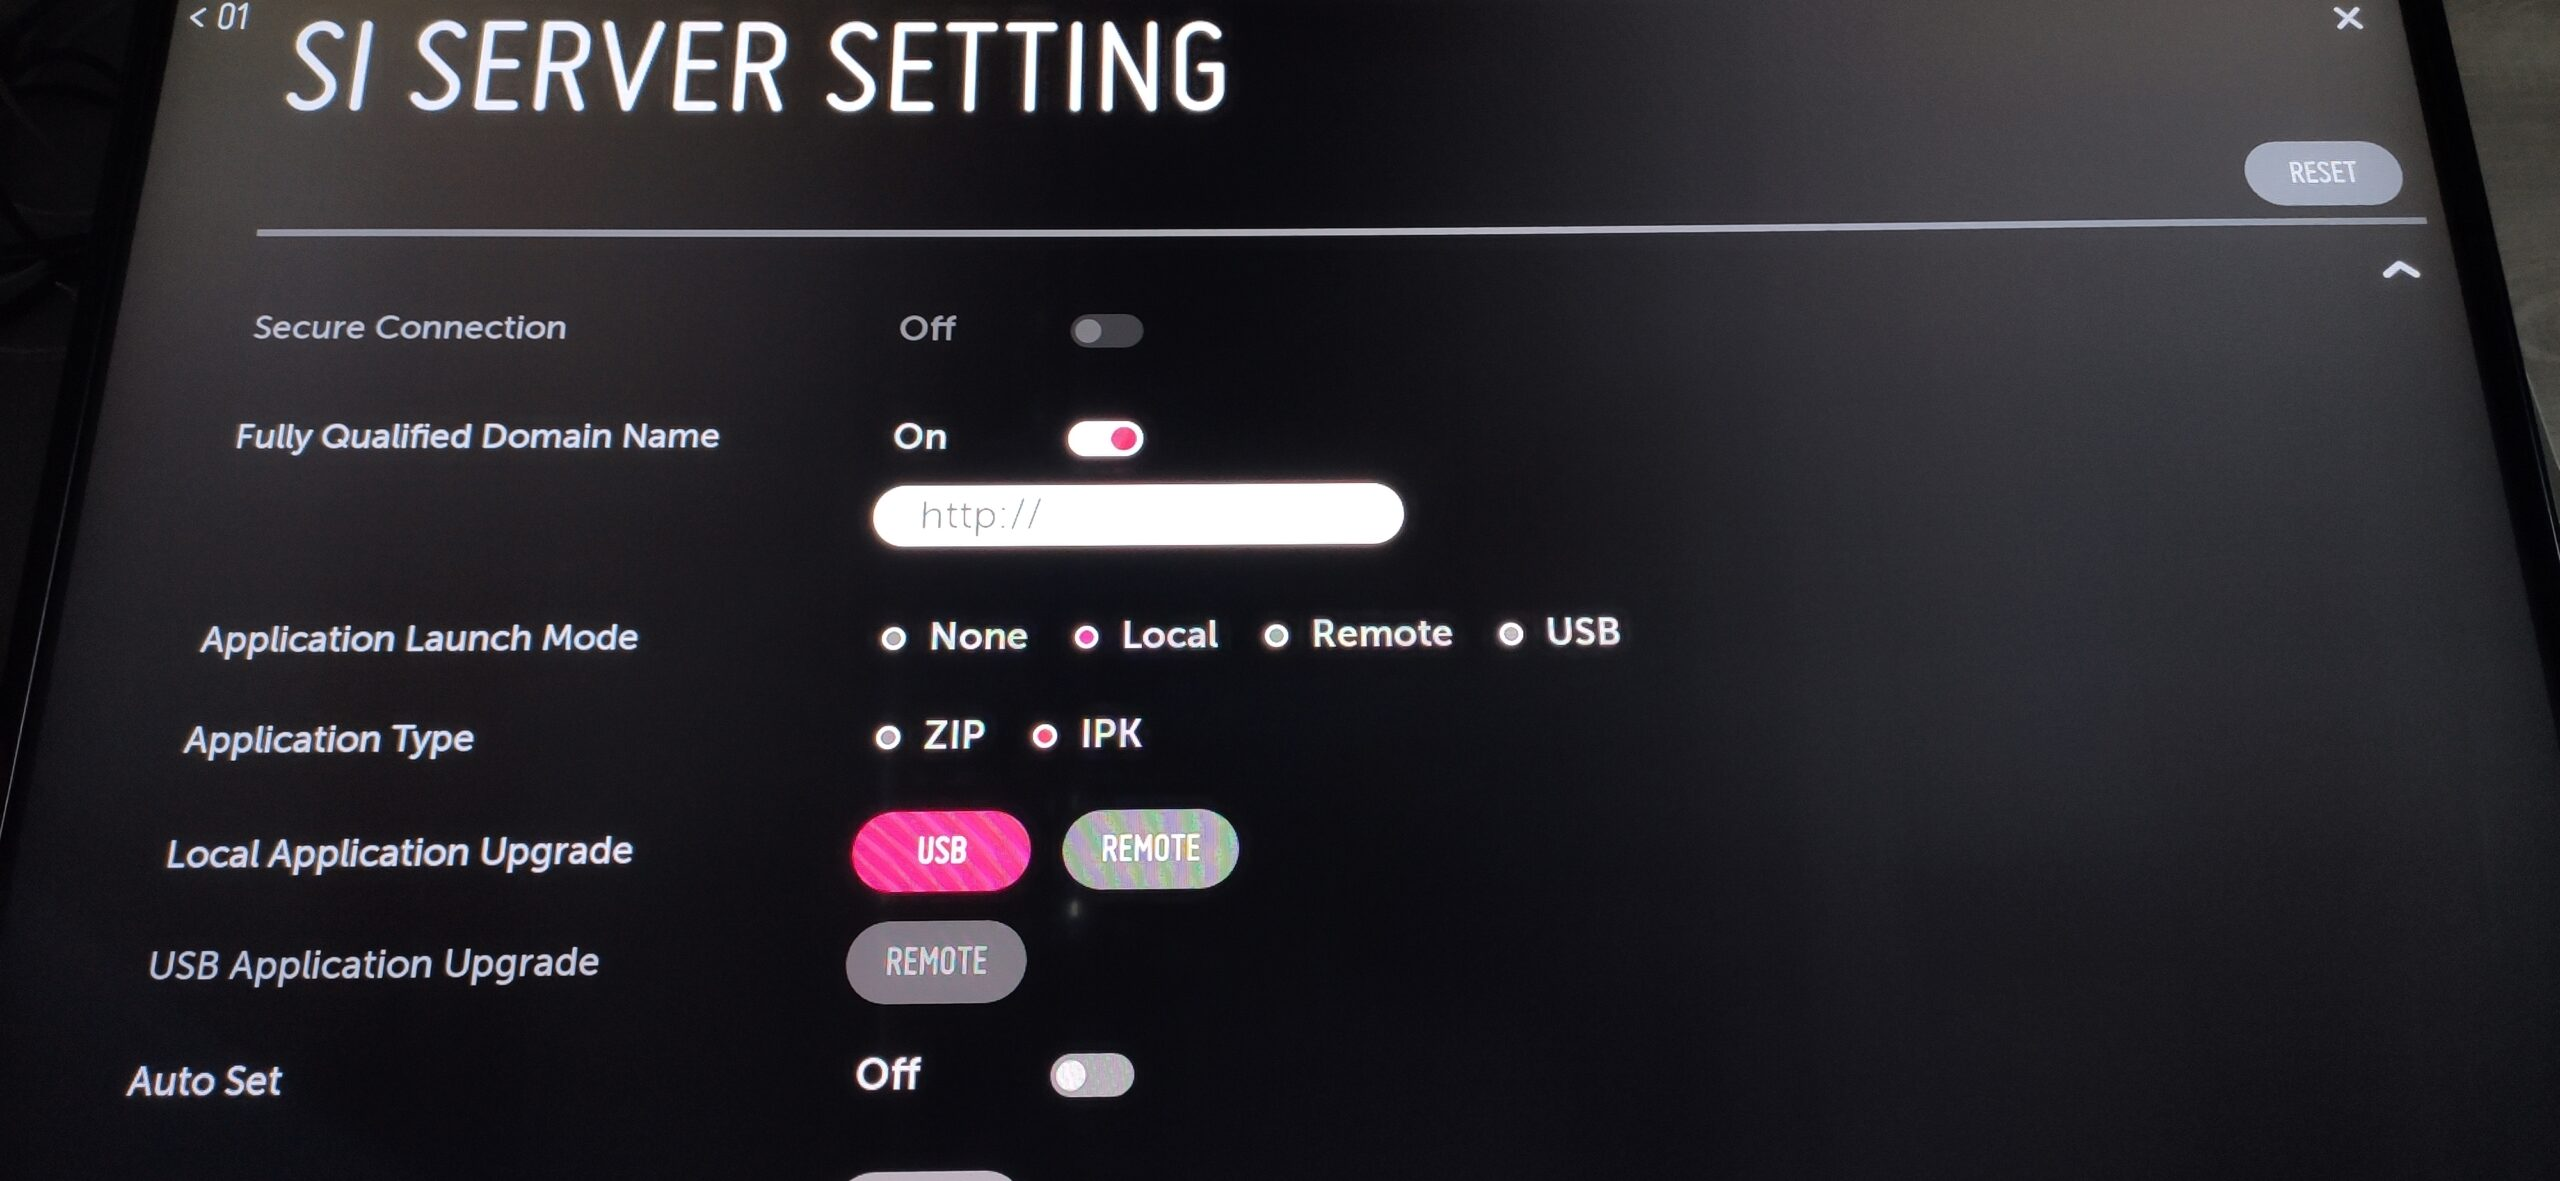
Set 'Fully Qualified Domain Name' to 'On'
Set the 'Application Launch Mode' to 'Local'
Set the 'Application Type' to 'IPK'
Set the 'Local Application Upgrade' to 'USB'
Confirm your intent to install the application
After the copying has finished you have to reboot the device with the power button
You can run your digital signage app from the homescreen (press the house icon on the remote)
You may remove the USB Hub (USB Drive, keyboard, and mouse) now
Your application has been installed, now you have to configure it
PLEASE make sure you have stable internet connection
When the installation process finished, you will see a modal where you have to confirm or modify the server url, where the device should attempt the registration.
It will take 2 minutes until the final confirmation, or you can manually confirm it.
If you modify the URL, the timer with 2 minutes will restart
When the registration to the server finished, you will see a 4-digit long registration code.
You have to open the Home >> Screens >> Screen >> Add screen modal where you have to fill the Temporary id / Serial field with the 4-digit code you see.