How to Show Hotel Room Availability
This guide shows you how to build a room-offer display for a hotel lobby: each room type shows its price, a LAST ROOMS or DEAL -20% badge when one applies, and SOLD OUT instead of the price when no rooms are left.
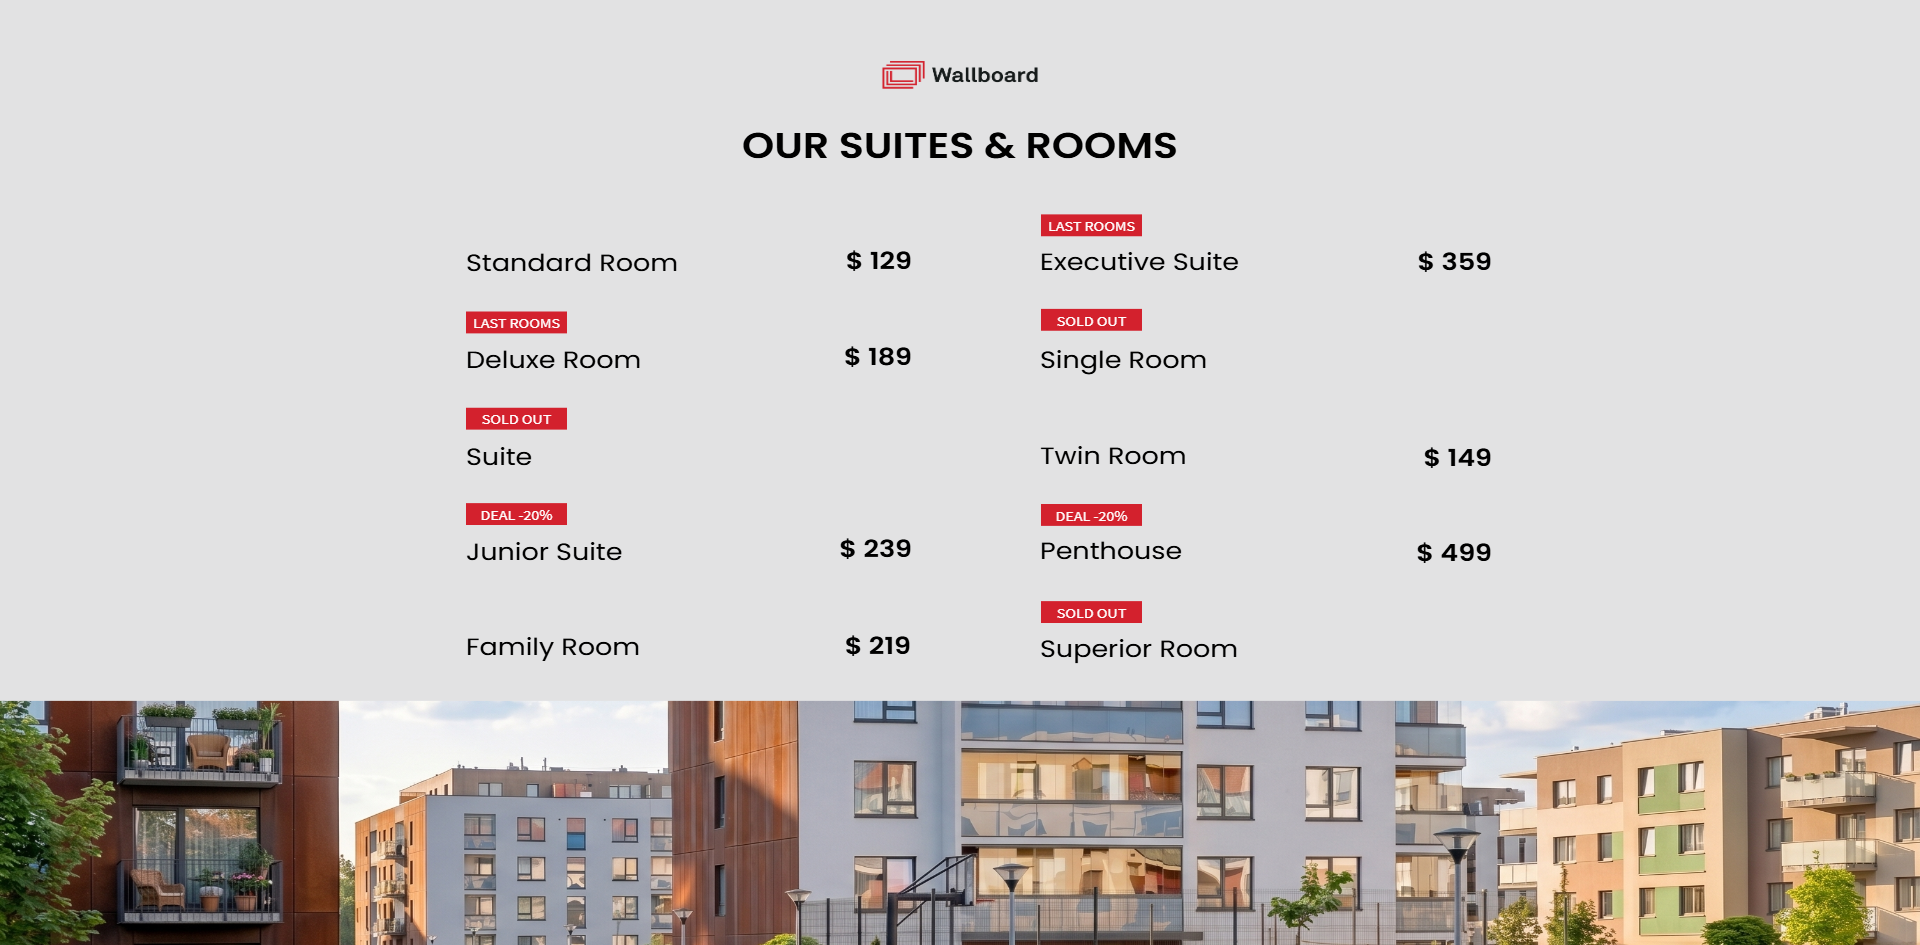
This guide answers:
- How can offers adjust automatically to current capacity — a higher price when few rooms are left, a discounted offer when demand is low?
- Is that logic better handled by the hotel's existing system, or implemented inside Wallboard?
Where the pricing logic belongs
The logic lives in the hotel's PMS (or a middleware spreadsheet between the PMS and Wallboard) — Wallboard is the display layer that reacts to it. You don't implement pricing rules inside Wallboard; you just tell it what to show based on the data it receives. When the PMS changes its rules, the display follows without any change in Wallboard.
You can implement the logic inside Wallboard too, with scripts and datasource actions, but that's more complicated to build and maintain.
Step 1: Create the inventory datasource
- Go to Datasources and click Add internal datasource.
- Set Structure type to Table, name it
Hotel Inventory, and save and open it. - In the empty worksheet, click the Import from JSON icon next to Save, paste in the JSON below, and click Confirm — the table fills in with every room already there:
{
  "Hotel Inventory": {
    "header": {
      "Room type": "string",
      "Price": "string",
      "Availability": "number",
      "Badge": "string"
    },
    "rows": [
      {
        "Room type": "Standard Room",
        "Price": "$ 129",
        "Availability": 12,
        "Badge": ""
      },
      {
        "Room type": "Deluxe Room",
        "Price": "$ 189",
        "Availability": 3,
        "Badge": "LAST ROOMS"
      },
      {
        "Room type": "Suite",
        "Price": "$ 299",
        "Availability": 0,
        "Badge": "SOLD OUT"
      },
      {
        "Room type": "Junior Suite",
        "Price": "$ 239",
        "Availability": 8,
        "Badge": "DEAL -20%"
      },
      {
        "Room type": "Family Room",
        "Price": "$ 219",
        "Availability": 5,
        "Badge": ""
      },
      {
        "Room type": "Executive Suite",
        "Price": "$ 359",
        "Availability": 1,
        "Badge": "LAST ROOMS"
      },
      {
        "Room type": "Single Room",
        "Price": "$ 99",
        "Availability": 0,
        "Badge": "SOLD OUT"
      },
      {
        "Room type": "Twin Room",
        "Price": "$ 149",
        "Availability": 7,
        "Badge": ""
      },
      {
        "Room type": "Penthouse",
        "Price": "$ 499",
        "Availability": 1,
        "Badge": "DEAL -20%"
      },
      {
        "Room type": "Superior Room",
        "Price": "$ 169",
        "Availability": 0,
        "Badge": "SOLD OUT"
      }
    ],
    "connectors": {}
  }
}
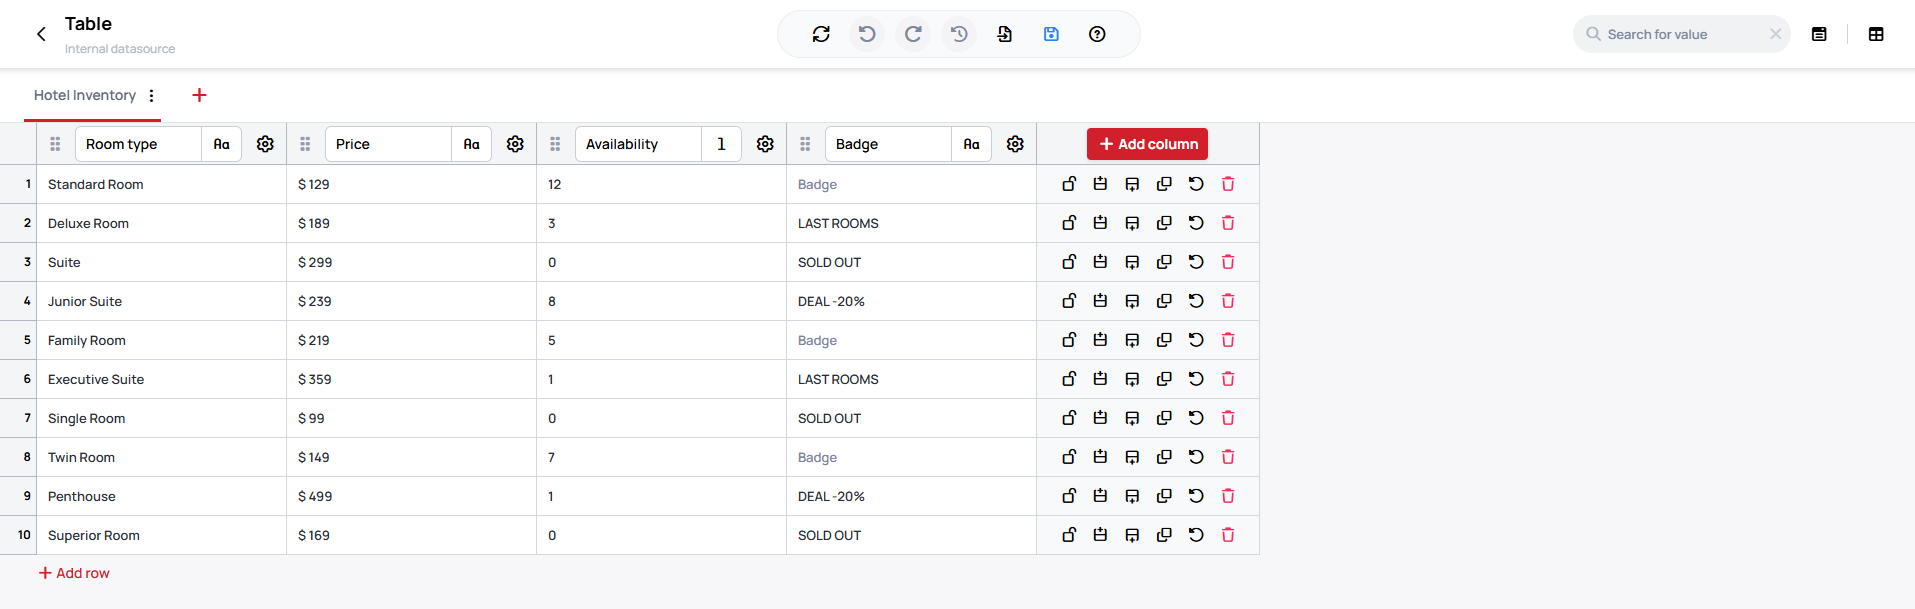
Price arrives pre-formatted, discount already applied — Wallboard only displays it (see above).
Invalid JSON won't break anything — the editor catches it and refuses the import rather than leaving the table half-written.
Learn more: Internal Table Datasources: Import from JSON
Step 2: Download and import the Slide
Hotel room offer Slide
hotel-inventory.zip
Import the file — a single-page export, so it comes in as a Slide by default. Skip Import as Content.
Step 3: Connect to base data path
With the Slide imported, point it at the datasource from Step 1:
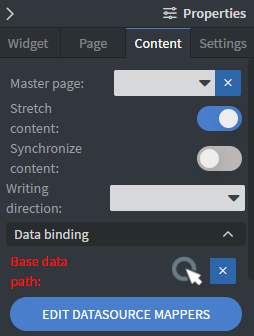
- Open the Slide, go to Content > Base data path.
-
Select the
Hotel Inventorydatasource. -
Preview the Slide — every room should already show its price, availability and badge.
Every widget in the Slide is already set up with Depend on base data path, so this one connection is all the binding it needs.
Learn more: How to connect a template to base data path
A Base data path swap keeps every binding only between two internal datasources with the same structure — swap the datasource, refresh the bindings, done. Switching to a Google Sheet or JSON source is a structural change even when the column names look the same, and it breaks every binding: plan to re-check Bind to data and Hide based on on each Widget by hand afterward.
Content Structure
The Slide you imported already has every room's card built and bound. Here's how each part of it works, so you can adjust or extend it.
How each card is bound
Each room's card is 3 Text Widgets — room name, price and badge — each pointed at that room's own row (its own rows.N path), with Depend on base data path switched on. None of them has its own independent datasource selection: they all resolve through the Base data path set in Step 3, so swapping that one connection moves every card at once. There's no repeating template: every room gets its own set of three Widgets.
Learn more: Databinding
How the SOLD OUT tag shows up
Some rooms show the SOLD OUT badge and no price at all
This is Bind anything: go to the price Widget's Other tab and click Bind Anything.
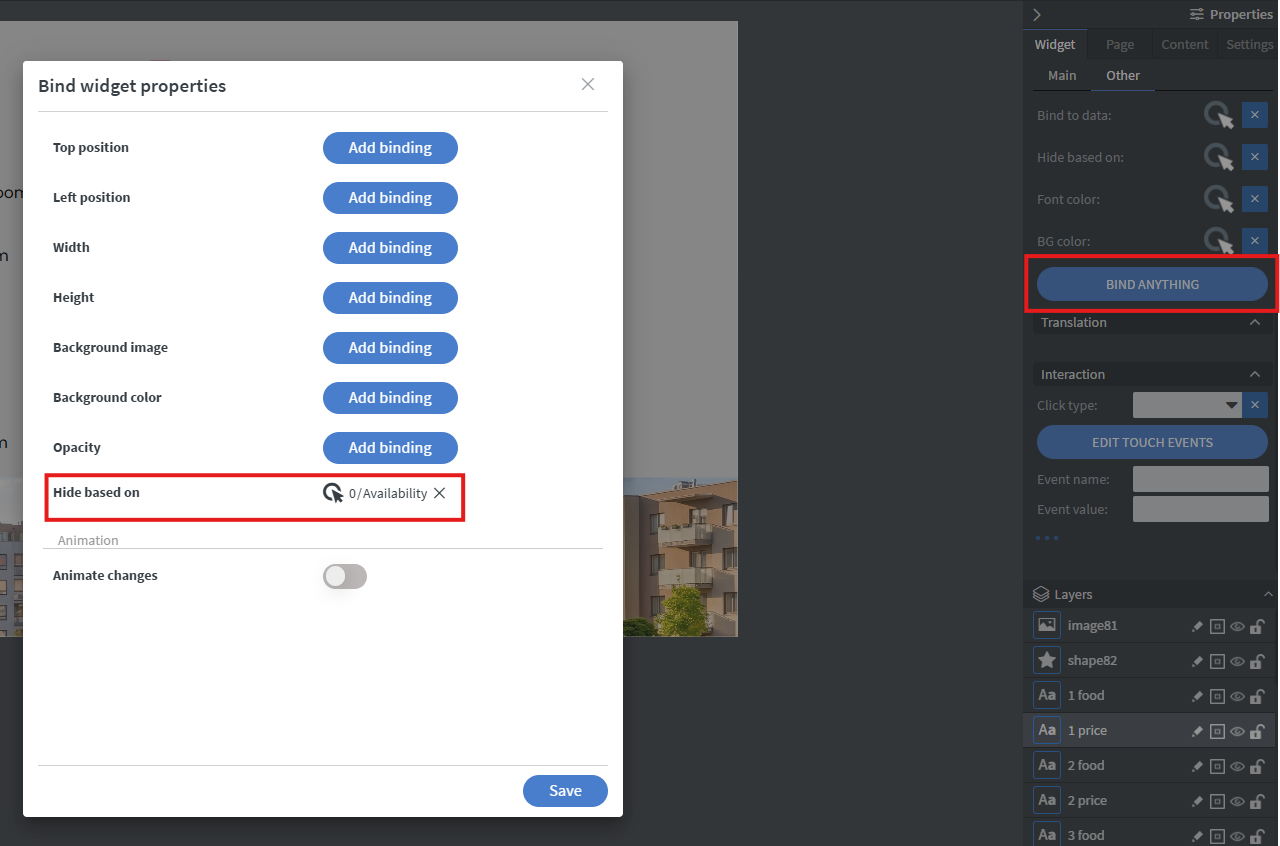
In the Data picker, a Hide rule is set on the room's Availability column: Evaluation type: equals, value 0.
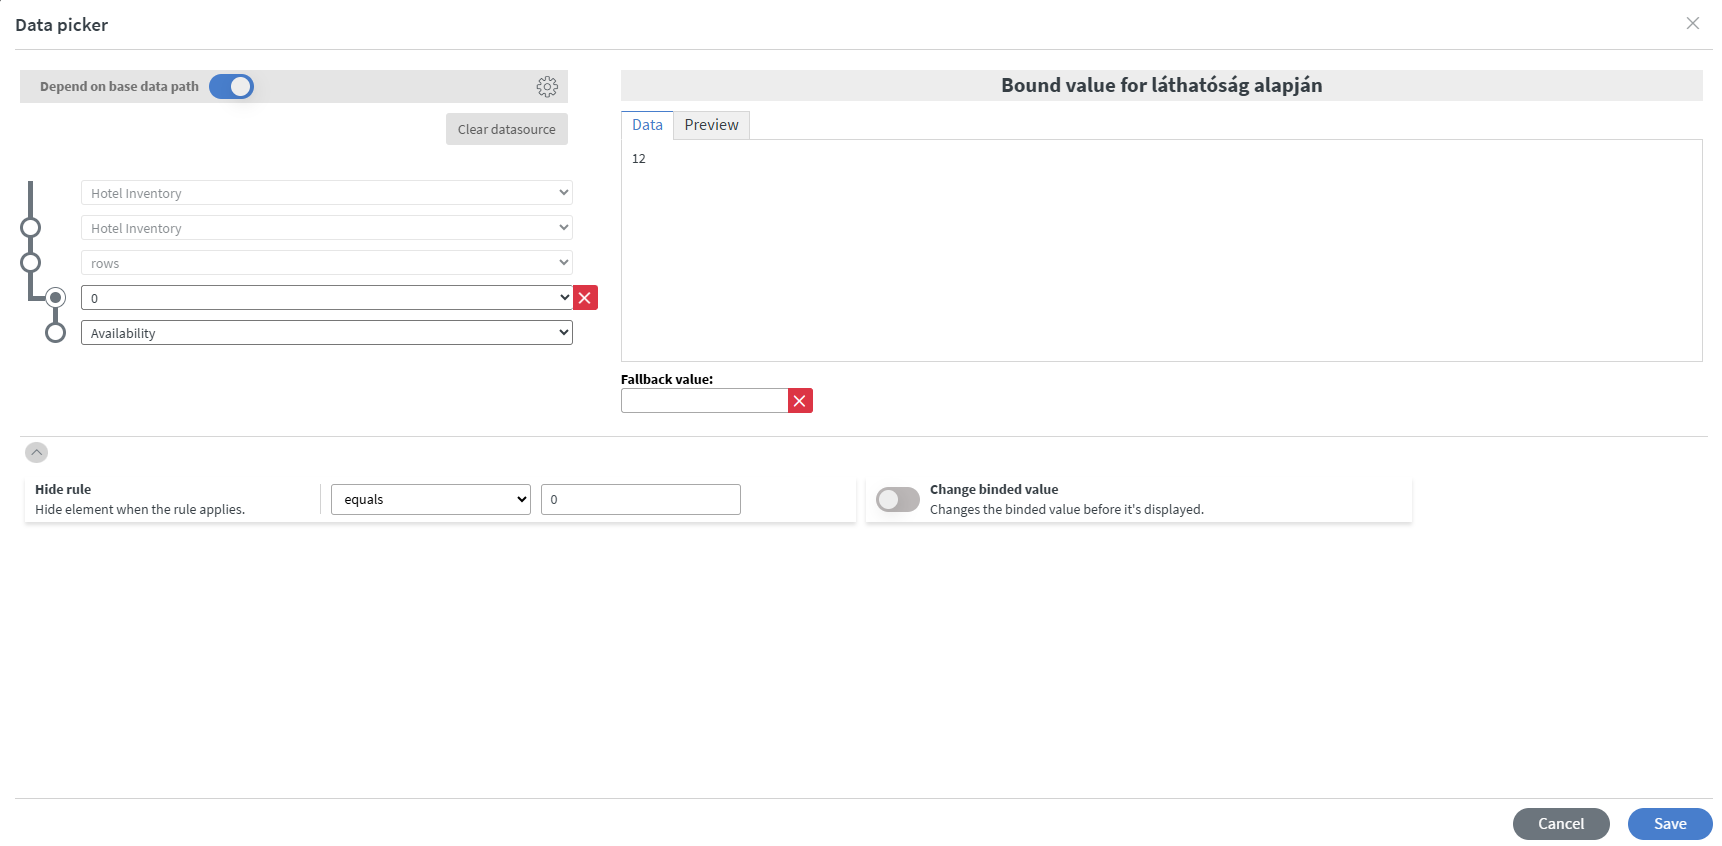
The price Widget is hidden while that rule is true, so a sold-out room shows no price.
A hidden Widget is still placed on the device as an element. Too many hidden Widgets on one Content or Slide will slow the screen down, even though nothing is visible.
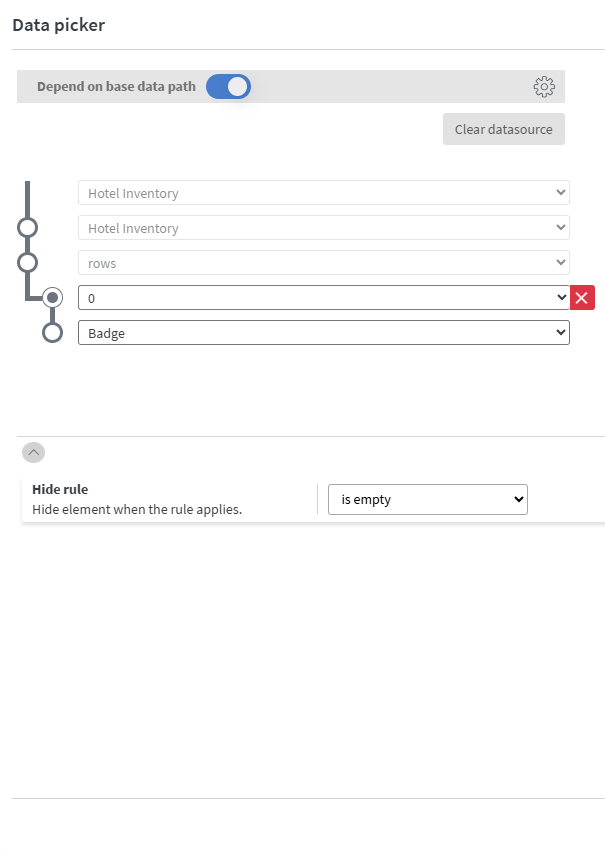
All other badges utilize the same mechanic as the sold-out pricing.
- The badges are bound to the
Badgecolumn instead ofAvailability, with Evaluation type: is empty. - Rooms with an empty
Badgeshow no badge; the others show LAST ROOMS, DEAL -20% or SOLD OUT, as set in the datasource.
How to work with real data
This guide has relied on an internal datasource so far. Wallboard can also work with various external and live sources — read Databinding: where does your external data come from? to get a good understanding of what fits the hotel's PMS best (a webhook push, a spreadsheet in between, or polling its API directly).
A Base data path swap in this guide's demo content keeps every binding. Only between two datasources with the same structure can be swapped — swap the datasource, refresh the bindings, done. Switching to a Google Sheet or JSON source is a structural change even when the column names look the same, and it breaks every binding: plan to re-check Bind to data and Hide based on on each Widget by hand afterward.