Installing the ePaper application with the Wallboard Toolbox
ePaper application installation
- Launch the WallboardToolbox.exe. You can download it by clicking here.
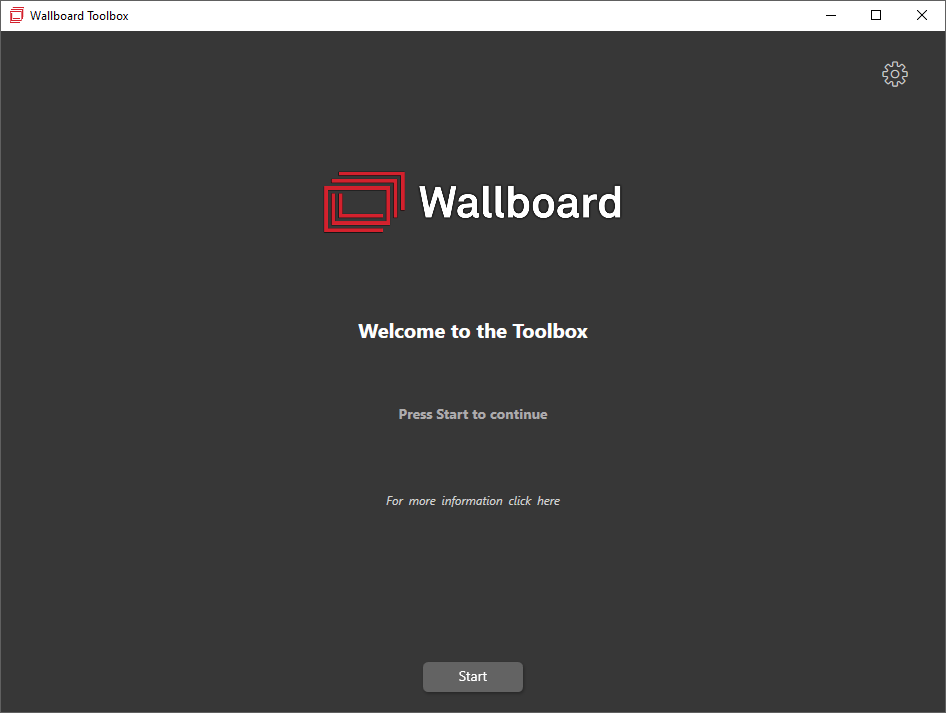
- Connect the ePaper device to your PC over USB cable and power it on.
- In the Wallboard Toolbox application click
Start. - Choose the ePaper option then click
Next.
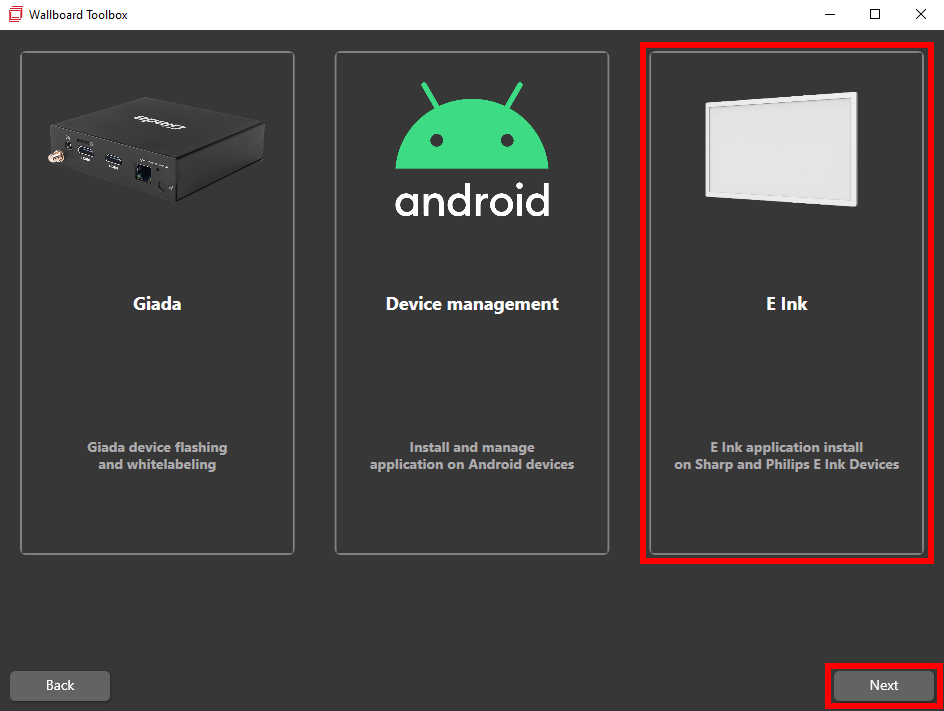
- Choose your target device (Philips/Sharp) then click
Next.
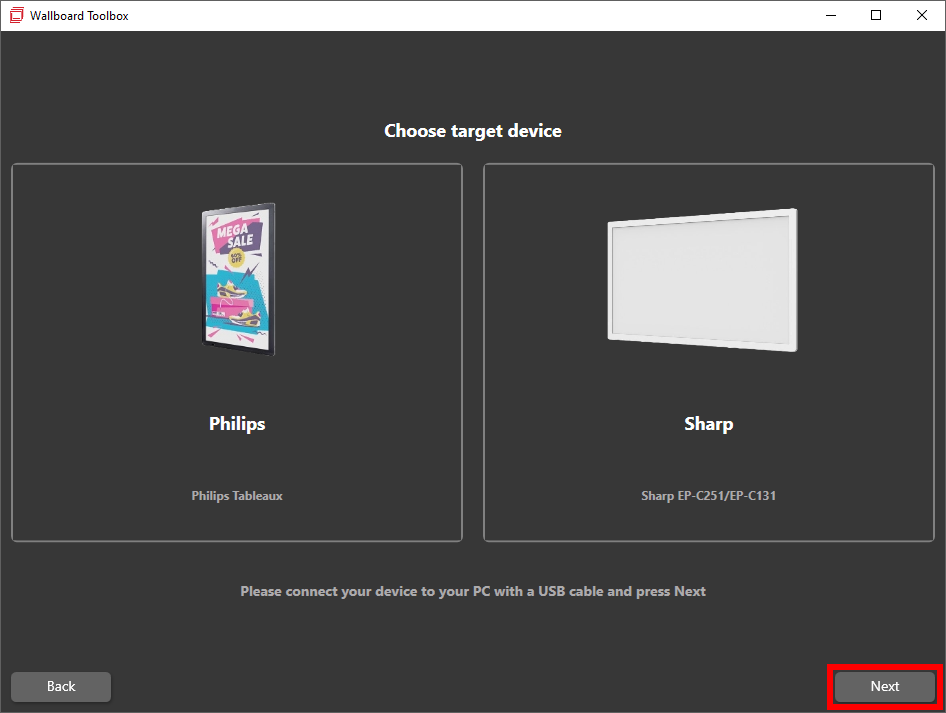
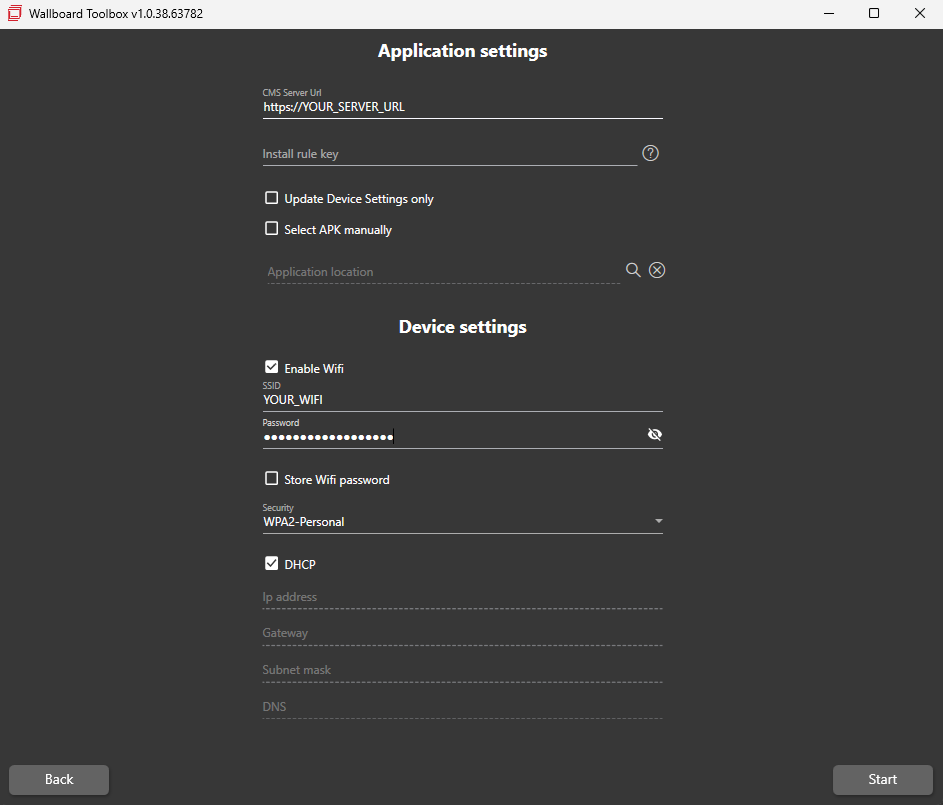
- Fill out the CMS Server url.
- (Optional) Provide an Install rule key.
- (Optional) Check Select APK manually and select an APK ONLY if you want an older version installed. More information about this option here.
- Fill out the network details (This is only needed for Sharp devices. To update only the network details without flashing select the Update device settings only checkbox).
- Make sure your device is powered on then click
Startand wait for the installation to finish.
If you're installing on a Sharp display double-check whether you've entered the correct network details otherwise the device won't connect to the internet and display an error message instead. In case you've entered incorrect details you don't have to start the installation process from the beginning, just select the Update device settings only checkbox and correct the network details.
On Sharp ePaper devices the installation takes a bit longer due to device specific settings.
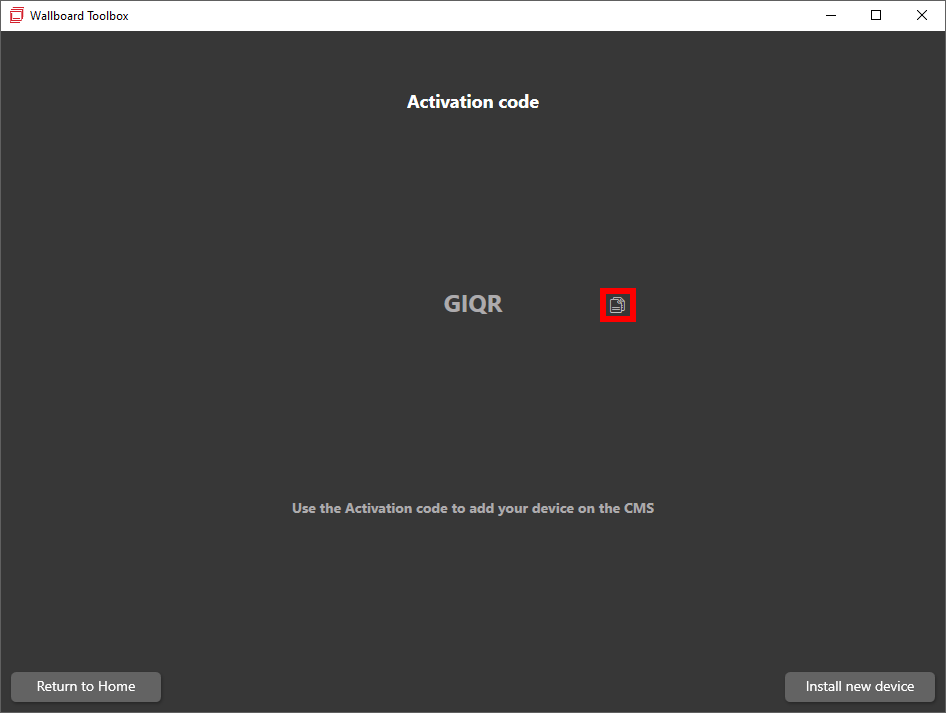
- After the installation has finished an activation code will appear in case you didn't provide an install rule key. You can easily copy the activation code by
clicking the
Copyicon. For more information about the activation code page click here.
Additional information
Application settings
CMS Server urlis the server URL where the screen will be installed.Install rule keyis the key which will be used by the ePaper application to assign the screen to a customer with the preset configuration. You can find more information about Install rule keys hereSelect APK manuallygives the option to manually provide any release APK to the device to use instead of downloading the newest from the provided server.
Only use the Select APK manually option if you want to install an older version. Otherwise, leave this blank and unchecked and it will automatically download the latest version from the server.
Device specific settings (Sharp)
Update Device Settings onlywhen checked will only update the Device settings and not reinstall the application.Enable Wifiwhen checked will enable the Wifi on the device.SSIDis the name(identifier) of the network to which the device will connect to.Passwordthe Wifi network's password.Store Wifi passwordwhen checked will store the password for future installations.DHCPwhen checked will enable the DHCP option on the device.
If DHCP is disabled:
Ip Addresswill be the IP address of the device.Gatewayspecifies the Gateway used by the device.Subnet maskspecifies the Subnet mask used by the device.DNSspecifies the DNS used by the device.
Activation code page
If you've set an installation rule key during the installation process the activation code page won't appear as your screen will already be assigned to your user.
- In case of a successful installation an activation code will appear in the middle. You will need to use this to assign the screen to your user in the editor.
- The
Copybutton is next to the Activation code which can be used to copy the Activation code to the clipboard - The
Install new deviceoption will go back to the Settings page assuming the same type of device will be installed again.
If you have further questions please do not hesitate to contact us at support@wallboard.info.