Wallboard firmware flashing and whitelabeling on Giada devices
This article shows you how to flash and whitelabel Giada Android devices.
Firmware for supported devices
| Manufacturer / Device model | Platform / FW | Chromium version | Date | Firmware |
|---|---|---|---|---|
| Giada DN76 | Android 11 | 83 | Nov 28, 2022 | Download |
| Giada DN75 | Android 8.1 | 81 | March 06, 2024 | Download |
| Giada DN74 | Android 11 | 114 | March 22, 2024 | Download |
| Giada DN73 | Android 10 | 74 | January 14, 2025 | Download |
| Giada DN73 | Android 10 | 74 | March 06, 2024 | Download |
| Giada DN73 | Android 7.1.2 | 81 | August 18, 2021 | Download |
Be sure to unzip the firmware archive before proceeding.
Steps
- Launch the Wallboard Toolbox application (you can download it by clicking here).
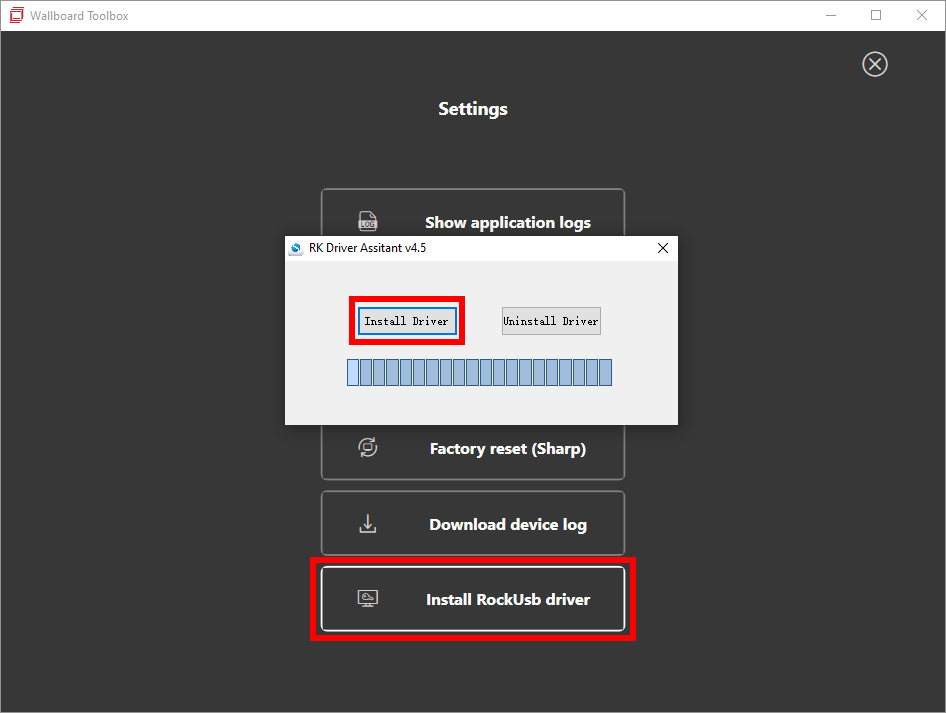
- In the top right corner of the Toolbox welcome screen click the
Gearicon then clickInstall RockUsb driver. When prompted clickInstall Driver. This driver is necessary so the application can recognize the device.
If you're using Giada DN76 you also have to manually select the installed driver. To do so open Device Manager on your PC then right click on your device (most likely named Unknown device under Other devices) and click Update driver. Next choose Browse my computer for drivers >> Let me pick from a list of available drivers on my computer. Here pick Class for rockusb devices from the list. Click next and yes when prompted with a warning.
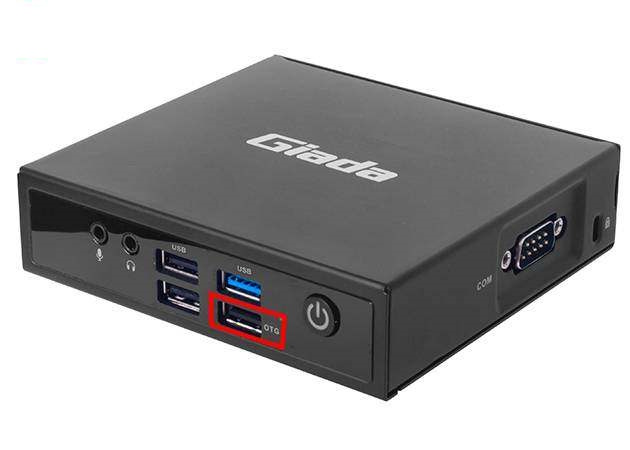
- Make sure your PC is connected to the 'OTG' port of the device using a male-to-male USB cable.
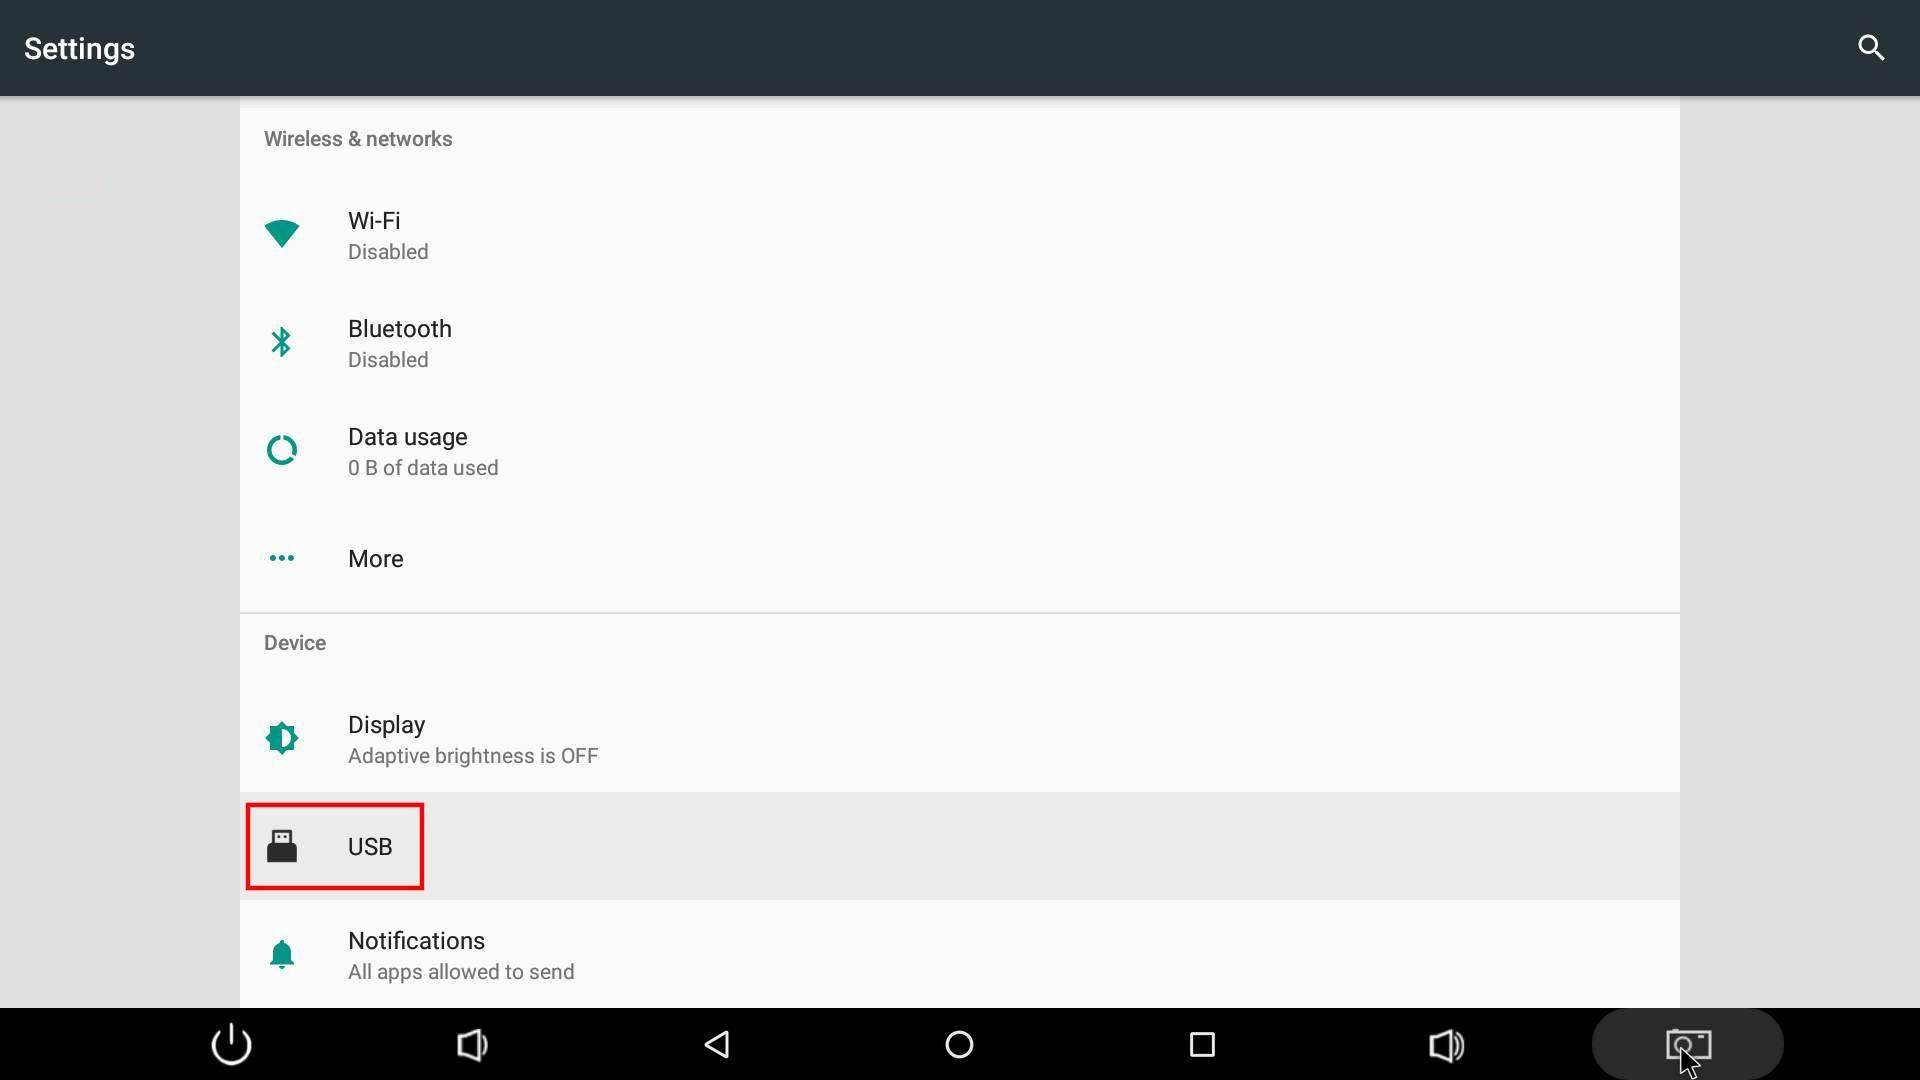
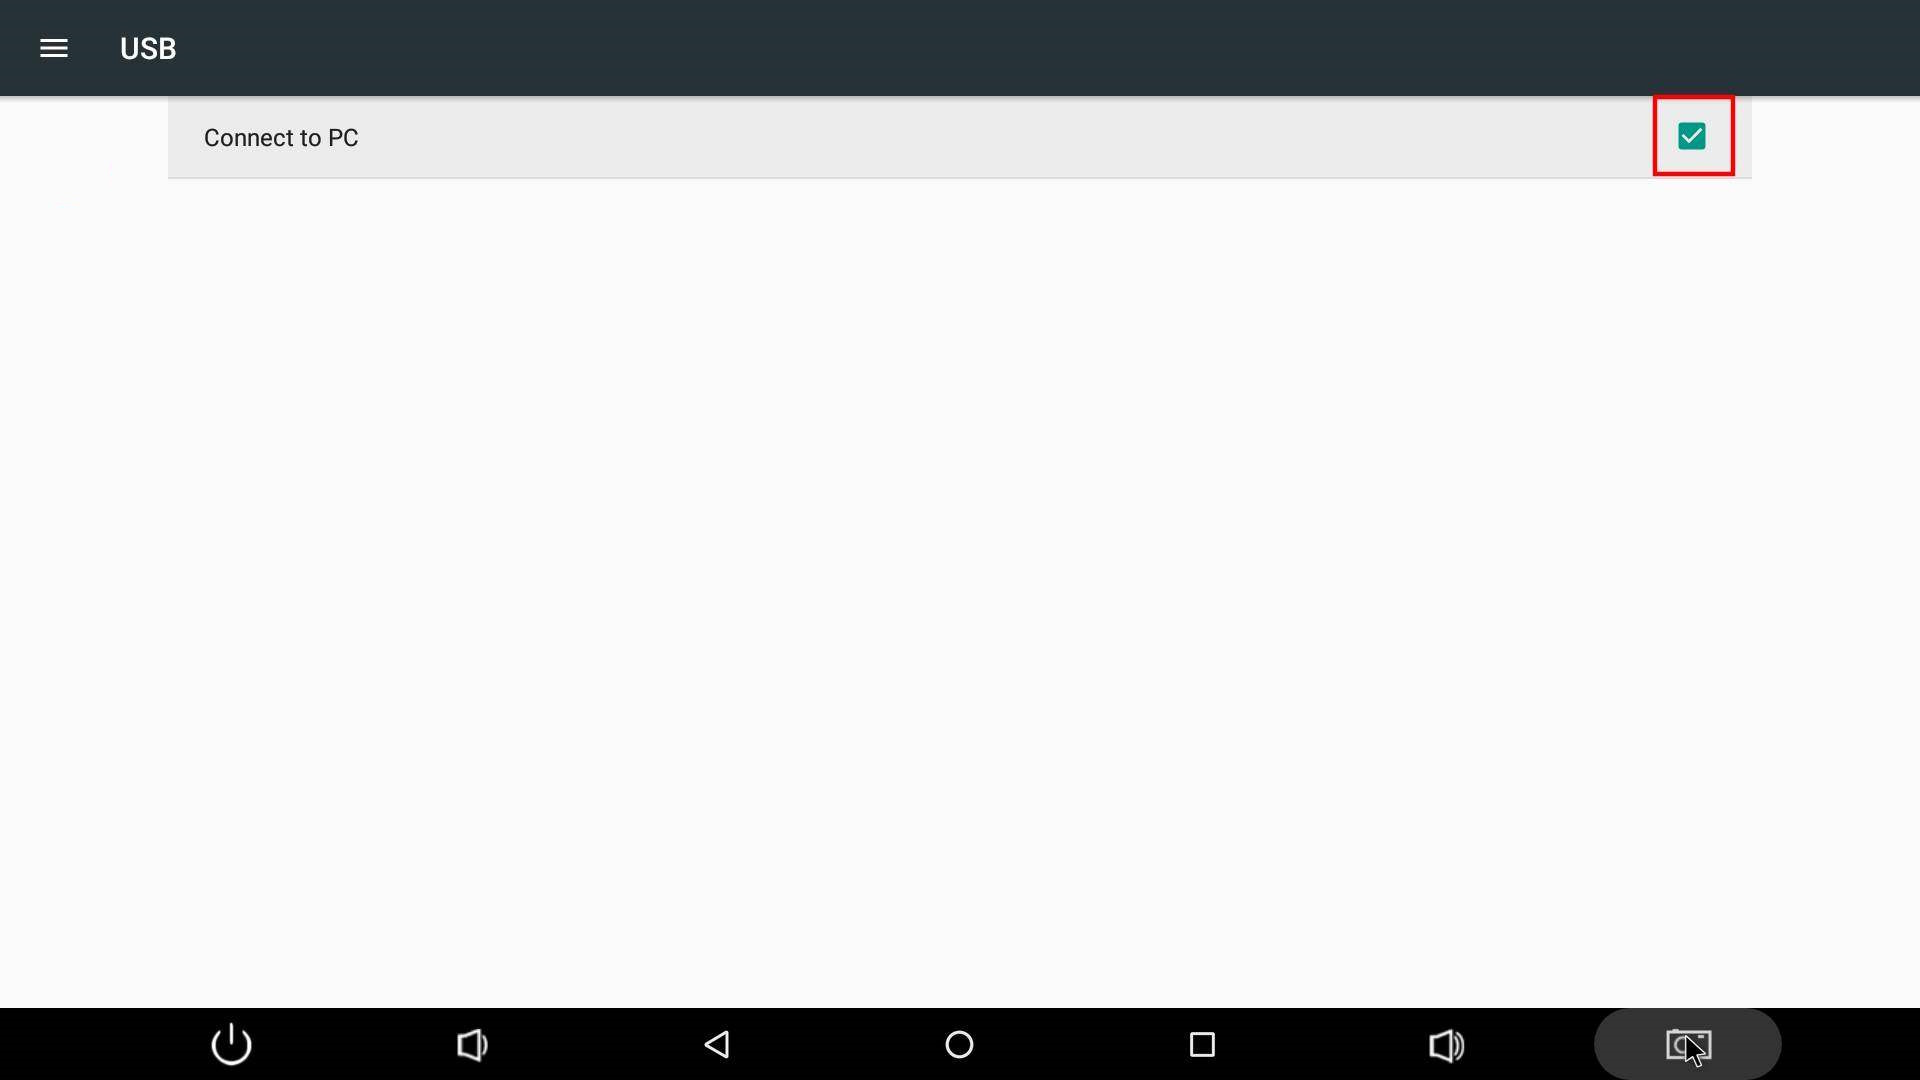
- You have to enable the USB >> Connect to PC option in your Giada device's Android settings. If the option is already checked, uncheck it and check it again just to be sure it can be detected by your PC.
If the device still can not connect properly to PC please consider factory resetting it!
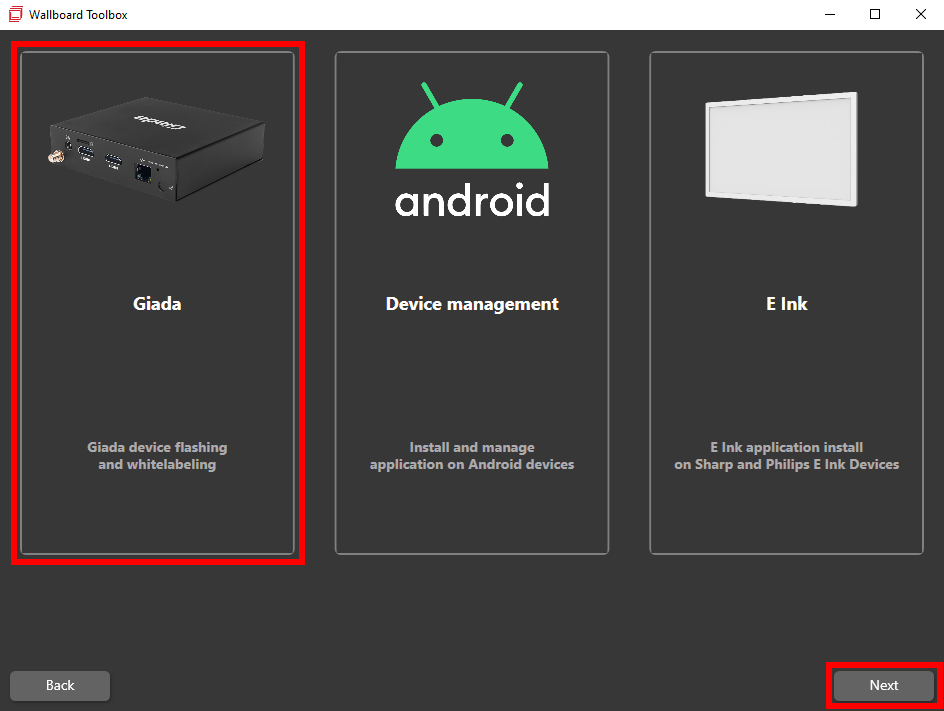
- In the Wallboard Toolbox application click
Startthen selectGiada. - Click
Next.
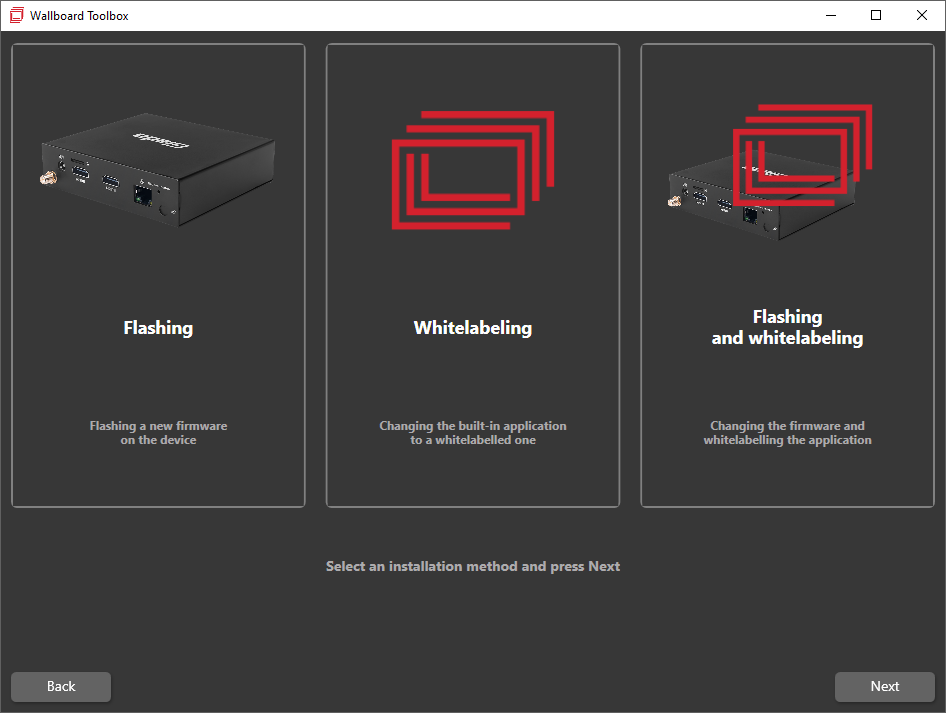
You can choose from:
- Flashing
- Whitelabeling
- Flashing and whitelabeling
- Select what you would like to do then click
Next.
- Flashing
- Whitelabeling
- Flashing and whitelabeling
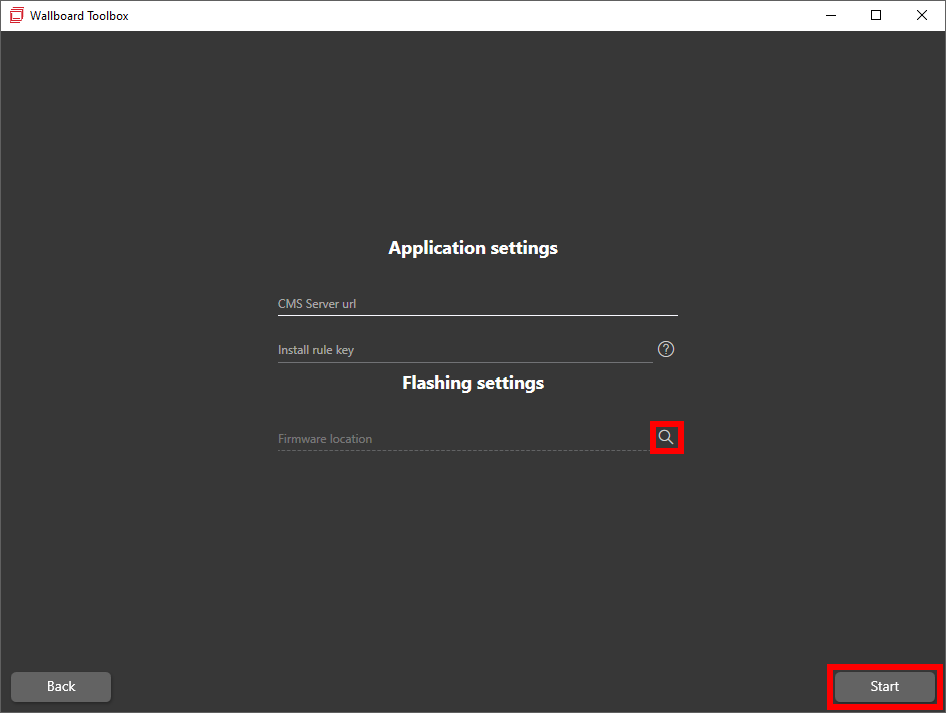
- Download the firmware for your specific device and unzip it. Firmware for Giada devices can be found by clicking here.
- In the Toolbox application use the magnifier icon to browse your files and select the Disc Image File (.img) you downloaded.
- Click
Start.

The toolbox application will now flash your device and reboot it. You will be notified when the installation finishes.
Starting from Android 11, whitelabeling only works if the whitelabeled application's package name matches the factory-embedded package name on the device.
- Input the CMS Server url where you want to download your Signage application from.
- (Optional) Provide an Install rule key. (Currently disabled, work in progress!)
- Click
Start.

The toolbox application will now whitelabel your device and reboot it. You will be notified when the installation finishes.
Starting from Android 11, whitelabeling only works if the whitelabeled application's package name matches the factory-embedded package name on the device.
- Input the CMS Server url where you want to download your Signage application from.
- (Optional) Provide an Install rule key. (Currently disabled, work in progress!)
- Download the firmware for your specific device and unzip it. Firmware for Giada devices can be found by clicking here.
- In the Toolbox application use the magnifier icon to browse your files and select the Disc Image File (.img) you downloaded.
- Click
Start.
The toolbox application will now flash and whitelabel your device and reboot it. You will be notified when the installation finishes.
If you have further questions please do not hesitate to contact us at [email protected].