Using Table widget with Mini widget
Follow these steps to ensure proper functionality:
Requirements
Datasource
- You need a datasource to rotate through its data
- Table type internal datasource
Mini Content
- You will need a mini content where you will arrange how a particular row should look within the content
Main Content
- You will need a main content that contains a table
Mini Content
Steps
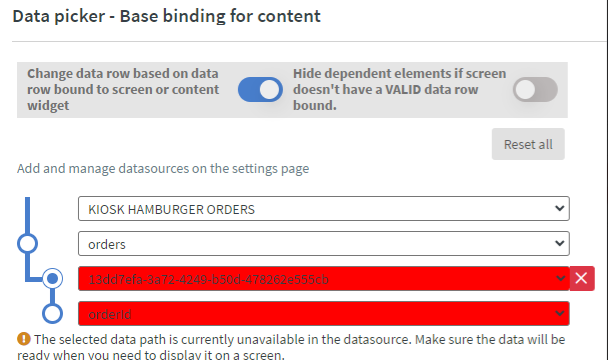
1. Activate the Change data row based on data row bound to screen or content widget option
2. Place the pivot point where you want the data to be changed.
- First product: Name-A and Price-A
- Second product: Name-B and Price-B
- ...
- Last product: Name-Z and Price-Z
3. Add the pivot point to the products, and the table will rotate on these later.
4. It is essential to navigate down the base data path until reaching the value intended for identification (some ID).
Once the base data path is set in the small content and things are connected to the particular widgets, you can move to the main content.
Main Content


Steps
1. Open your table and select the value marked as ID in the small content.
2. The pivot point doesn't matter in this case.
3. Set the Column level settings for the selected ID, and within it, set the Displayed value.
4. Here, select the ID. For Type, choose content, then select your mini content and the specific page you want to use.
5. Finally, for the Use different cell’s value, select the ID you wanted.
This setup should ensure the table widget works correctly with the "Mini" widget, displaying each row as arranged in the mini content.
