How to Embed External Content Using Alternative Methods
Using iFrame embedding requires advanced knowledge due to security restrictions on many options.
If you're unsure about the site's implementation, this article provides methods to bypass embedding altogether.
Table of Contents
Screenshot Service
If the webpage has no interactive elements or consists of simple static pages, we recommend taking screenshots of the pages and using the SCREENSHOT data source type.
This method is advantageous for showcasing external pages on low-end or weak devices, or devices that cannot use our traditional HTML-based displayer, such as eInk devices.
Datasource Setup
- In
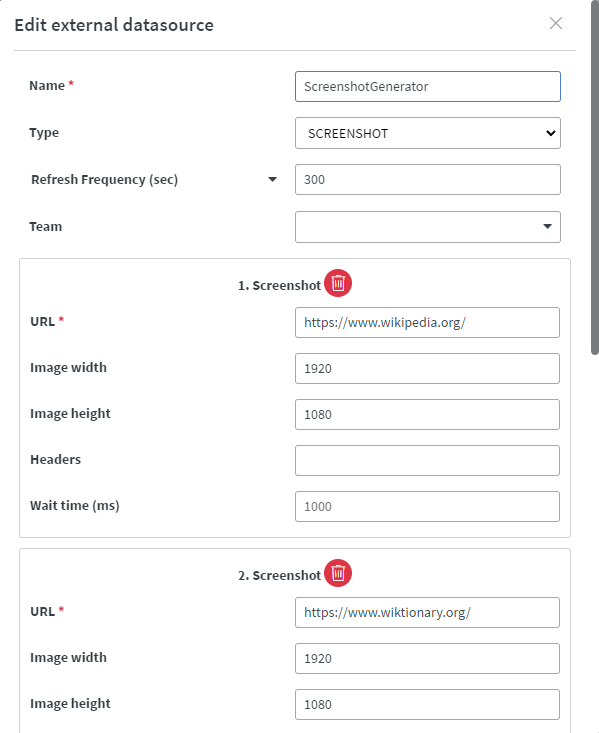
Settings>Data sources>External data sources, select theSCREENSHOTtype. - Set the
Nameof the data source. - Set the
Refresh Frequency, which determines how often the data source will refresh itself.- Note:
Refresh Frequencyis different from theWait timein theScreenshotsection.
- Note:
- Fill out the parameters for the
Screenshot(s):URL: The URL from which the screenshot will be created.- Image dimensions: Specify the
widthandheightof the generated image. Wait time (ms): The time (in milliseconds) the service will wait before taking the screenshot.Headers(optional): Provide HTML headers if needed.- Note: You can include multiple screenshots from different sites in one data source.

Success Message
- When the service runs, it will create screenshot(s) of the page(s) and return a JSON list with the created images' paths and their creation status.
{
  "screenshots": [
    {
      "imagePath": "https://beta.wallboard.info/api/storage/screenshots/cf064d75072b4c89af76532a645d1098.jpg",
      "status": "SUCCESS"
    },
    {
      "imagePath": "https://beta.wallboard.info/api/storage/screenshots/eefdef65ef6a44d5816fa549c277b00f.jpg",
      "status": "SUCCESS"
    }
  ]
}
Connect to Content
- Reference the screenshots via the data source picker in a widget. For example, use the Image widget for data binding.

PDF Embedding
If the webpage has no interactive elements or consists of simple static pages, you can also download the pages as a PDF.
Create PDF
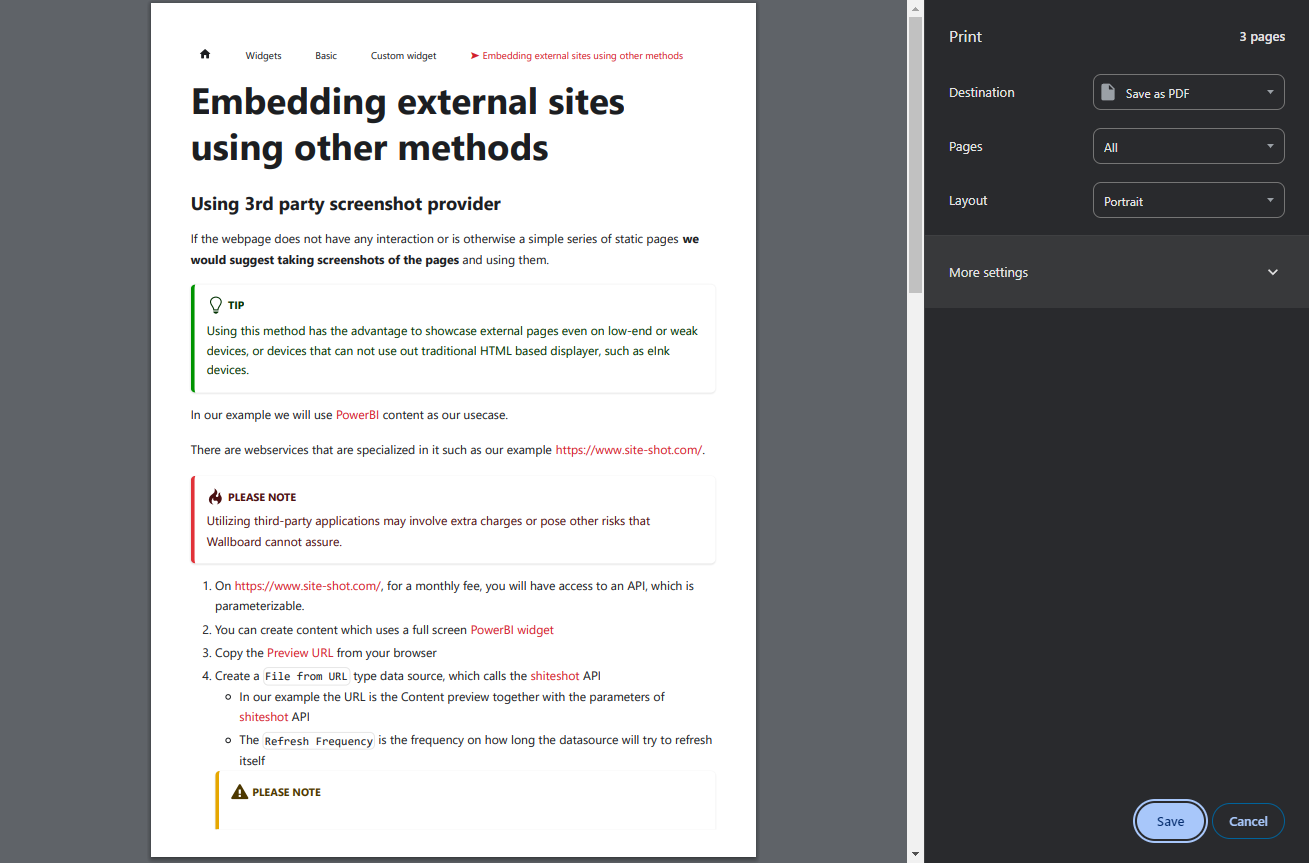
- In most browsers, pressing
CTRL+Popens the browser'sPrint Modal.

- Save the page as a PDF and upload it to the
File Manager.
Connect to Content
- Use the PDF widget or the Gallery widget with PDF settings to display the PDF in your content.
Share or Export Data for Native Display
This method avoids authentication entirely by using data sharing or exporting options available on many sites, especially those providing data sources (e.g., currency data).
If your goal is to present data with charts or layouts, consider exporting or sharing the data and displaying it natively in Wallboard using widgets and data binding.
Sharable Links
If the site provides a public sharable link to the raw data in a usable format like JSON or XML, consider using it as an external data source.
Exporting Data
Exporting data can be a practical option, particularly if the data doesn't change frequently. Export the data as JSON and use it with internal data sources for easy integration.
Alternative URLs
Some sites offer alternative URLs that bypass authentication, such as links accessible only by specific internal devices.
Whether such URLs are provided depends on the site owner and organization policies.