How to use Toast with MenuBoard app
This article shows you how to integrate Toast restaurant management system with Wallboard and display your menus using our MenuBoard app.
Table of Contents
Connecting Toast to Wallboard
In the Toast restaurant management system:
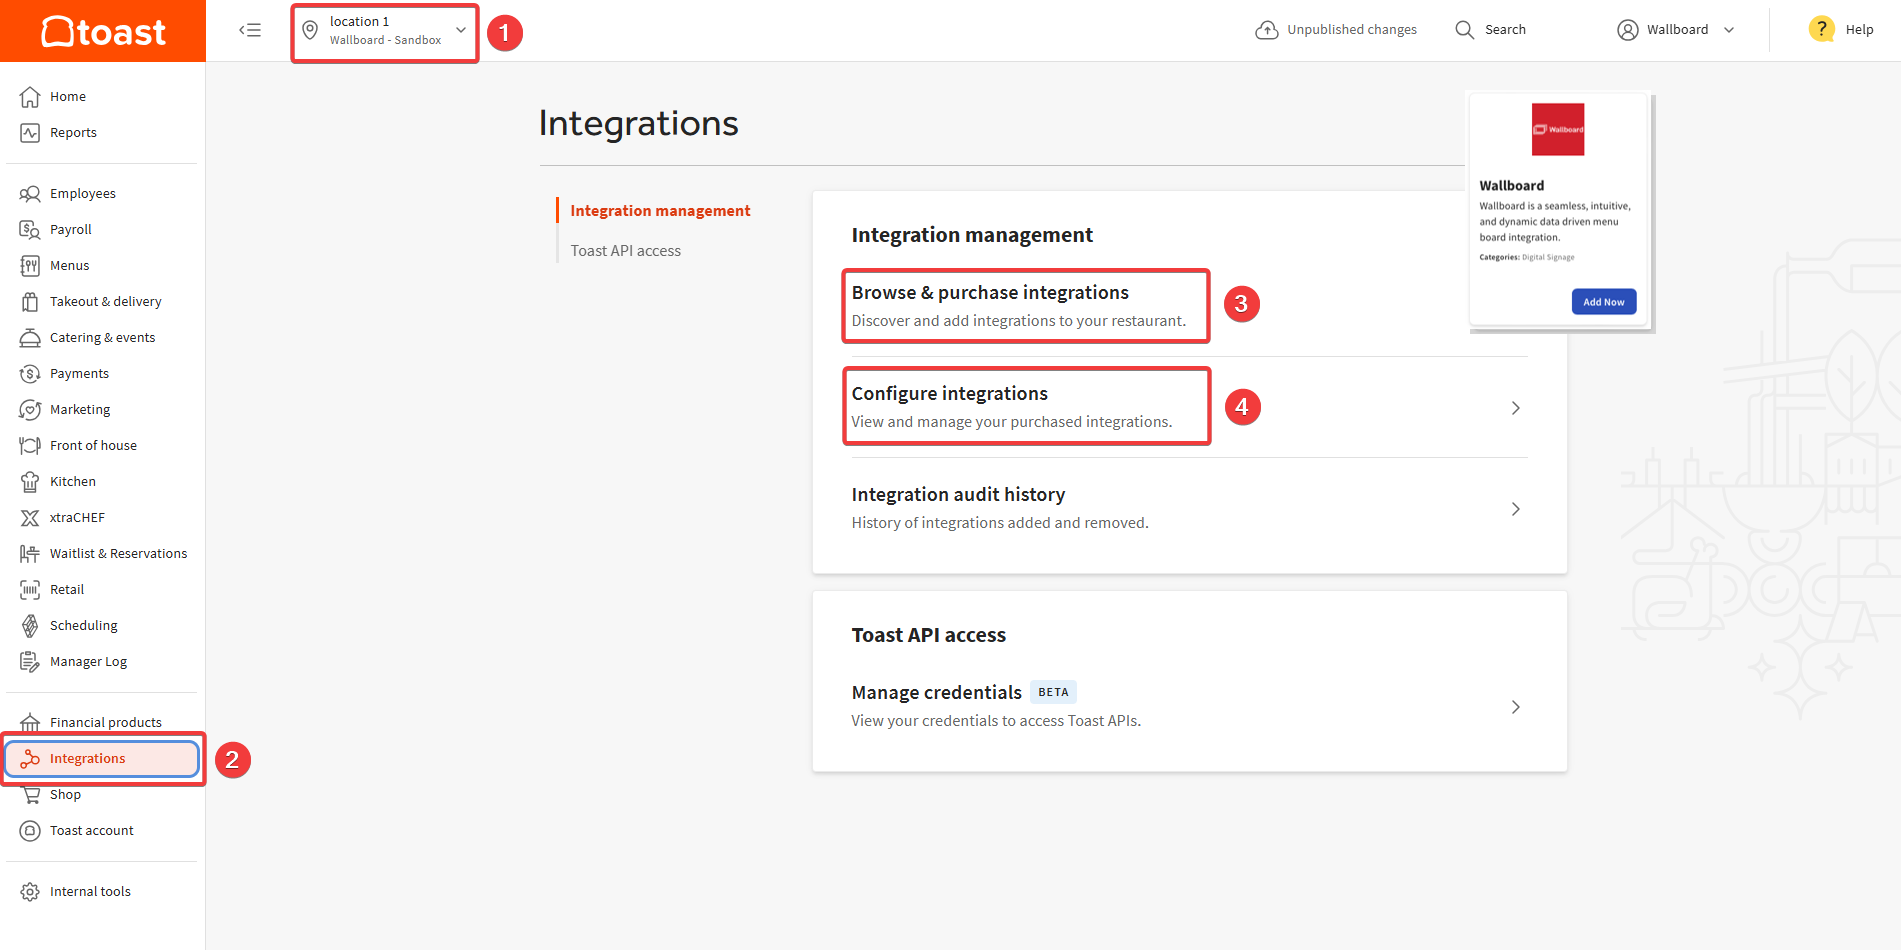
- Select your restaurant location
- Go to Integrations
- Go to Browse & Purchase integrations and add Wallboard integration
- Go to Configure integrations
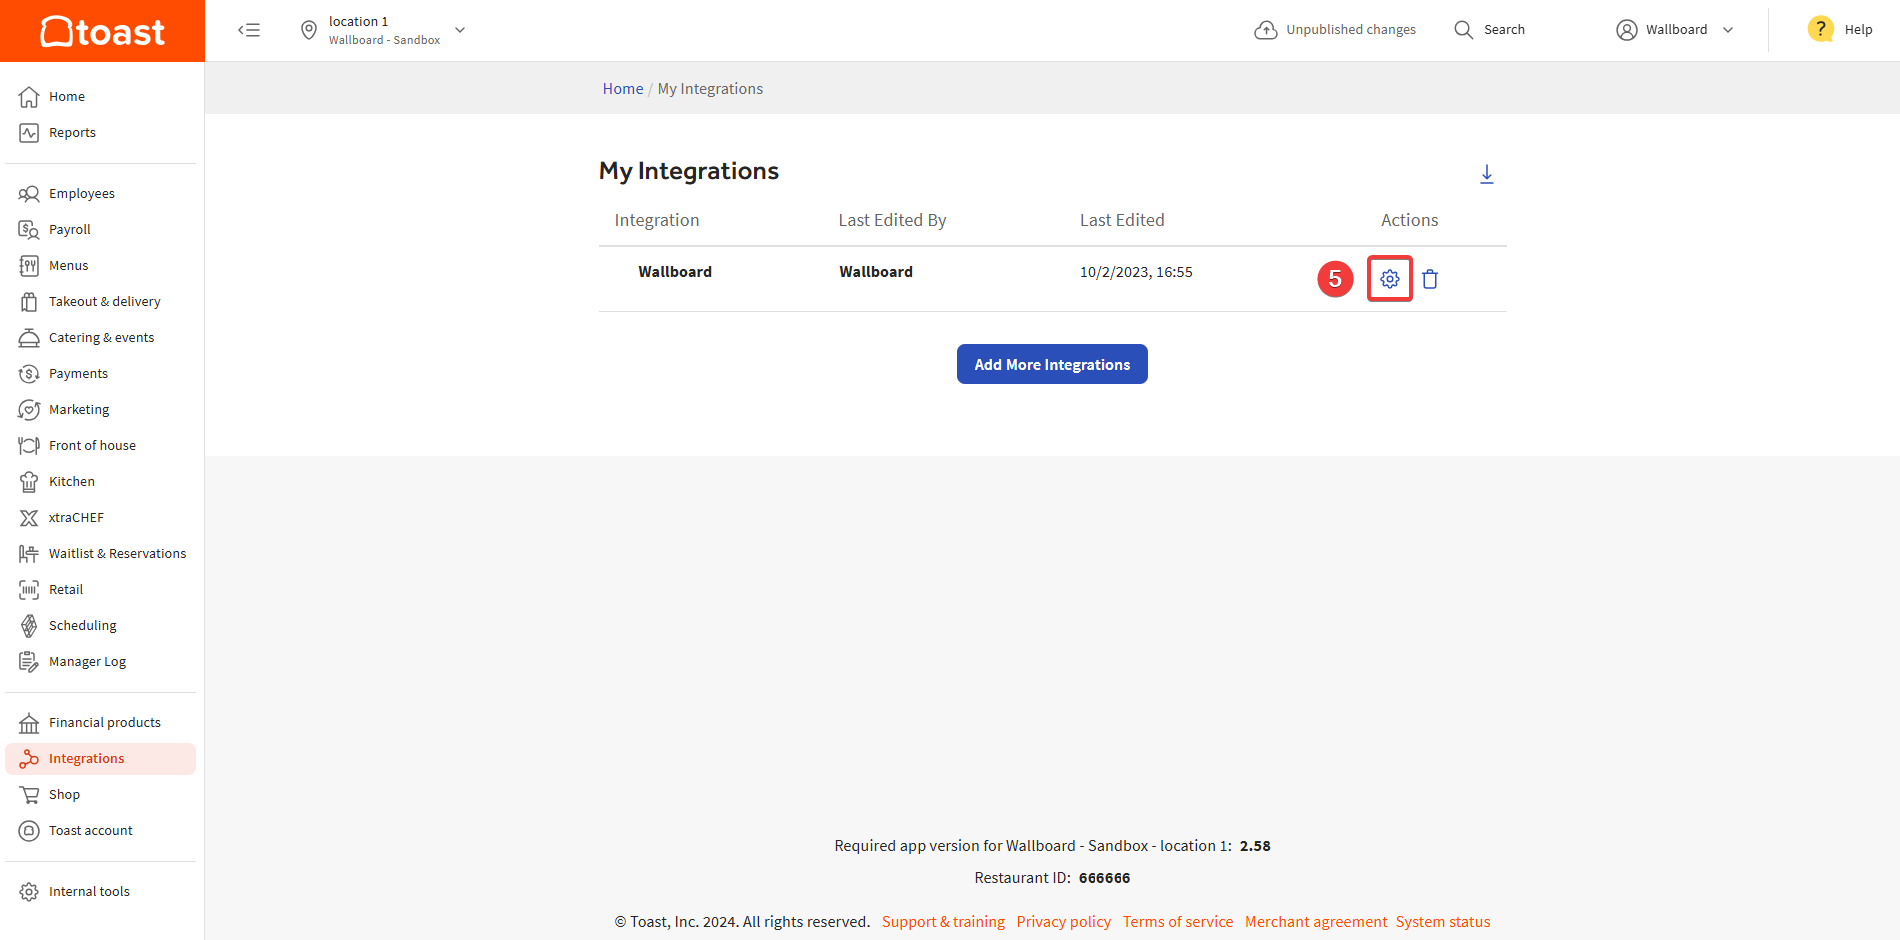
- Click on the Gear icon
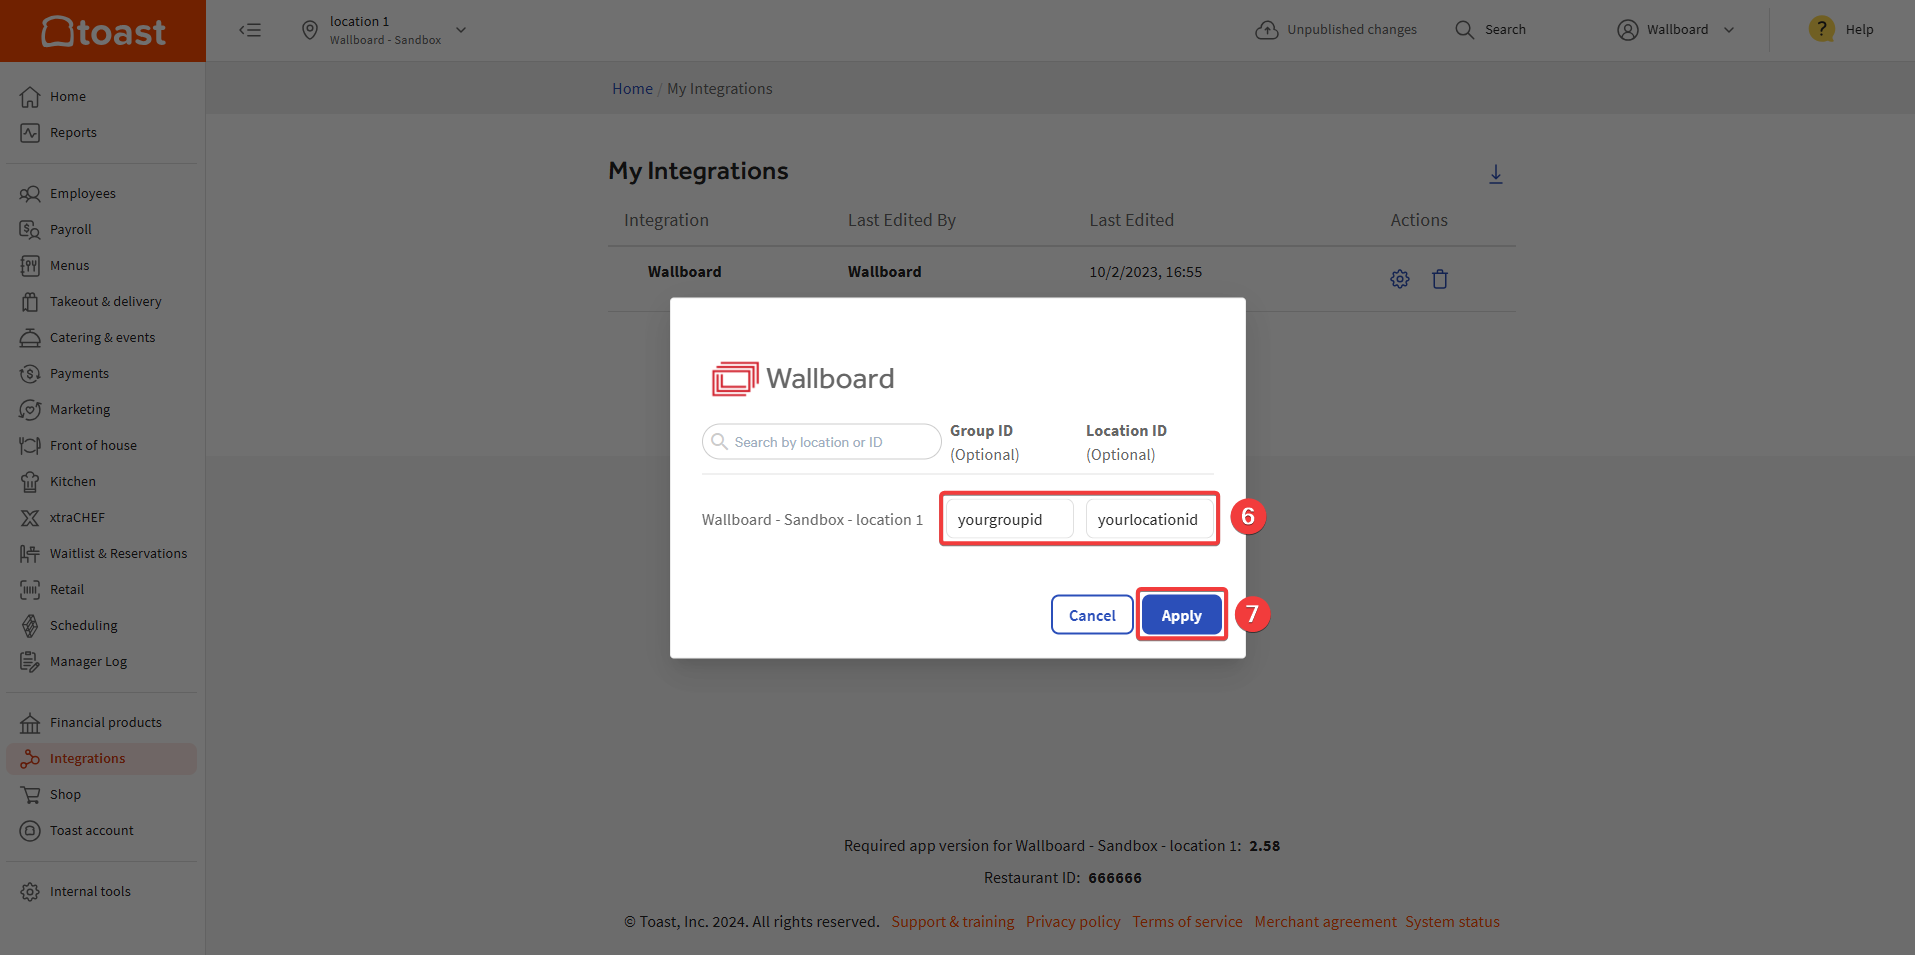
- Enter the unique identifier for the GroupID and LocationID. You can come up with a random unique GroupID and LocationID.
- Press Apply
In the Wallboard Editor:
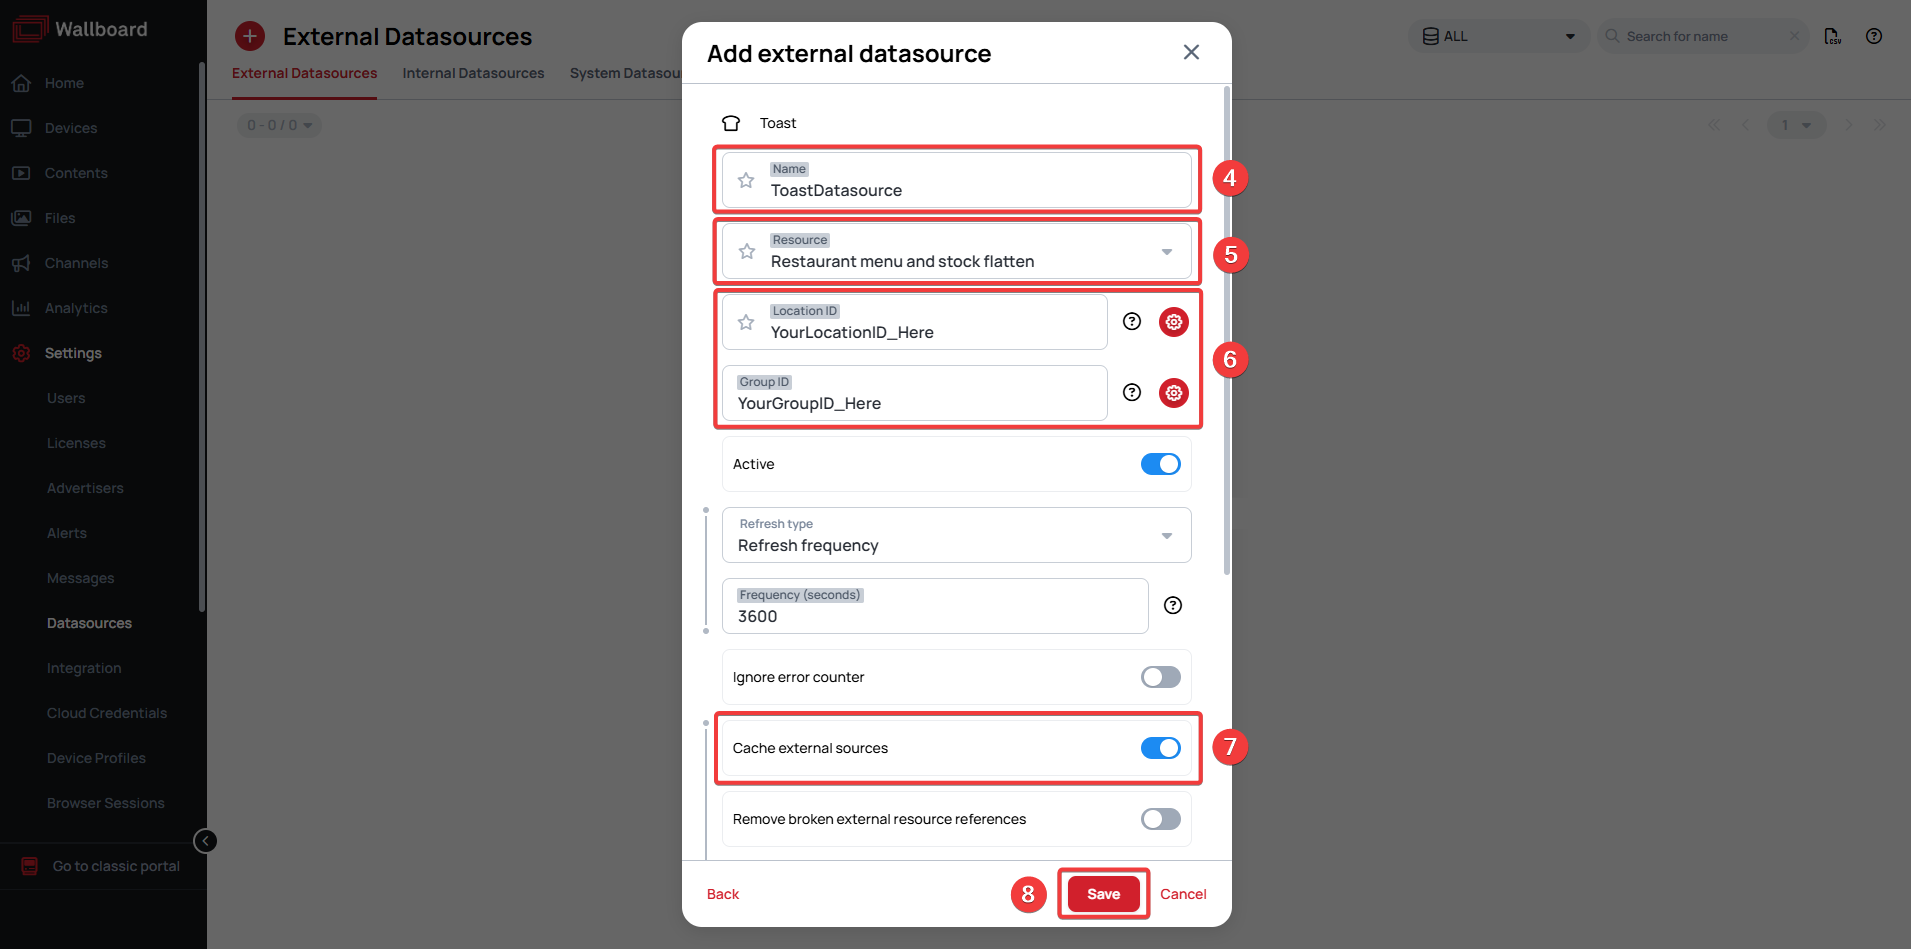
- Go to Settings >> Datasources >> External datasources
- Click Add new
- Select TOAST as type
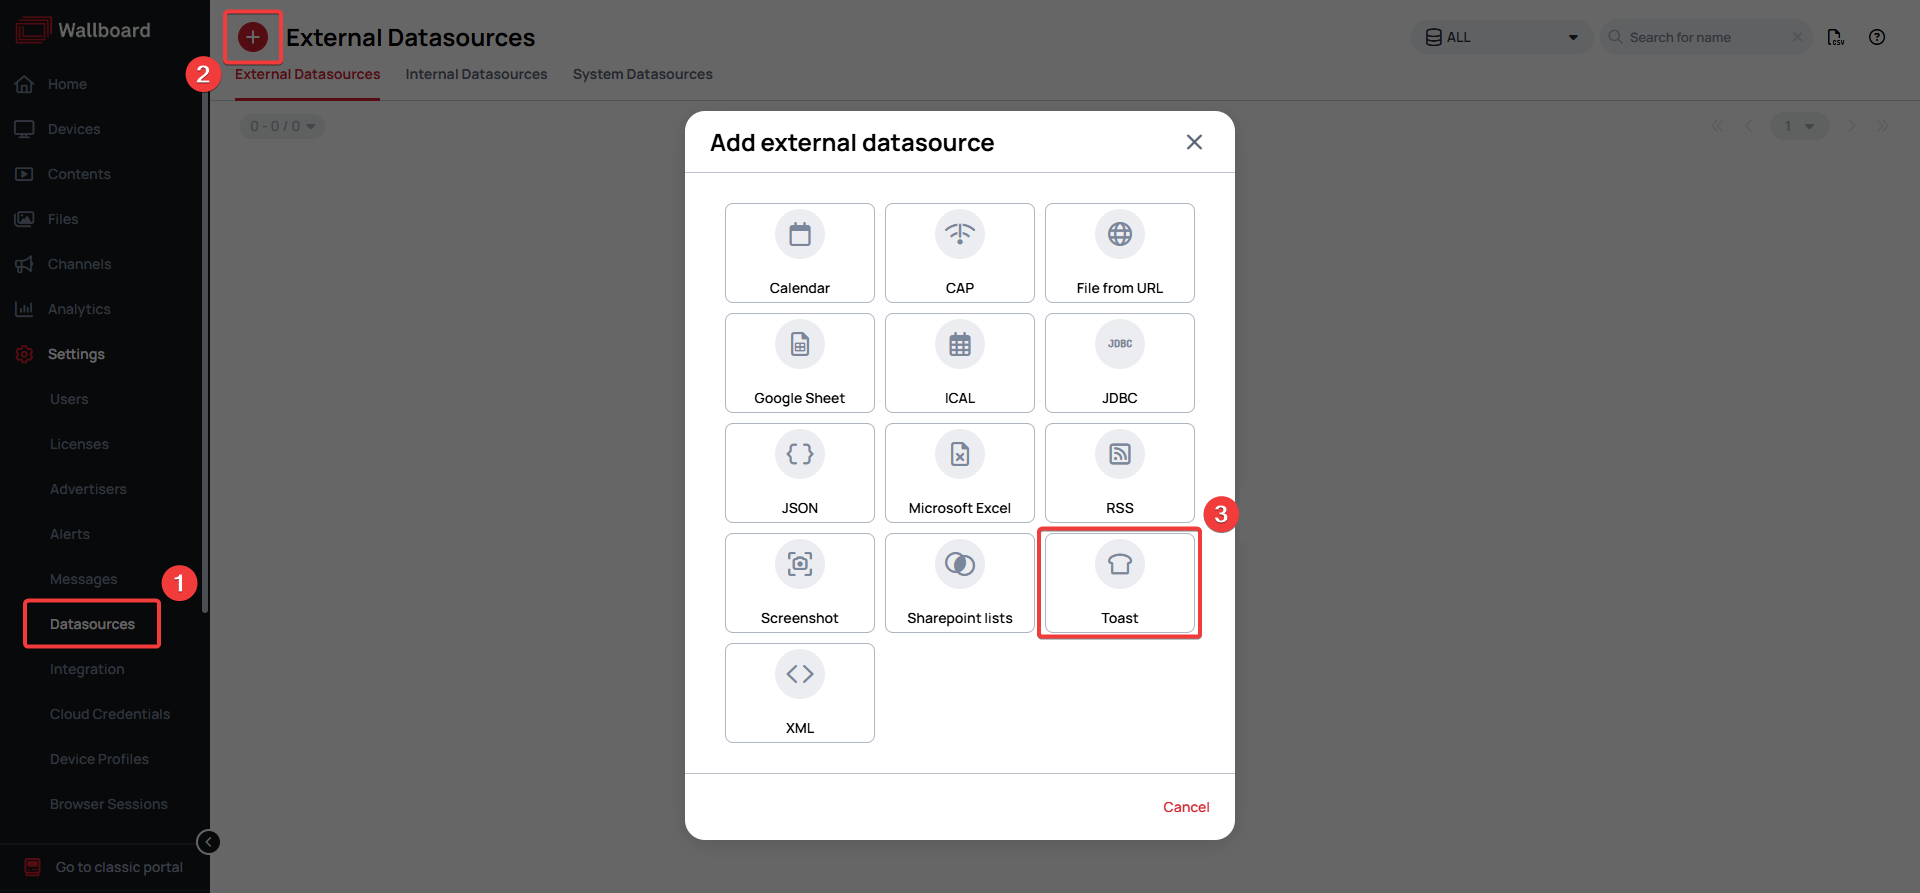
- Name your datasource
- As your Resource, select the Restaurant menu and stock flatten option
- Enter the LocationID and GroupID you configured in Toast
- Turn on the cache external sources option to cache the images saved to your menu items in Toast
- Click Save
Creating your Layout & Displaying your Items
In the Toast restaurant management system:
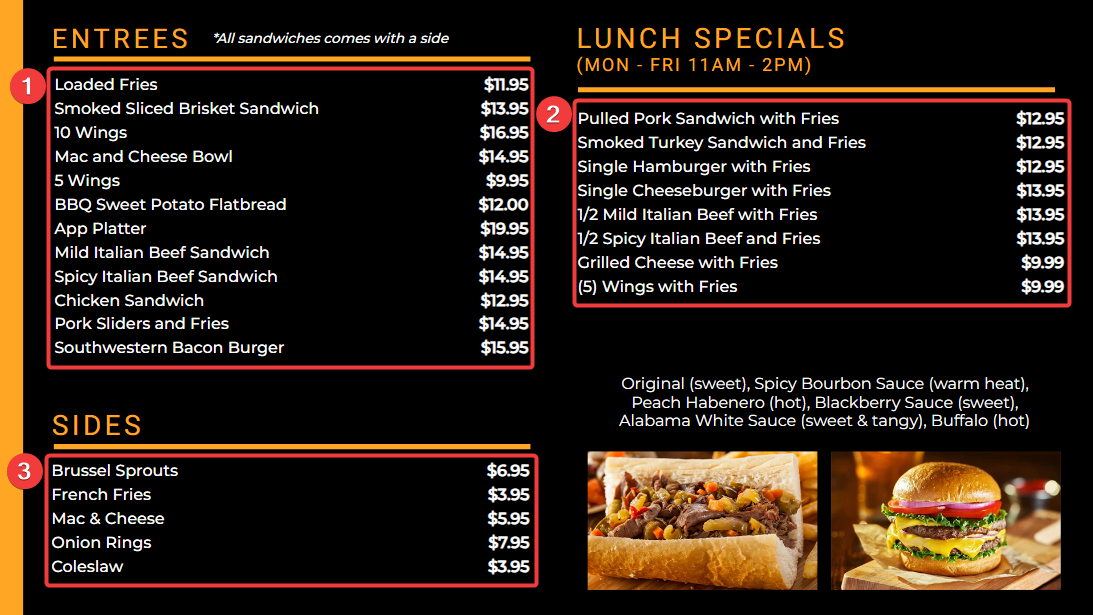
Before creating your content in Wallboard it's important to understand how your items get from Toast to your menu. In the editor your are able to create zones by placing multiple MenuBoard apps on the canvas. By default each of these apps will look at your entire menu UNLESS you tell it to filter items by MENU GROUP or ITEM TAG.
This means that if you want your items to appear on your menu properly, you must organize them into the corresponding menu groups or assign them tags in Toast. Below are a few possible scenarios:
-
Scenario #1:(Easiest) If you keep your Toast menu very organized and delete items when you don't want them to appear on your Wallboard menu, then you should use menu groups.
-
Scenario #2:(Most common) If you find yourself pulling items from your menu, but you want to keep them in Toast under their menu group, you should use tags exclusively to determine what appears on your Wallboard menu.
Ex. Apply the item tag "Entrees" to your Entrée items in Toast that you want to appear in Wallboard. -
Scenario #3: If you want items to appear in a zone from separate menu groups, then you should use item tags in Toast.
Ex. Go to all your menu groups and tag your items with a "Vegan" tag if you would like to create a Vegan section in Wallboard.

In the Wallboard Designer:
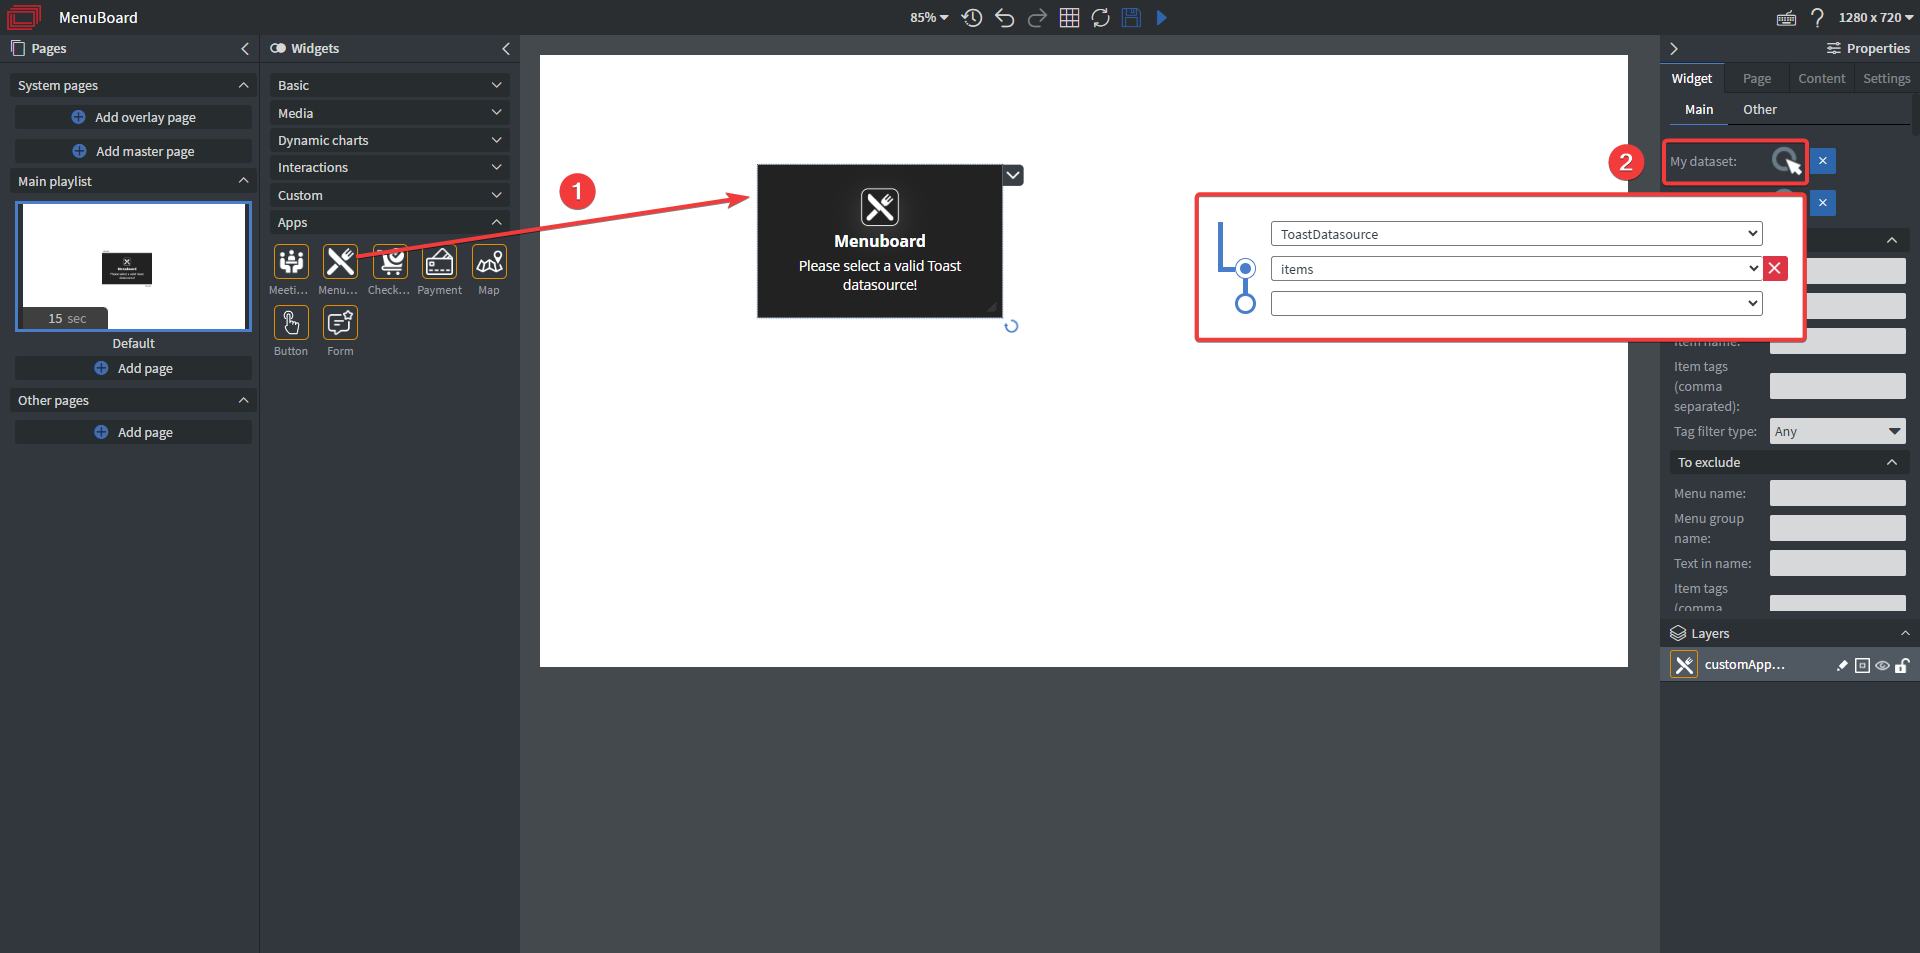
- Drag & drop the MenuBoard app onto the canvas
- Select the Toast datasource you created in Wallboard (On the second dropdown you have to select the items field too)
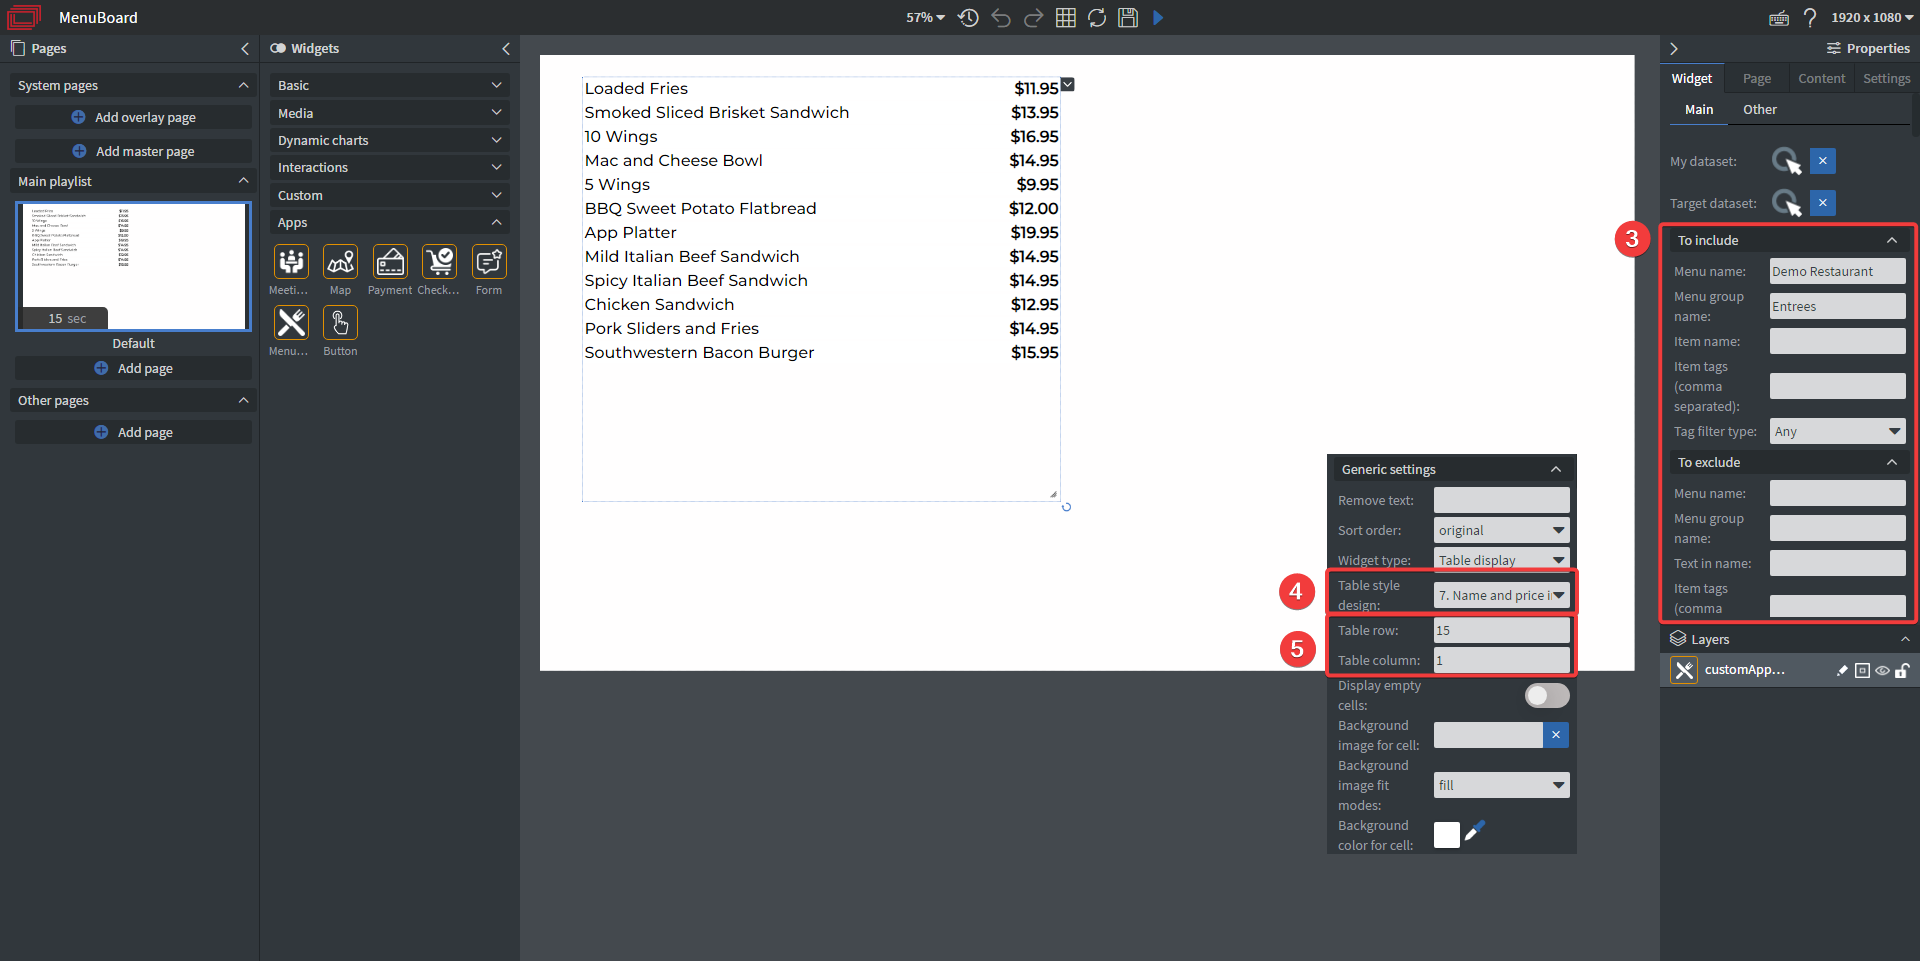
- Specify the menu group or tag you want to list your menu items by in the To include section. You can optionally exclude items from displaying in the To exclude section.
- Select the layout of your menu under Table style design in Generic settings. In this example we are using the most common: 7. Name and price in one row.
- Remember to save space for additional items and set the rows to a larger number than the amount of items you currently have. By doing this, when new items are added they will immediately appear on your menu without requiring additional edits.
Designing your Menu
Now with a basic menu placed we can move on to making it look more appealing.
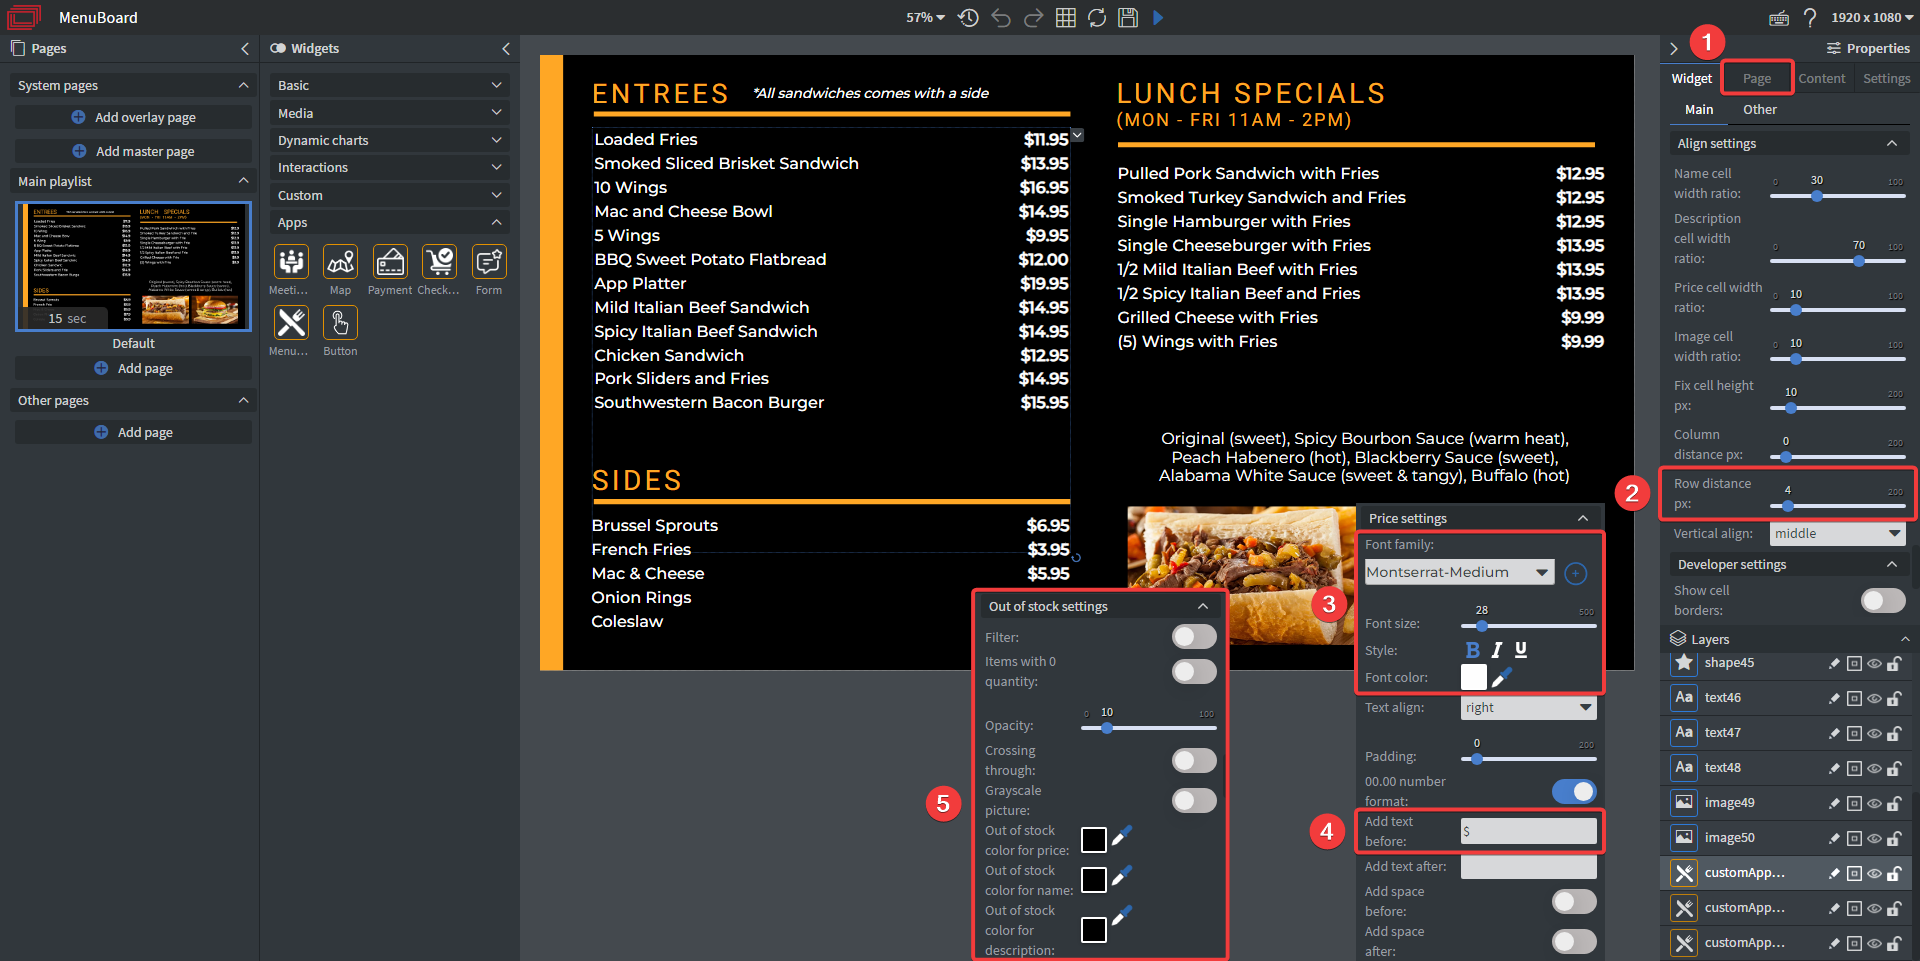
- Select a background image under the Page settings tab.
- Adjust the spacing of your items under Row distance px in Align settings.
- Adjust font size/family/color for the name, price and description. You can find them in the name/price/description settings category. You can optionally upload your own custom font.
- Add text(currency) before your price under Price settings.
- Adjust Out of Stock settings:
- Filter - Completely hide out of stock items
- Crossing through - Cross out items that are out of stock
- Grayscale - Makes out of stock items appear light grey
- Drag & Drop additional MenuBoard apps onto the canvas for each zone. Ex. Sides and Lunch Specials in this case.
- Add any other widgets to make it look neater.
Watch YouTube tutorial video
If you have further questions please do not hesitate to contact us at support@wallboard.info. Happy editing!