GPIO input
Configuration
{
	"services": [
		{
			"uid": "gpio",
			"type": "GPIO",
			"settings": {
				"openForRead": [
					{
						"id": "GPIO0",
						"pin": 0,
						"lowEvent": "GPIO_0_OFF",
						"highEvent": "GPIO_0_ON"
					},
					{
						"id": "GPIO1",
						"pin": 1,
						"lowEvent": "GPIO_1_OFF",
						"highEvent": "GPIO_1_ON"
					},
					{
						"id": "GPIO3",
						"pin": 3,
						"lowEvent": "GPIO_3_OFF",
						"highEvent": "GPIO_3_ON"
					},
					{
						"id": "GPIO4",
						"pin": 4,
						"lowEvent": "GPIO_4_OFF",
						"highEvent": "GPIO_4_ON"
					}
				],
				"openForWrite": []
			}
		}
	]
}
Simple usage in content
Preparations
In this tutorial We will use a GPIO controller and a Brightsign XD4 device.
In this tutorial my configuration will only work with the GPIO0 and the GPIO1 buttons, but if you need all the buttons, feel free to use the whole configuration, i mentioned above.
The controller uses the Brightsign's GPIO connector, so you have to attach the GPIO into your device.
The port direction is left to right, so you have to insert the GPIO into the GPIO connector starting from the left.
- After this you have to go to the Wallboard Editor site, where you have to click onto the Brightsign device, choose Device Properties>>Set>>
Set sensor configuration
- Then add the configuration into it.
 {
	"services": [
		{
			"uid": "gpio",
			"type": "GPIO",
			"settings": {
				"openForRead": [
					{
						"id": "GPIO0",
						"pin": 0,
						"lowEvent": "GPIO_0_OFF",
						"highEvent": "GPIO_0_ON"
					},
					{
						"id": "GPIO1",
						"pin": 1,
						"lowEvent": "GPIO_1_OFF",
						"highEvent": "GPIO_1_ON"
					}
				],
				"openForWrite": []
			}
		}
	]
}
- Choose the custom preset, because you use a custom configuration, then click on the save button.
Content
- Create a new content, then you will need only the Default page.
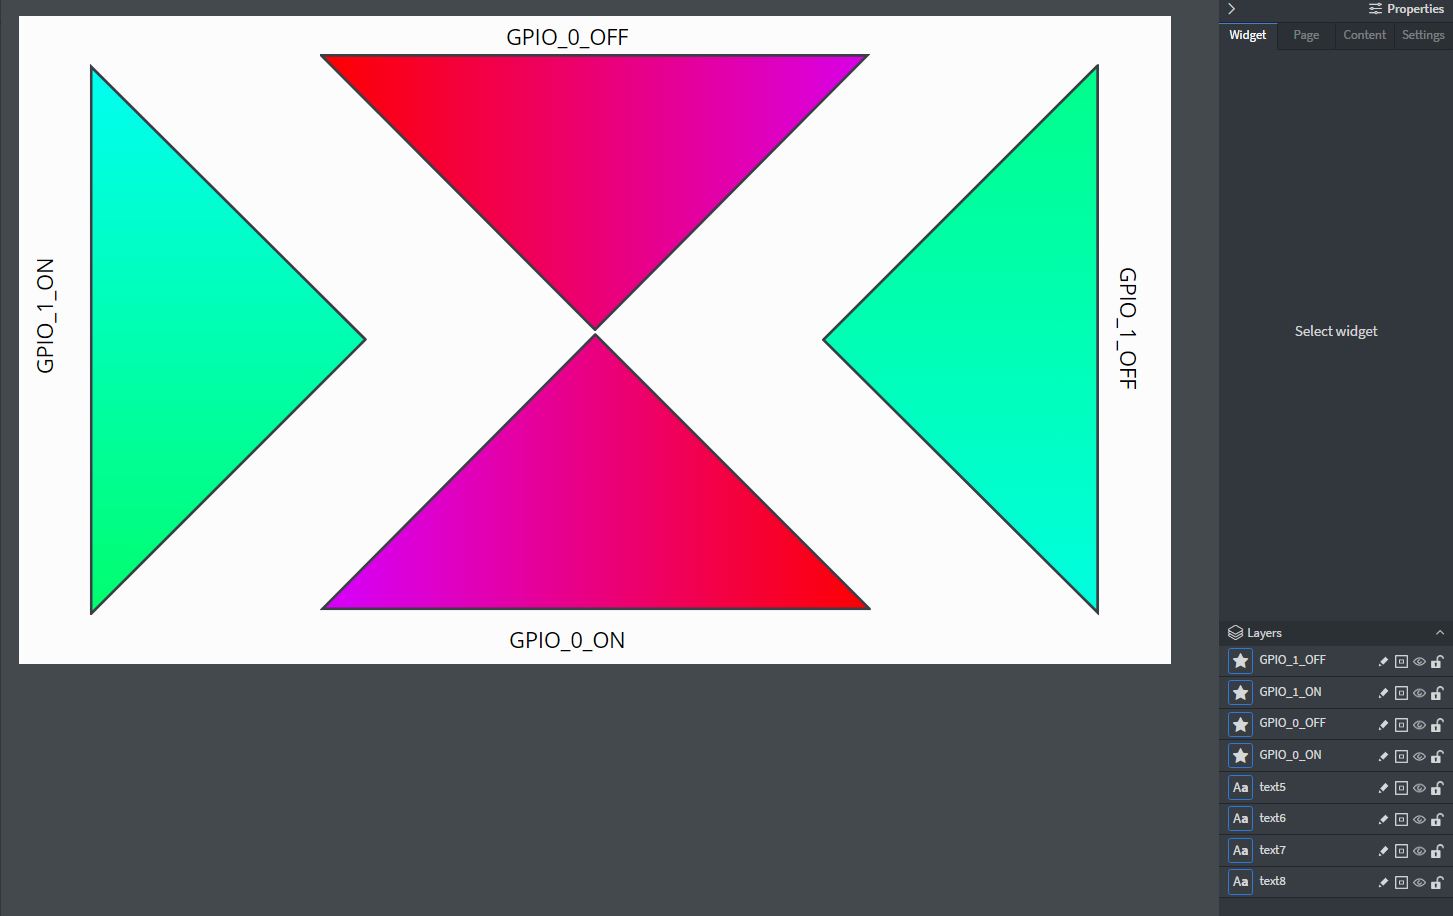
- Take the upcoming value names into text widgets, and add a shape widgets to each of the value names.
- After that, select Content on the right Properties panel, and click onto the
Edit sensor event
- Click onto the Add new button, and create the events like this:
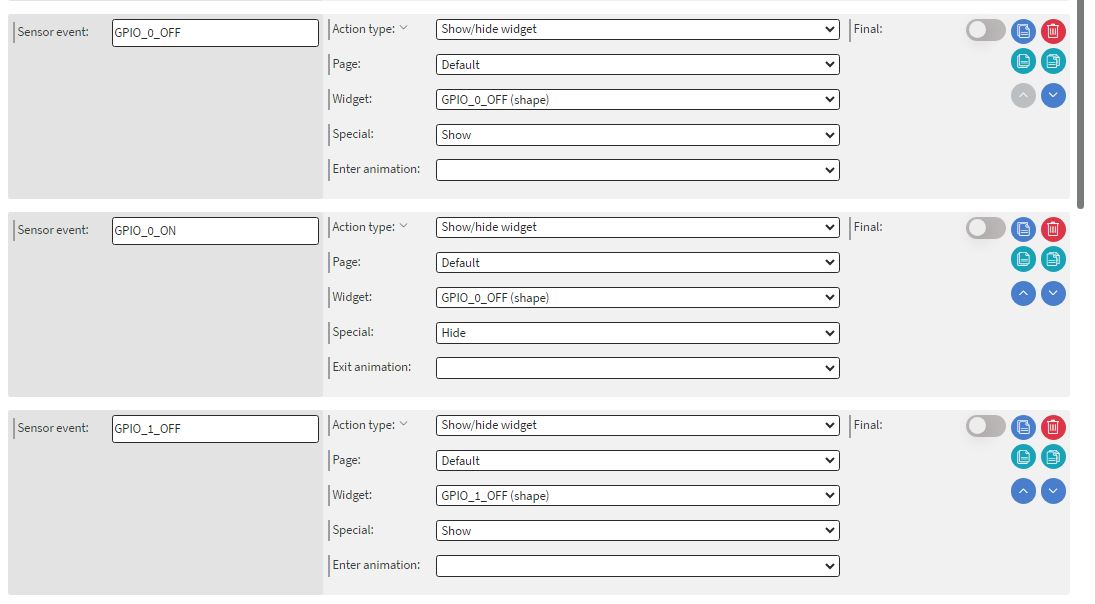

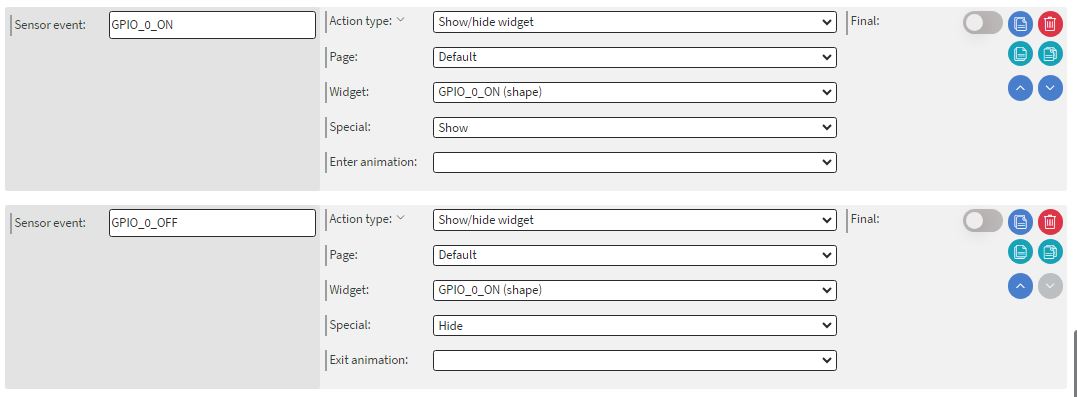
- You have to add every single value a shape widget to show, and to see the event is not happened or not received by the system,add hide events to hide the not actual shape widget.
- If you added all necessary events into the content, use the hide button on the right of the Layers panel to hide all the shape widgets. The text widgets are meant for indicating the actual event.
- if you make this , you will see what is the actual event your device received, because only the actual shape widget will be shown.
If the actual event's (Call it GPIO_1_ON now)shape widget is shown (this is an event that appears when you press the button) and you release the button, the GPIO_1_OFF should appear instead of the previous, there is a chance that the GPIO_1_ON shape is still active, and you will see both of the events that came from the button, because the button is not 100% accurate.
After the previous steps, please save your content, and assign it to the Brightsign device, where you put the configuration.
Tutorial
THERE IS NO TUTORIAL VIDEO YET :(