Advanced device configuration options for Windows players
Where can you set these configurations?
2.0 UI
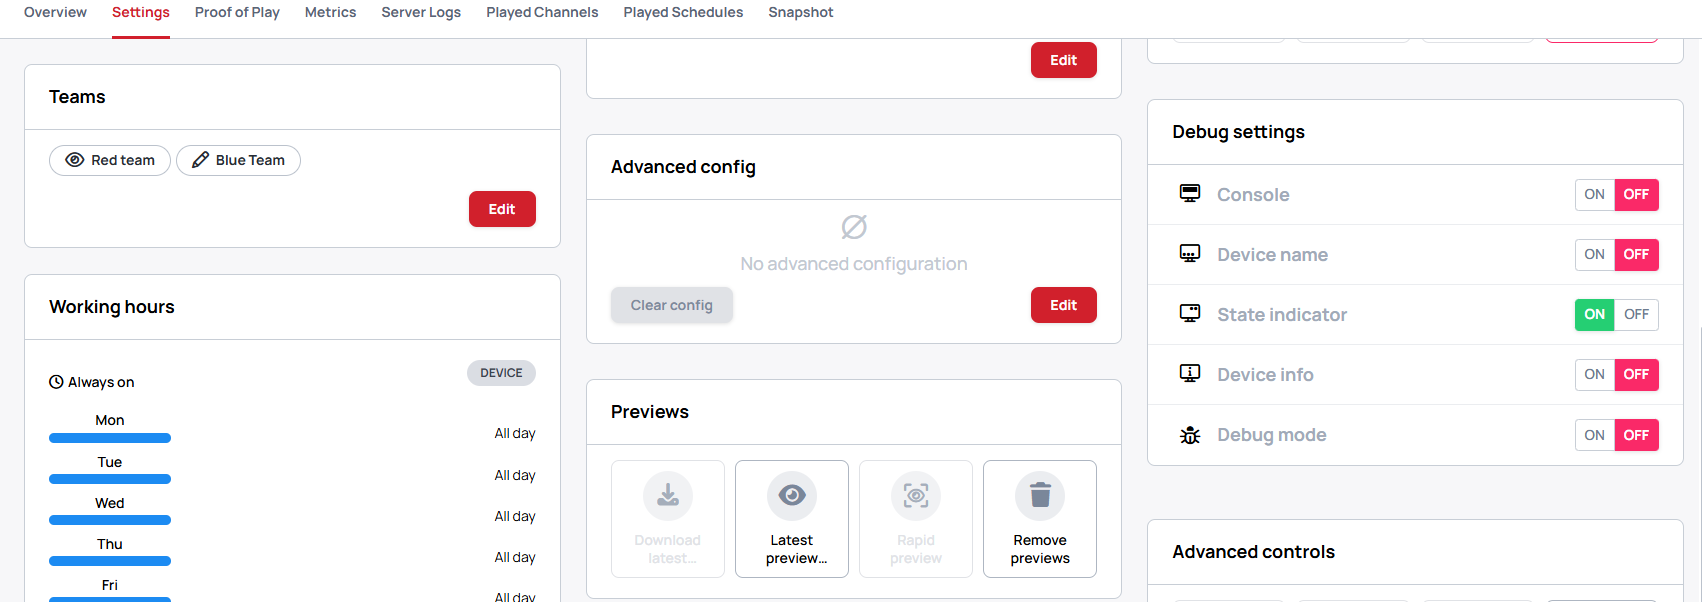
Navigate yourself to Devices menu, select the device where you wish to set the advanced configs.
- In the details tab, select
Settings, scroll down until you find theAdvanced configmodal.

- Click on the
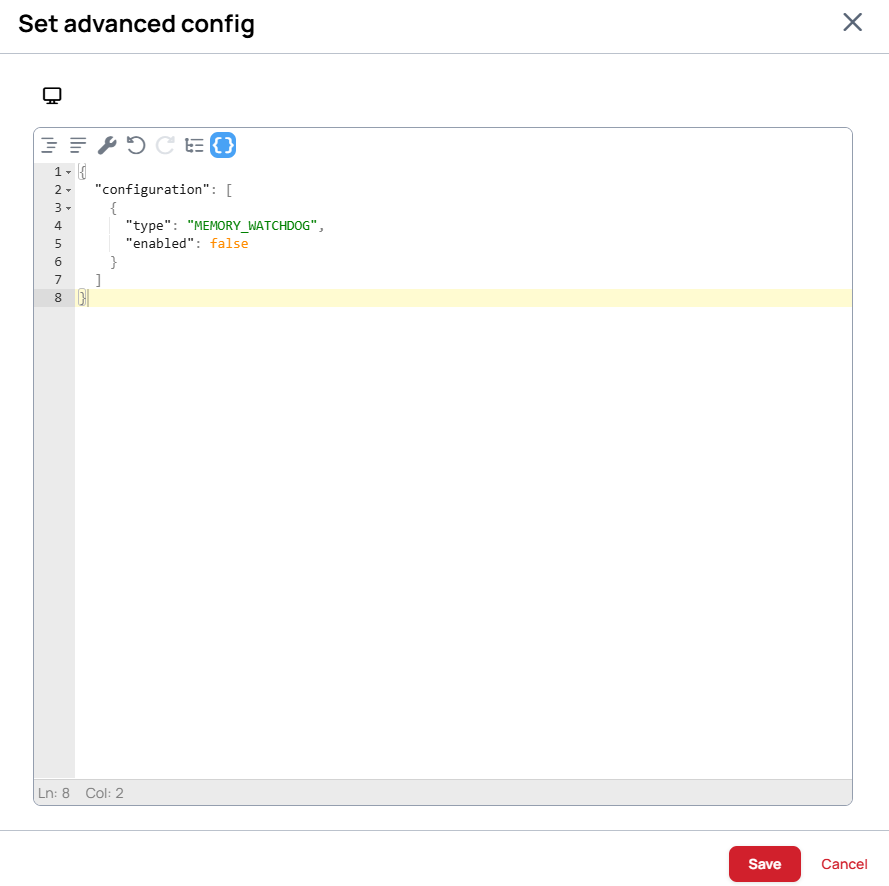
editthen place theconfigto the box

1.x UI
You can set advanced configuration from the context menu of the device: Manage screen >> Set Advanced config
- A modal will appear where you can type or paste the config and send it to the device.
Clear button only clears the input field to an empty json. Sending this json doesn't disable the previous configuration of the device.
The basic configuration structure is the following json array, which contains the actual configuration objects
{
  "configuration": [
    {
    }
  ]
}
There can be multiple objects inside a singe command. For example you can enable both debug mode and memory watchdog in the same Advanced configuration json
{
  "configuration": [
    {
      "type": "DEBUG_MODE",
      "enabled": true
    },
    {
      "type": "AUTO_START",
      "enabled": true
    }
  ]
}
enabledkey has to be defined, value has to be a non-empty booleanmaxMemoryLimitFractionkey has to be defined, value has to be number. The minimum limit is0.4, the maximum is1.0.
Screen control
Control screens
{
  "configuration": [
    {
      "type": "SCREEN_CONTROL",
      "serialConnection": {
        "baudrate": 9600,
        "port": "COM1",
        "dataBits": 8,
        "stopBits": 0,
        "parity": 0,
        "flowControl": 1
      },
      "commands": [
        {
          "action": "SCREEN_ON",
          "method": "serial",
          "messageType": "string",
          "message": "TON\n"
        },
        {
          "action": "SCREEN_OFF",
          "method": "serial",
          "messageType": "string",
          "message": "TOF\n"
        }
      ]
    }
  ]
}
serialConnectionbaudrateint - Serial communication speed in bits per second (e.g., 9600, 115200)portstring - COM port identifier (e.g., "COM1", "COM3")dataBitsint - Number of data bits per frame (typically 7 or 8)stopBitsint - Number of stop bits: 0 = One, 1 = 1.5, 2 = Two stop bitsparityint - Parity check mode: 0 = None, 1 = Odd, 2 = Even, 3 = Mark, 4 = SpaceflowControlint - Currently not used
commandshas to be an array type containing validScreenControlCommandobjectsactionkey has to be defined, and one of the following values:SCREEN_ON,SCREEN_OFFmethodkey has to be defined, one of the following values:serial,socketmessageTypekey has to be defined, and one of the following values:byte,stringmessagehas to be defined. The command varies by device/TV manufacturer and must be obtained from the device's documentation- In case of
stringmessageTypethey have to be non-empty strings for exampleTOF\n
- In case of
Show debug logs
Sometimes the support team requires a device log from the users to find out what causes a problem on the device. Enabling the debug log on the device will show more information for us in the device log.
{
  "configuration": [
    {
      "type": "DEBUG_MODE",
      "enabled": true
    }
  ]
}
enabledkey has to be defined, value has to be a non-empty boolean
Set WebView with Browser Authentication Requests
The WEBVIEW_AUTHENTICATION advanced configuration is specifically designed for authentication methods that utilize browser's request for authentication.
{
  "configuration": [
    {
      "type": "WEBVIEW_AUTHENTICATION",
      "credentials": [
        {
          "host": "example.com",
          "username": "AUTH_USERNAME",
          "password": "AUTH_PASSWORD"
        }
      ]
    }
  ]
}
credentialshas to be an array type containing validcredentialobjects
Set WebView Basic Authentication
The WEBVIEW_BASIC_AUTHENTICATION advanced configuration is specifically designed for basic authentication that do not utilize browser's request for authentication.
It automatically applies the Authorization header to all outgoing requests based on the specified URL parameter.
{
  "configuration": [
    {
      "type": "WEBVIEW_BASIC_AUTHENTICATION",
      "credentialList": [
        {
          "domainUrl": "PROTOCOL://DOMAIN:PORT/PATH",
          "userName": "AUTH_USER_NAME",
          "password": "AUTH_PASSWORD"
        }
      ]
    }
  ]
}
credentialListhas to be an array type containing validcredentialListobjects
Examples on how to fill data in the configuration:
{
  "configuration": [
    {
      "type": "WEBVIEW_BASIC_AUTHENTICATION",
      "credentialList": [
        {
          "domainUrl": "http://192.168.1.166:8080/",
          "userName": "MyUserName",
          "password": "MyPassword"
        }
      ]
    }
  ]
}
{
  "configuration": [
    {
      "type": "WEBVIEW_BASIC_AUTHENTICATION",
      "credentialList": [
        {
          "domainUrl": "http://mystreamhost.infoo/",
          "userName": "MyUserName",
          "password": "MyPassword"
        }
      ]
    }
  ]
}
Set Power button behavior
Set the behavior of the power button
{
  "configuration": [
    {
      "type": "POWER_BUTTON",
      "mode": "DO_NOTHING"
    }
  ]
}
modekey has to be defined, and one of the following values:DO_NOTHING,SLEEP,SHUTDOWN
Turn off websecurity
This command disables device's websecurity.
Enabling this feature carries a certain level of risk. Once this feature is activated, we cannot accept responsibility for any unexpected outcomes that may occur
{
  "configuration": [
    {
      "type": "WEB_SECURITY",
      "enabled": false
    }
  ]
}
Set application's automatic start
Set the application's behavior, to start when system starts.
{
  "configuration": [
    {
      "type": "AUTO_START",
      "enabled": true
    }
  ]
}
Set application's window properties
Set the application's window properties and behavior
{
  "configuration": [
    {
      "type": "APPLICATION_WINDOW",
      "windowMode": "FullScreen",
      "windowPosition": "LeftTop",
      "width": 1280,
      "height": 720
    }
  ]
}
windowModekey has to be defined, and one of the following values:FullScreen,FullScreenMultiple,WindowedwindowPositionkey has to be defined, and one of the following values:LeftTop,Center
Device Preview
The Preview creation/upload can be disabled with this command
{
  "configuration": [
    {
      "type": "DEVICE_PREVIEW",
      "enabled": true
    }
  ]
}
Device Statistics
The device Metric and Proof of Display statistics collection can be triggered with this command
{
  "configuration": [
    {
      "type": "STATISTICS_SETTINGS",
      "deviceMetricsEnabled": true,
      "displayTimeStatEnabled": true
    }
  ]
}
- The
deviceMetricsEnabledparameter can be used to turn on or off the device metric Metric collection and upload - The
displayTimeStatEnabledparameter can be used to turn on or off the Proof of Display statistics collection and upload