How to create a Meeting Room Sign from a template
This article shows you how to integrate your cloud calendar with Wallboard and display your schedule using our MeetingRoom app.
Table of Contents
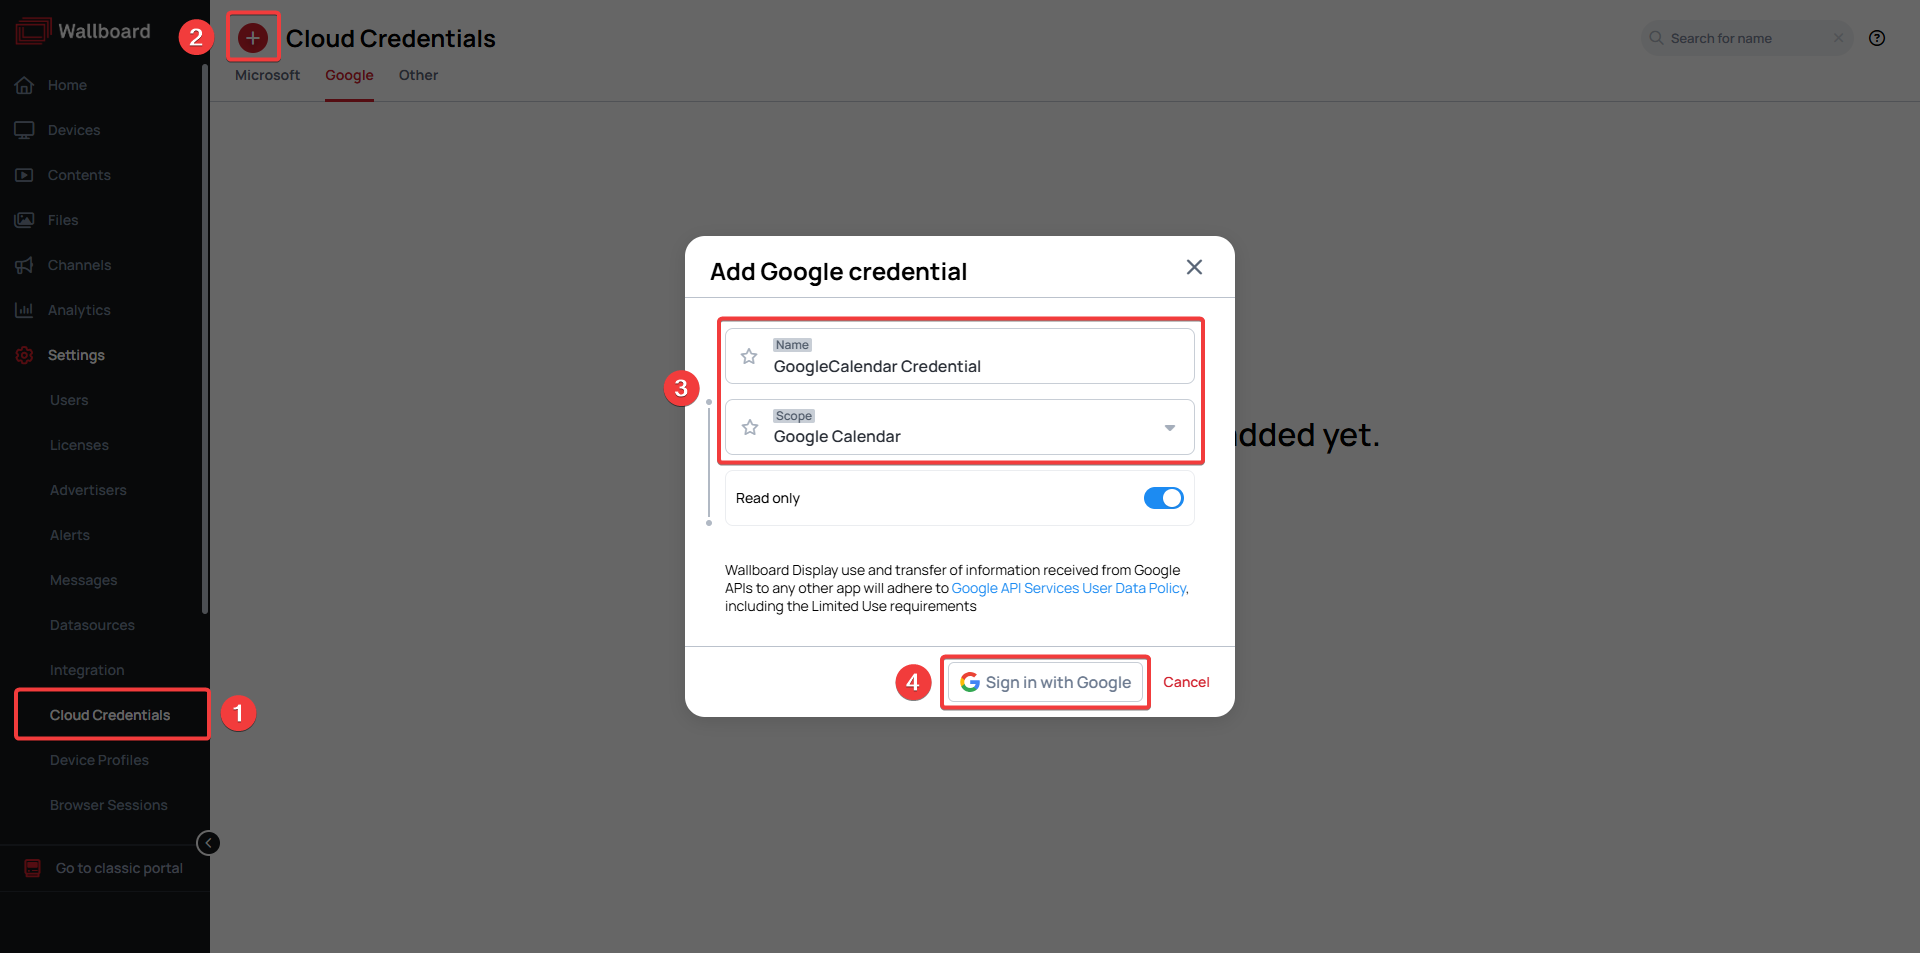
Adding Microsoft or Google Cloud Credentials
- Go to Settings >> Cloud Credentials >> Select Microsoft or Google from the tabs near the top
- Click Add new
- Name your credential and select the Microsoft/Google Calendar scope (For Microsoft credentials you additionally have to select the Tenant type)
- Click Sign in with Microsoft/Google and sign in using your account that has your calendar. When prompted allow Wallboard access to your calendars.
Adding Calendar Datasource
- Go to Settings >> Datasources >> External Datasources
- Click Add new
- Select CALENDAR as type
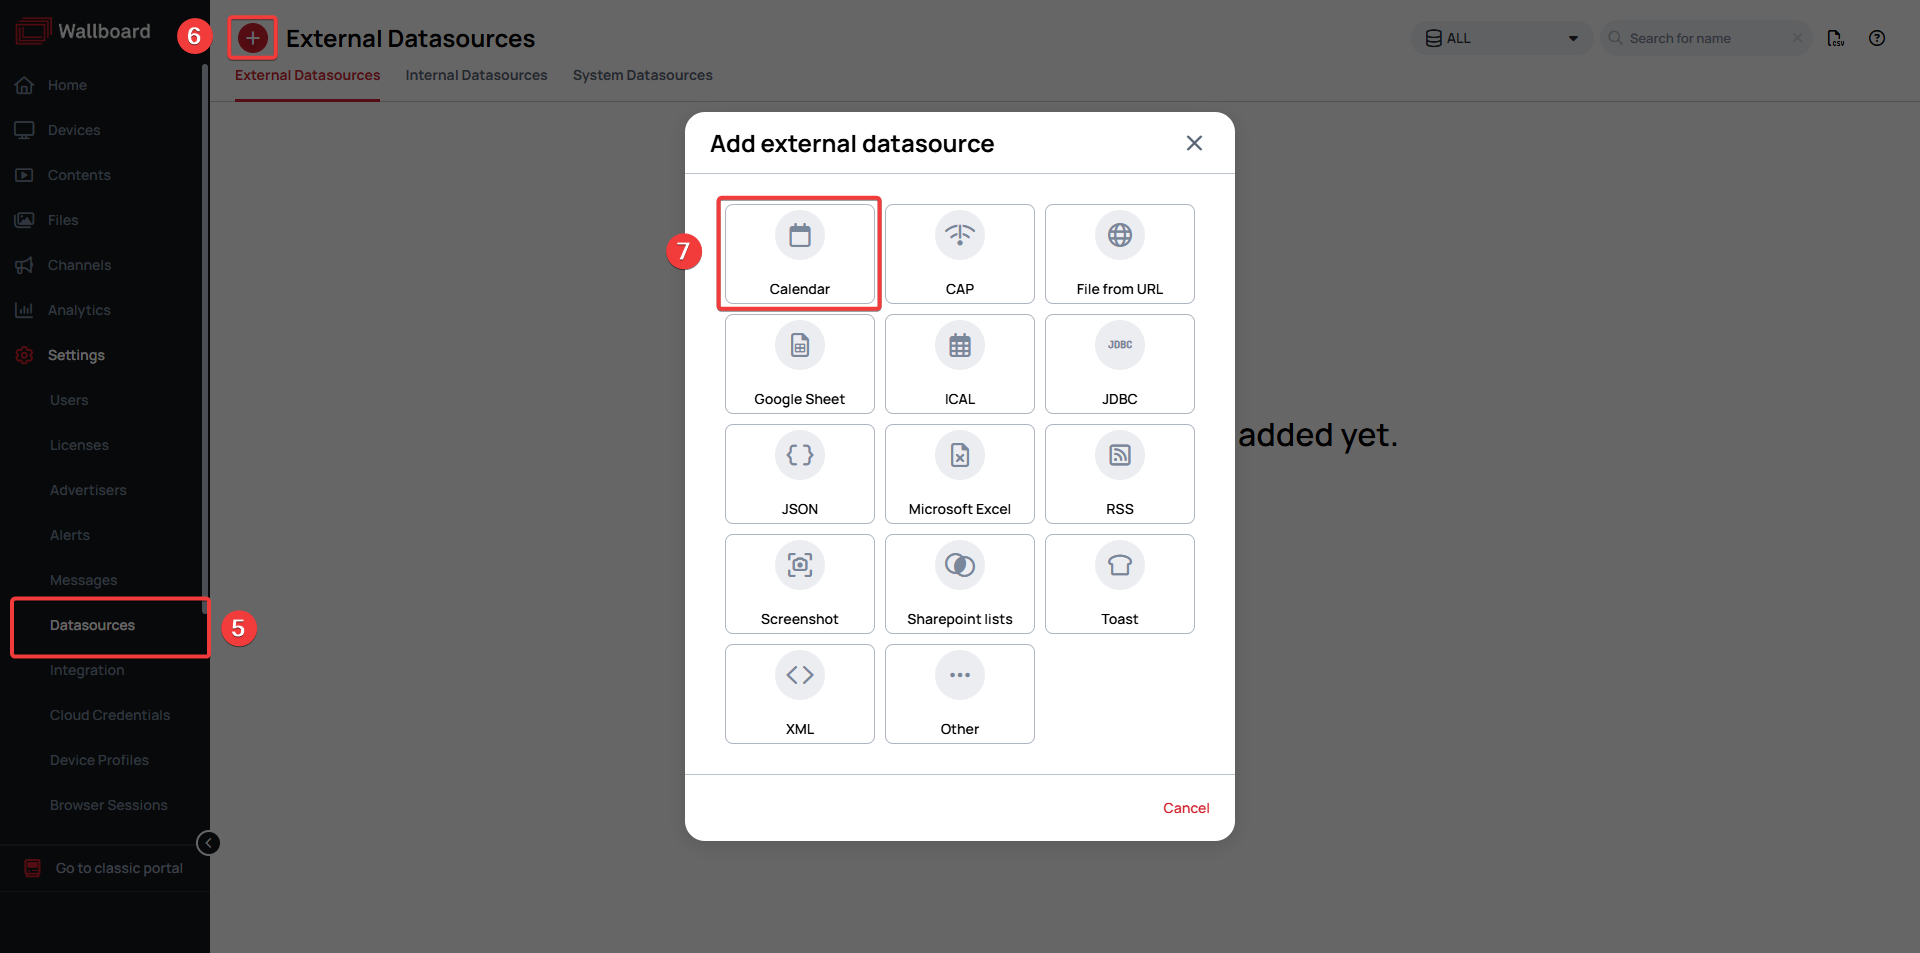
- Name your datasource
- Select the credential type and credential you've set up previously
- Select the calendar that you will want to display
- Click Save
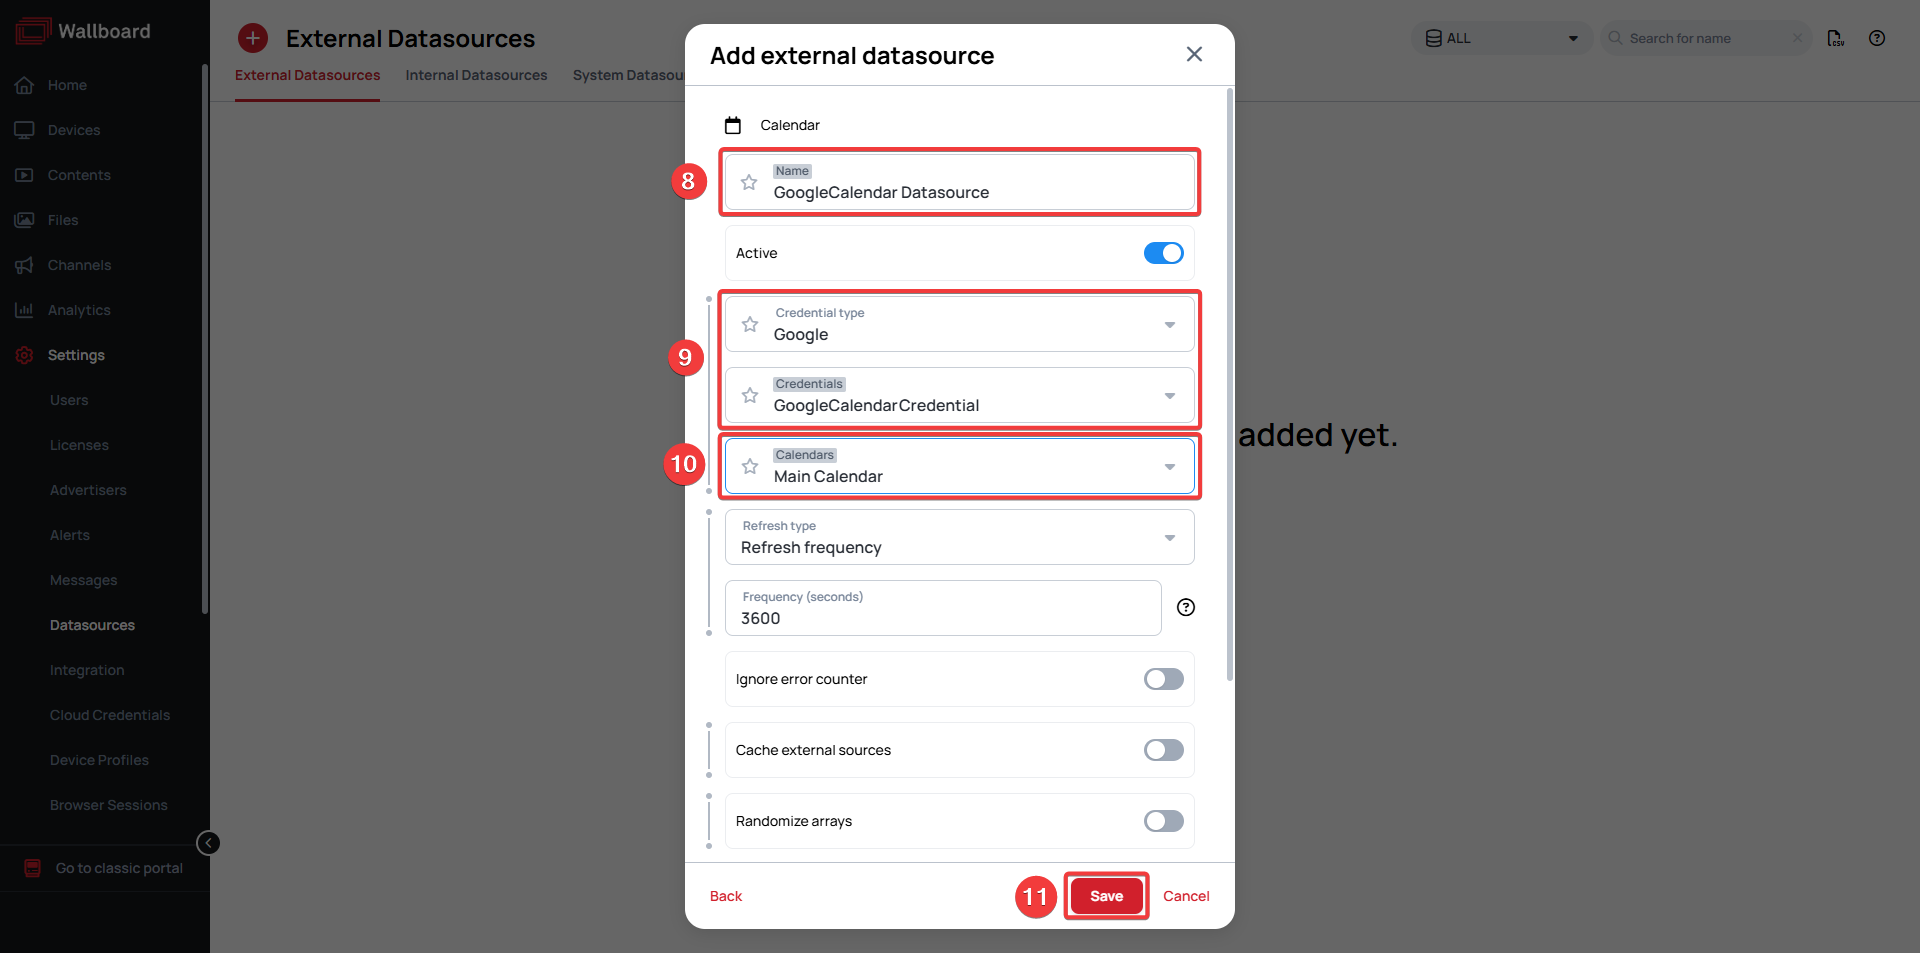
Importing Template from Template Library
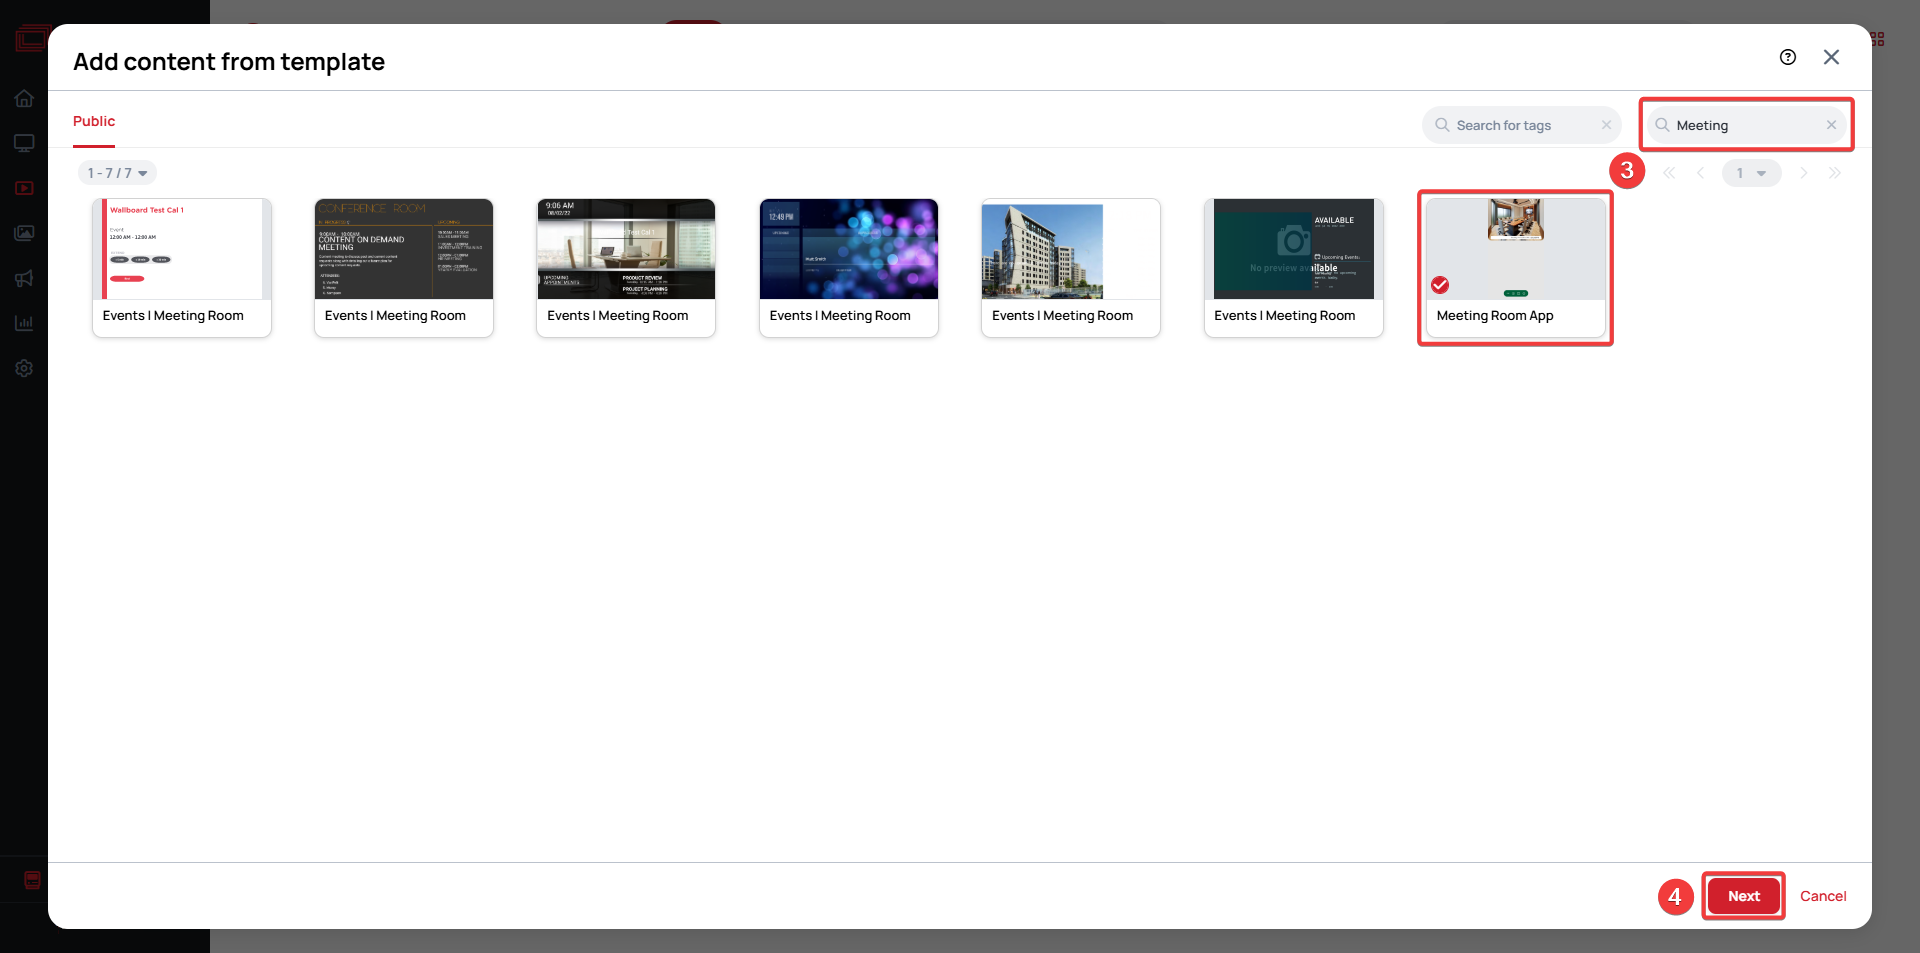
- Go to Contents
- Click Add new >> Create content from template
- Search for Meeting Room App and select the template
- Click Next
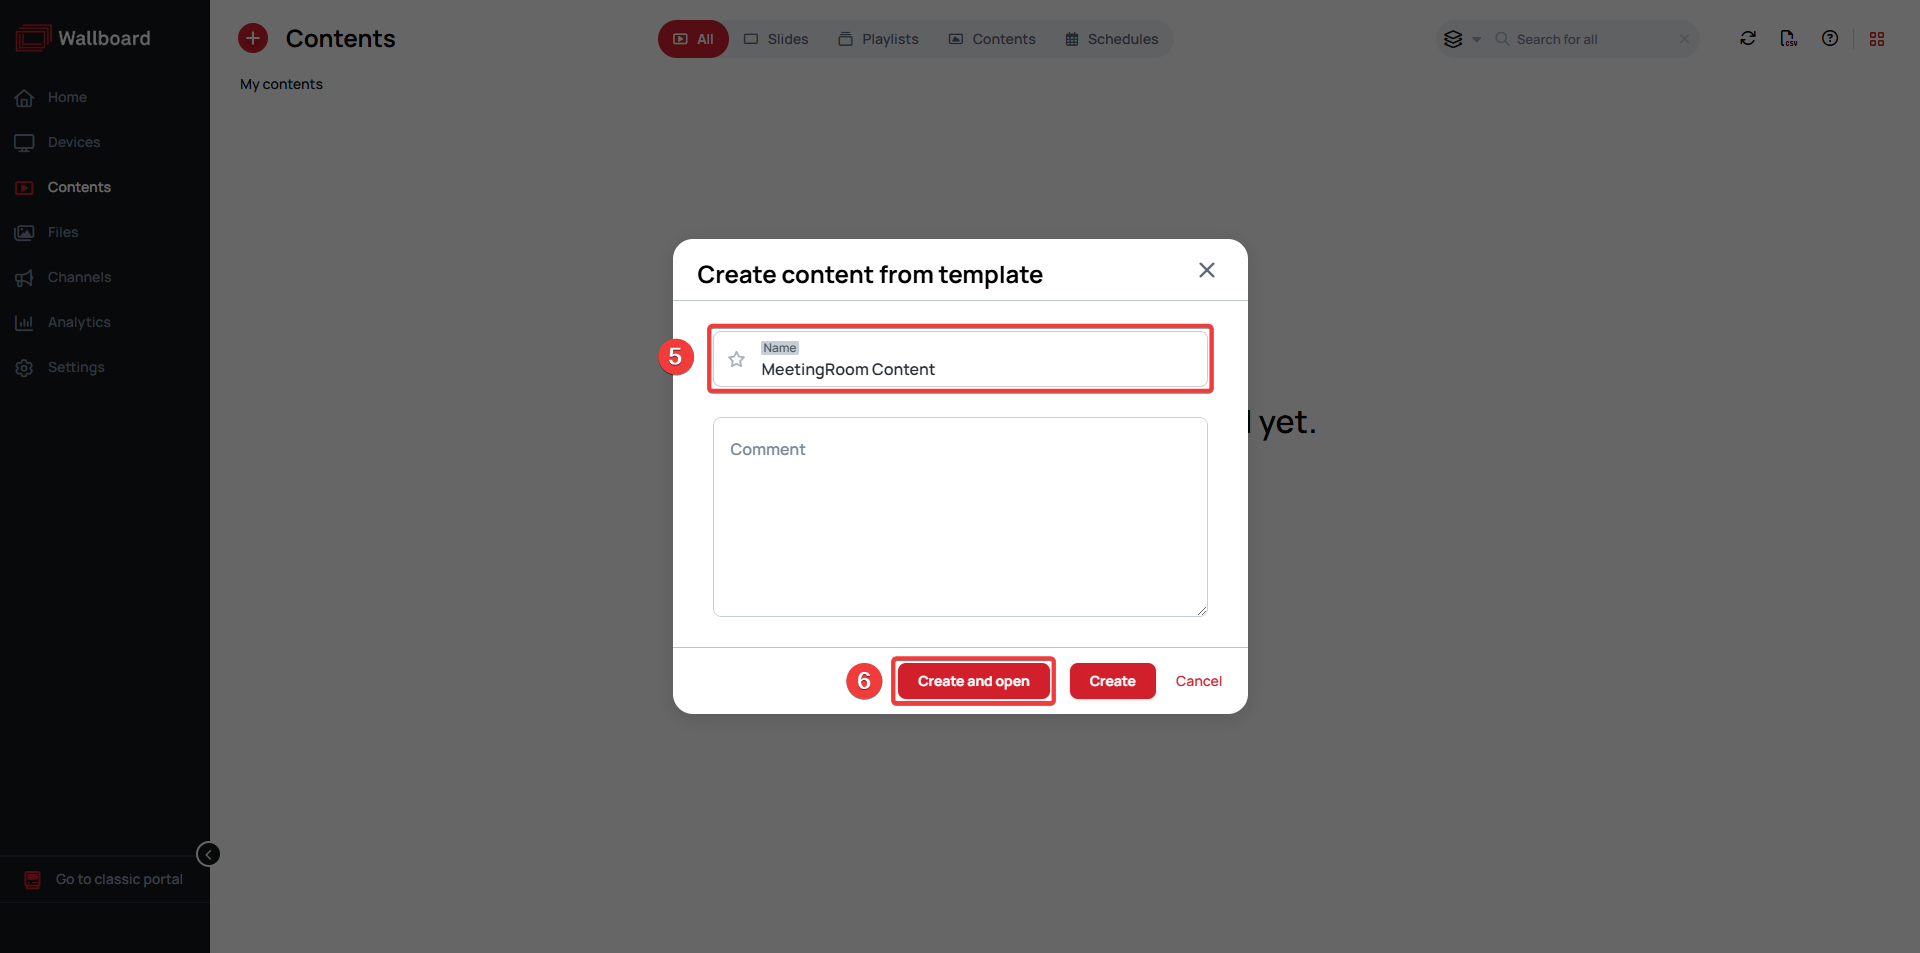
- Name your content
- Click Create and open
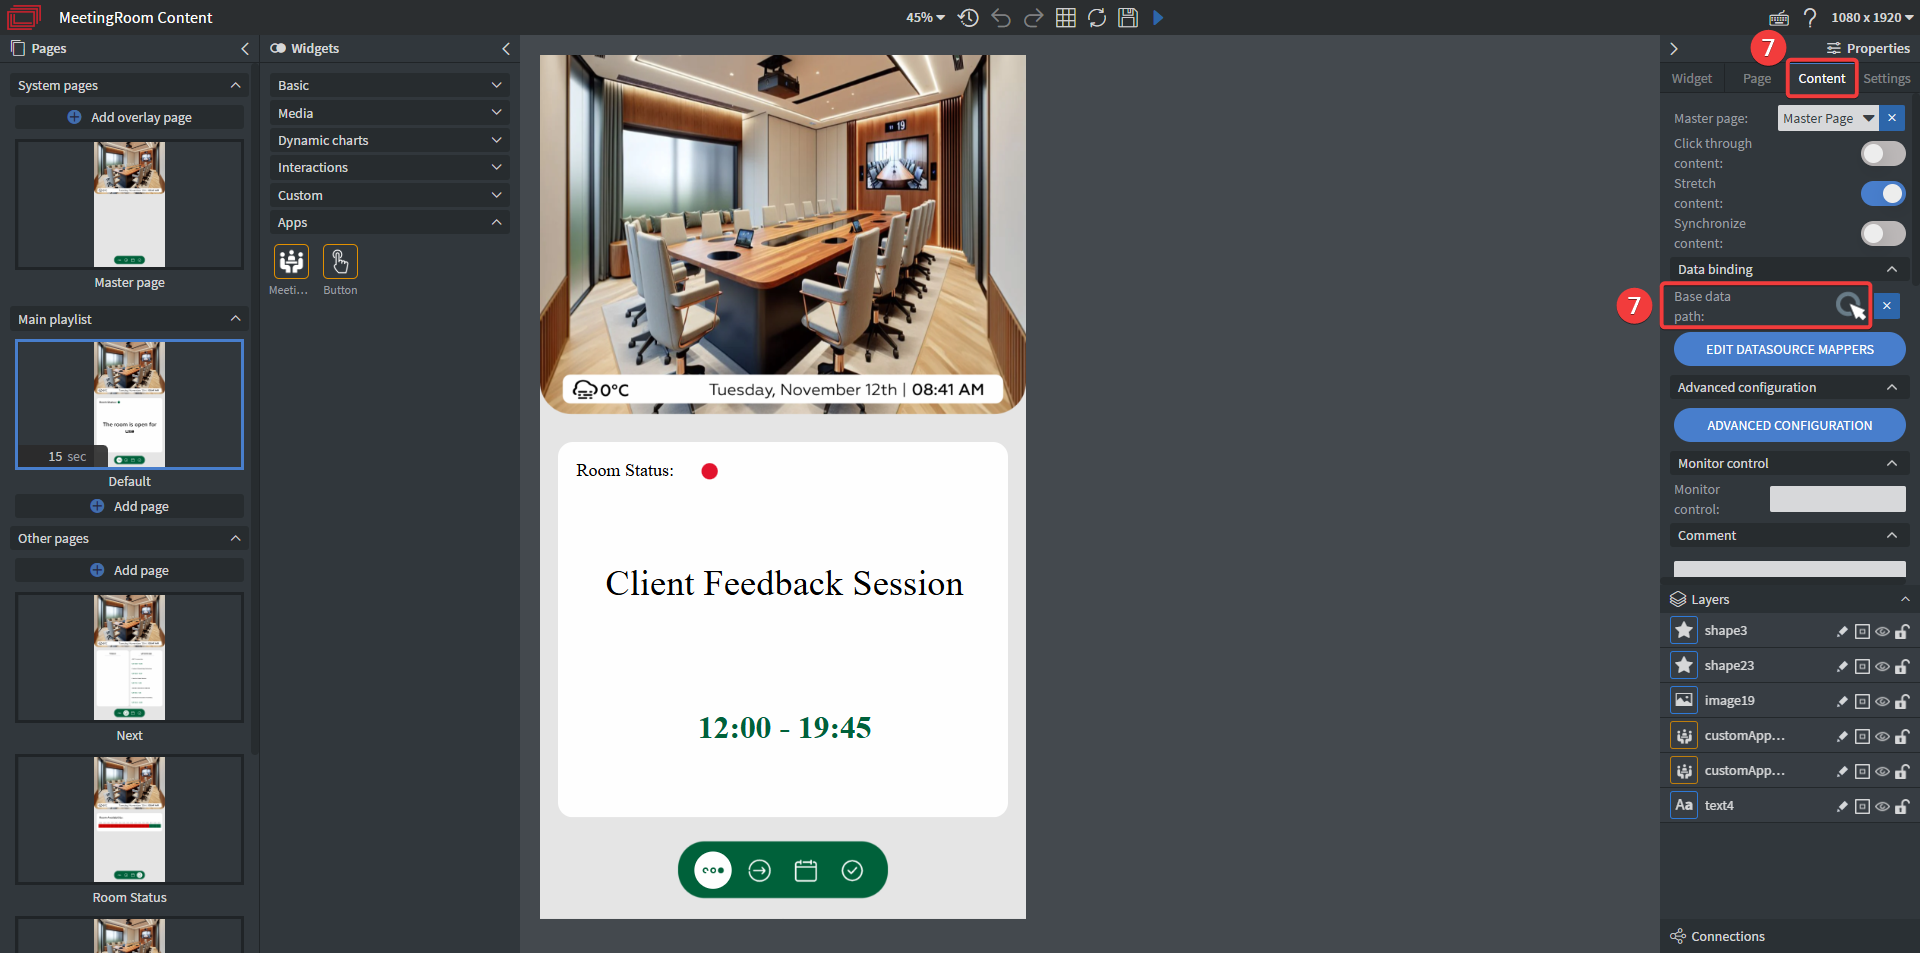
Connecting Your Calendar to Template
- In your content go to the Content tab and click on Base data path
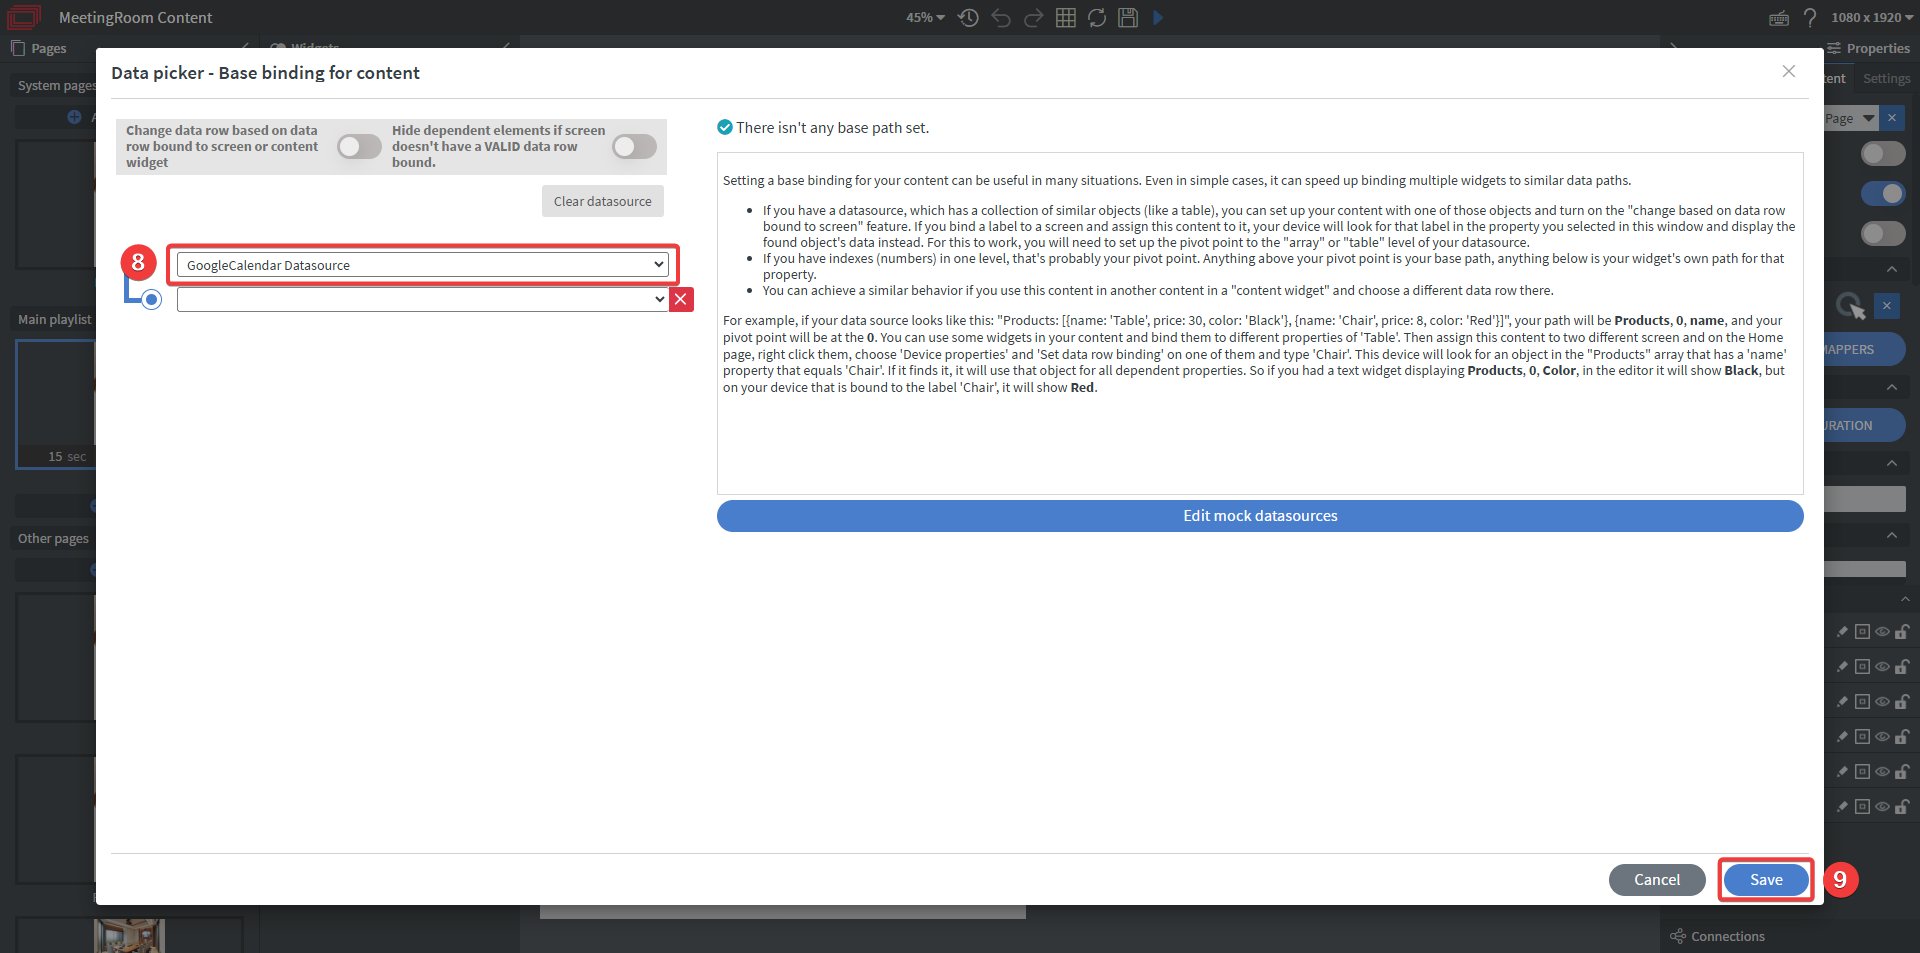
- From the dropdown select the Calendar datasource you've created
- Click Save
Customizing the Content to Your Branding
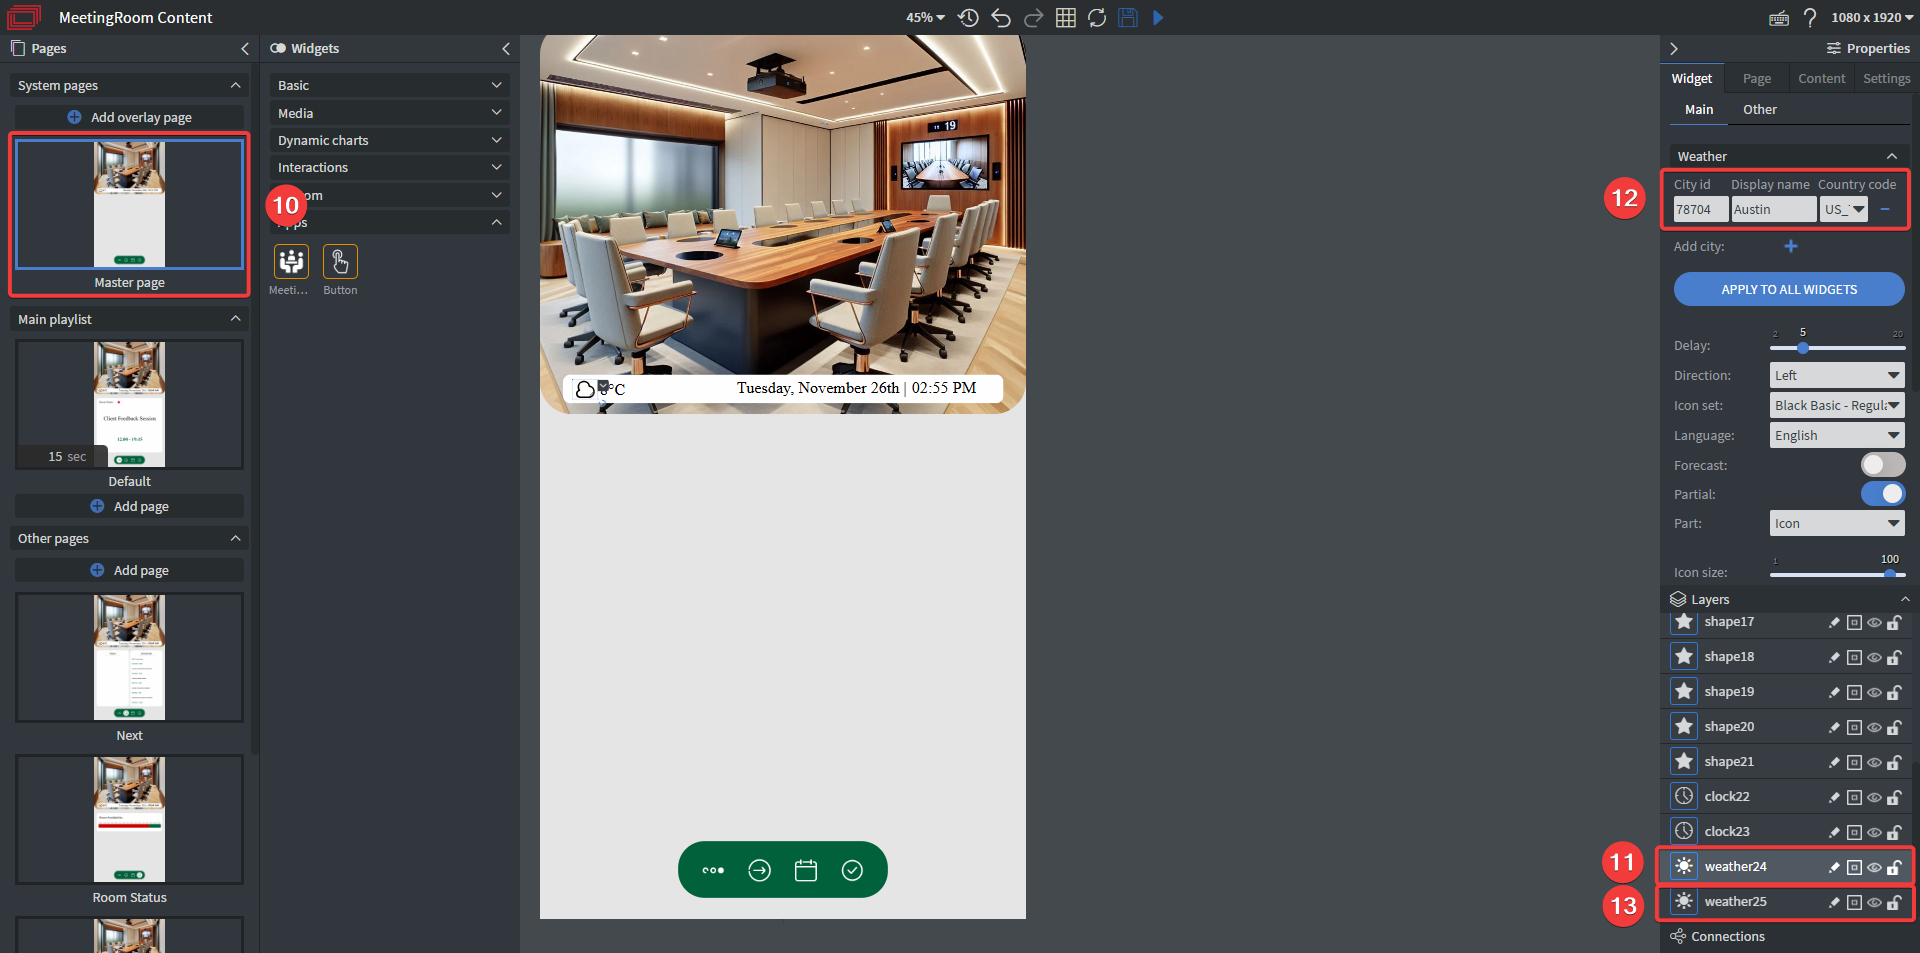
Changing weather widget location:
- On the left side click on the Master page
- In layers, scroll to the bottom and click on weather24
- Change the weather location to your city (Set a zip code, display name and choose your country code)
- Repeat the same process with the other weather widget
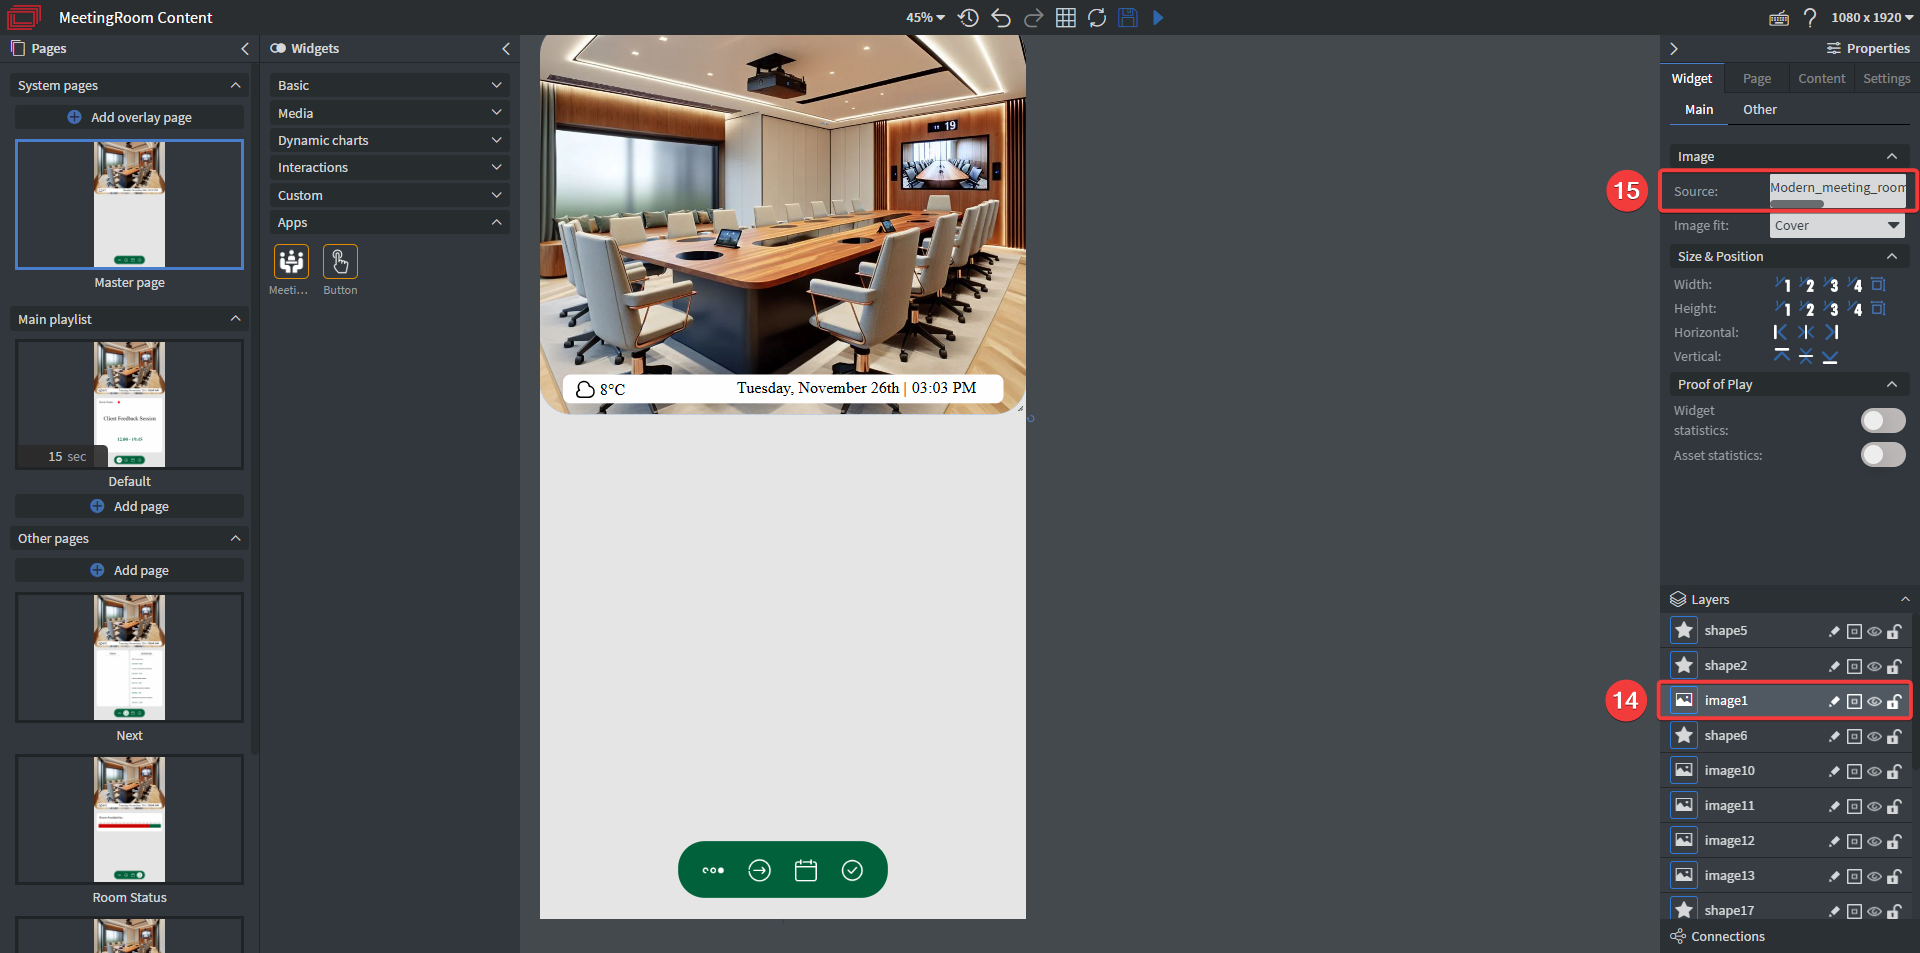
Changing the default image:
- On the Master page in layers scroll to the top and click on image1
- Click on Source and choose an uploaded image from your File Manager to replace the current picture at the top with your own
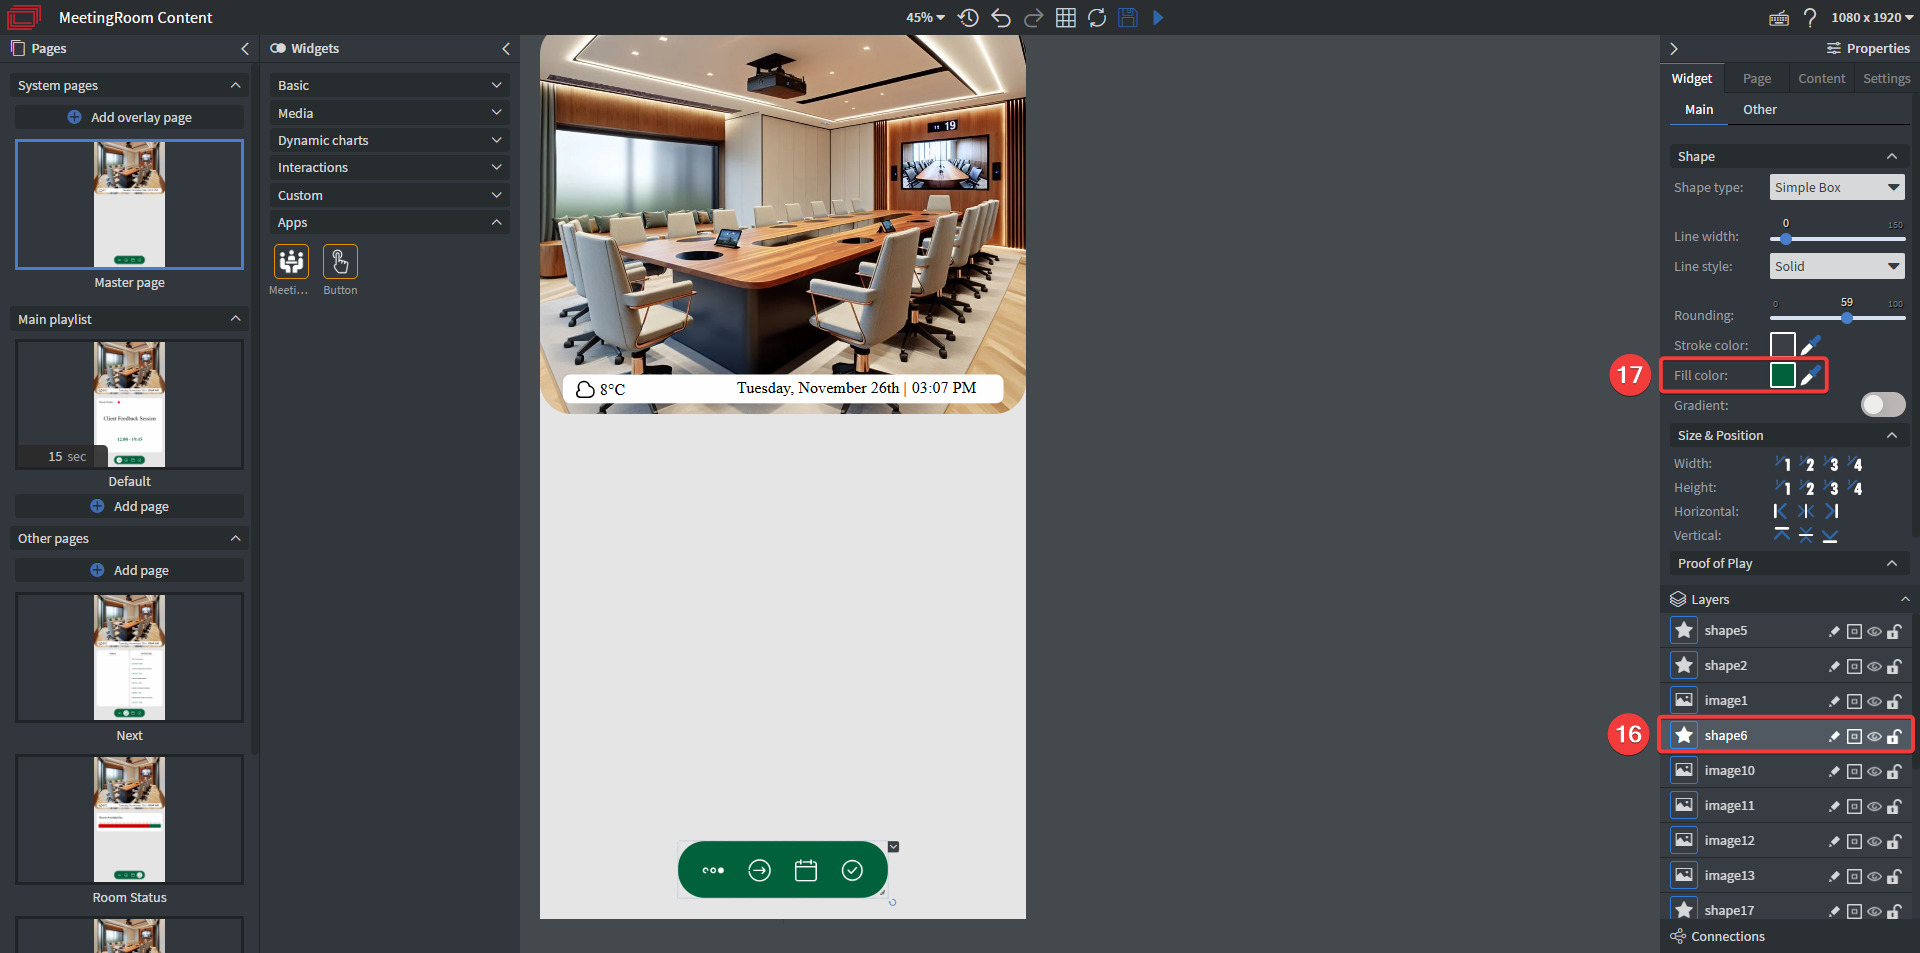
Changing the colors to match your brand's color:
- On the Master page in layers click on shape6
- Under Shape click on Fill color and set it to the desired color
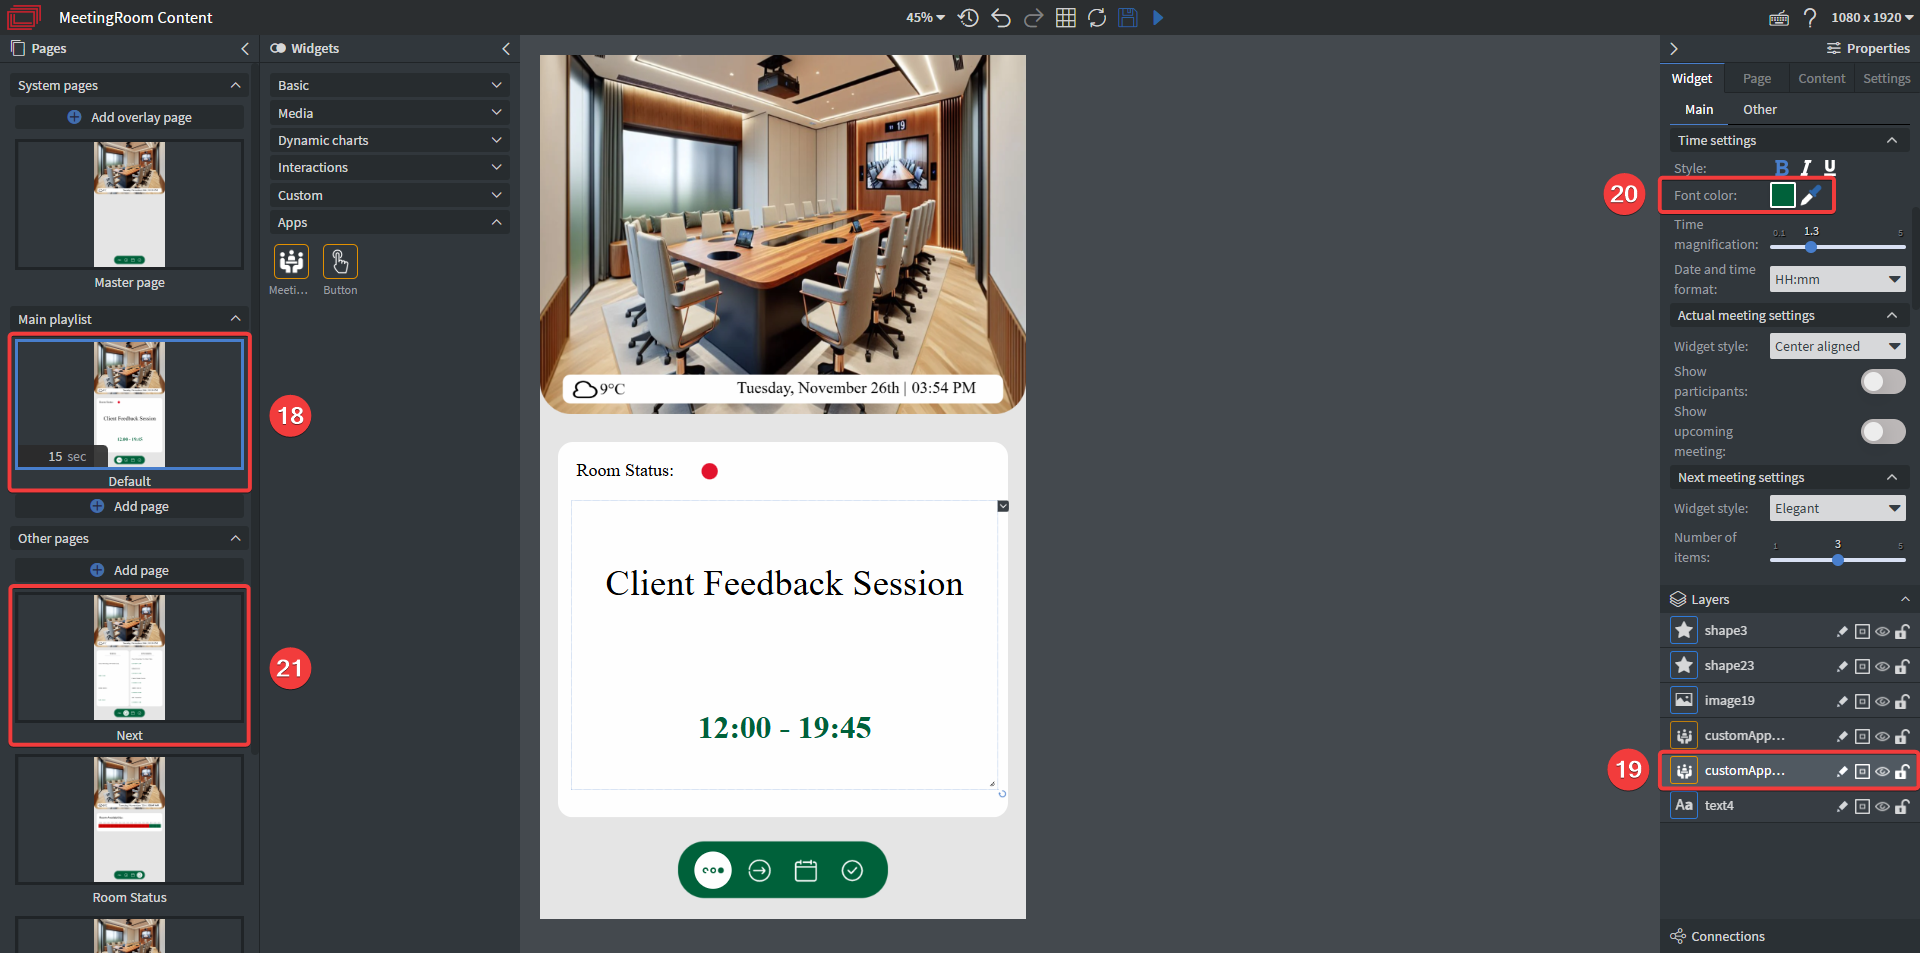
- On the left side click on the Default page
- In layers click on the second MeetingRoom app
- Under Time settings click on Font color and set it to the desired color
- On the Next page repeat the same for both MeetingRoom apps
Tip!
If you have further questions please do not hesitate to contact us at support@wallboard.info. Happy editing!