How to collect data into an internal datasource
This article shows you how to create a content that collects names and email addresses from inputs into an internal datasource.
Table of Contents
Create an internal datasource
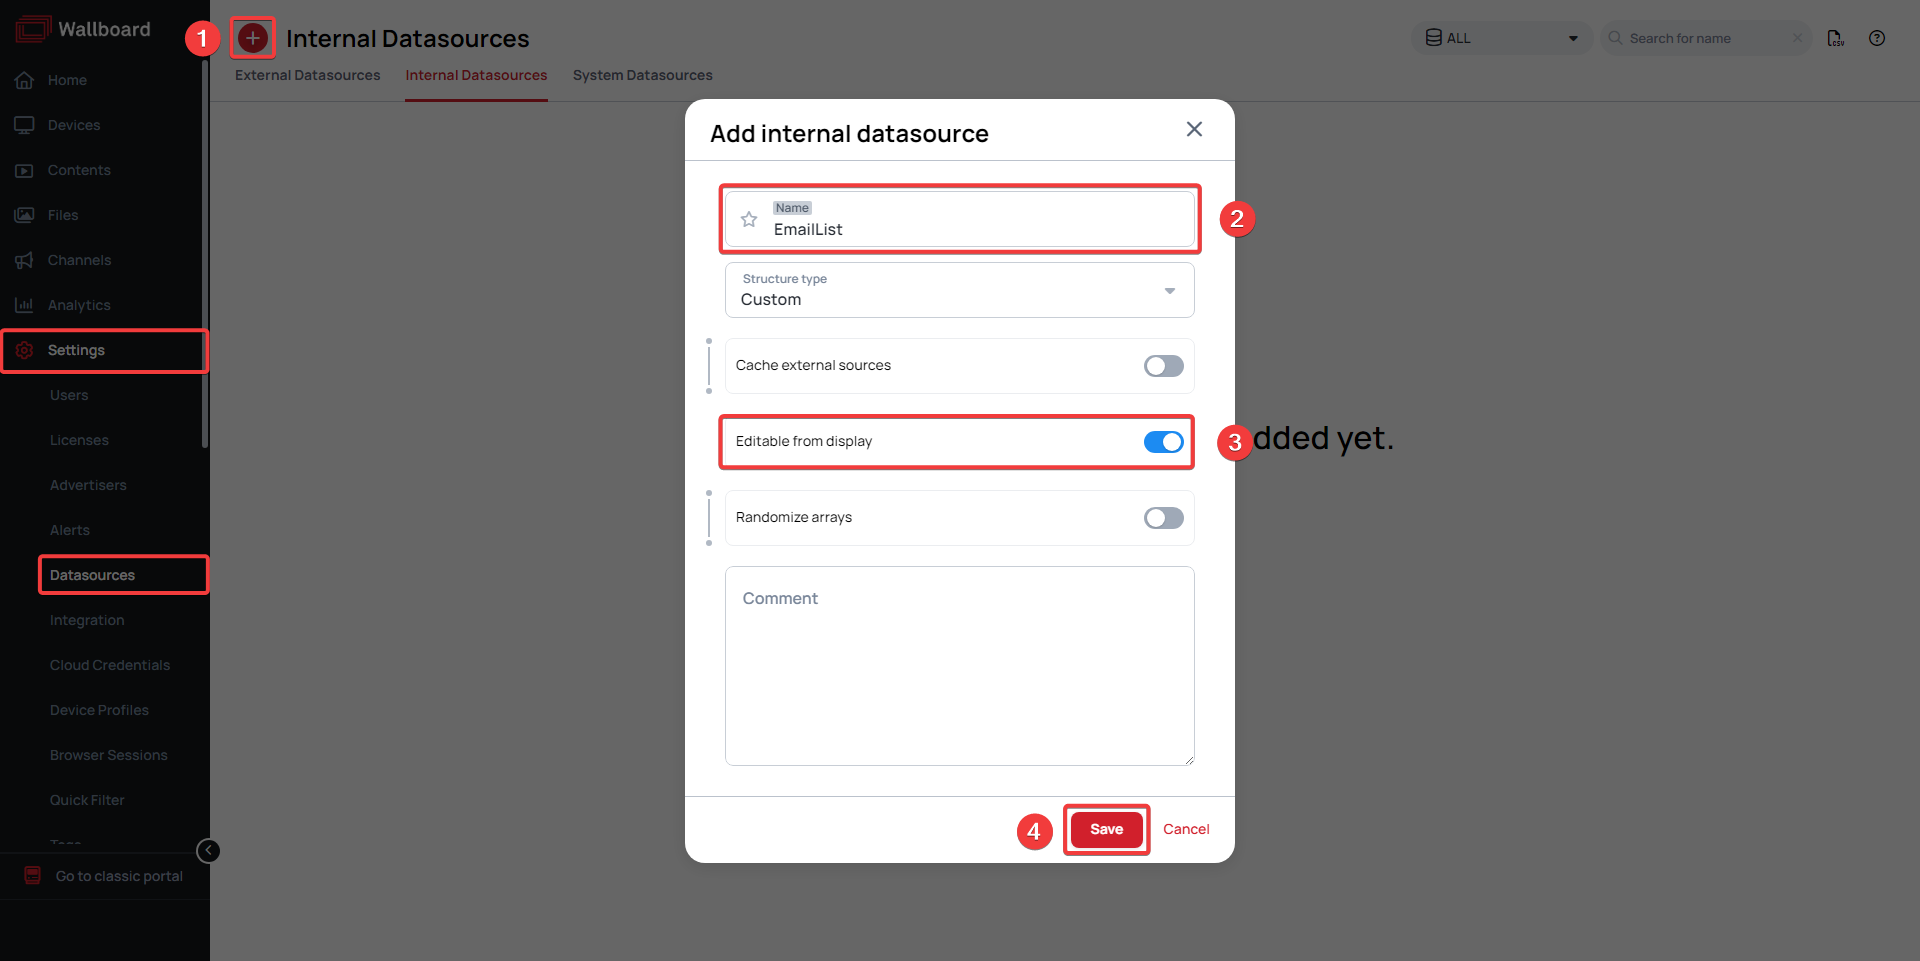
- Go to Settings > Datasources > Internal Datasources and click Add internal datasource
- Name your datasource
- Enable the Editable from display option
- Click Save
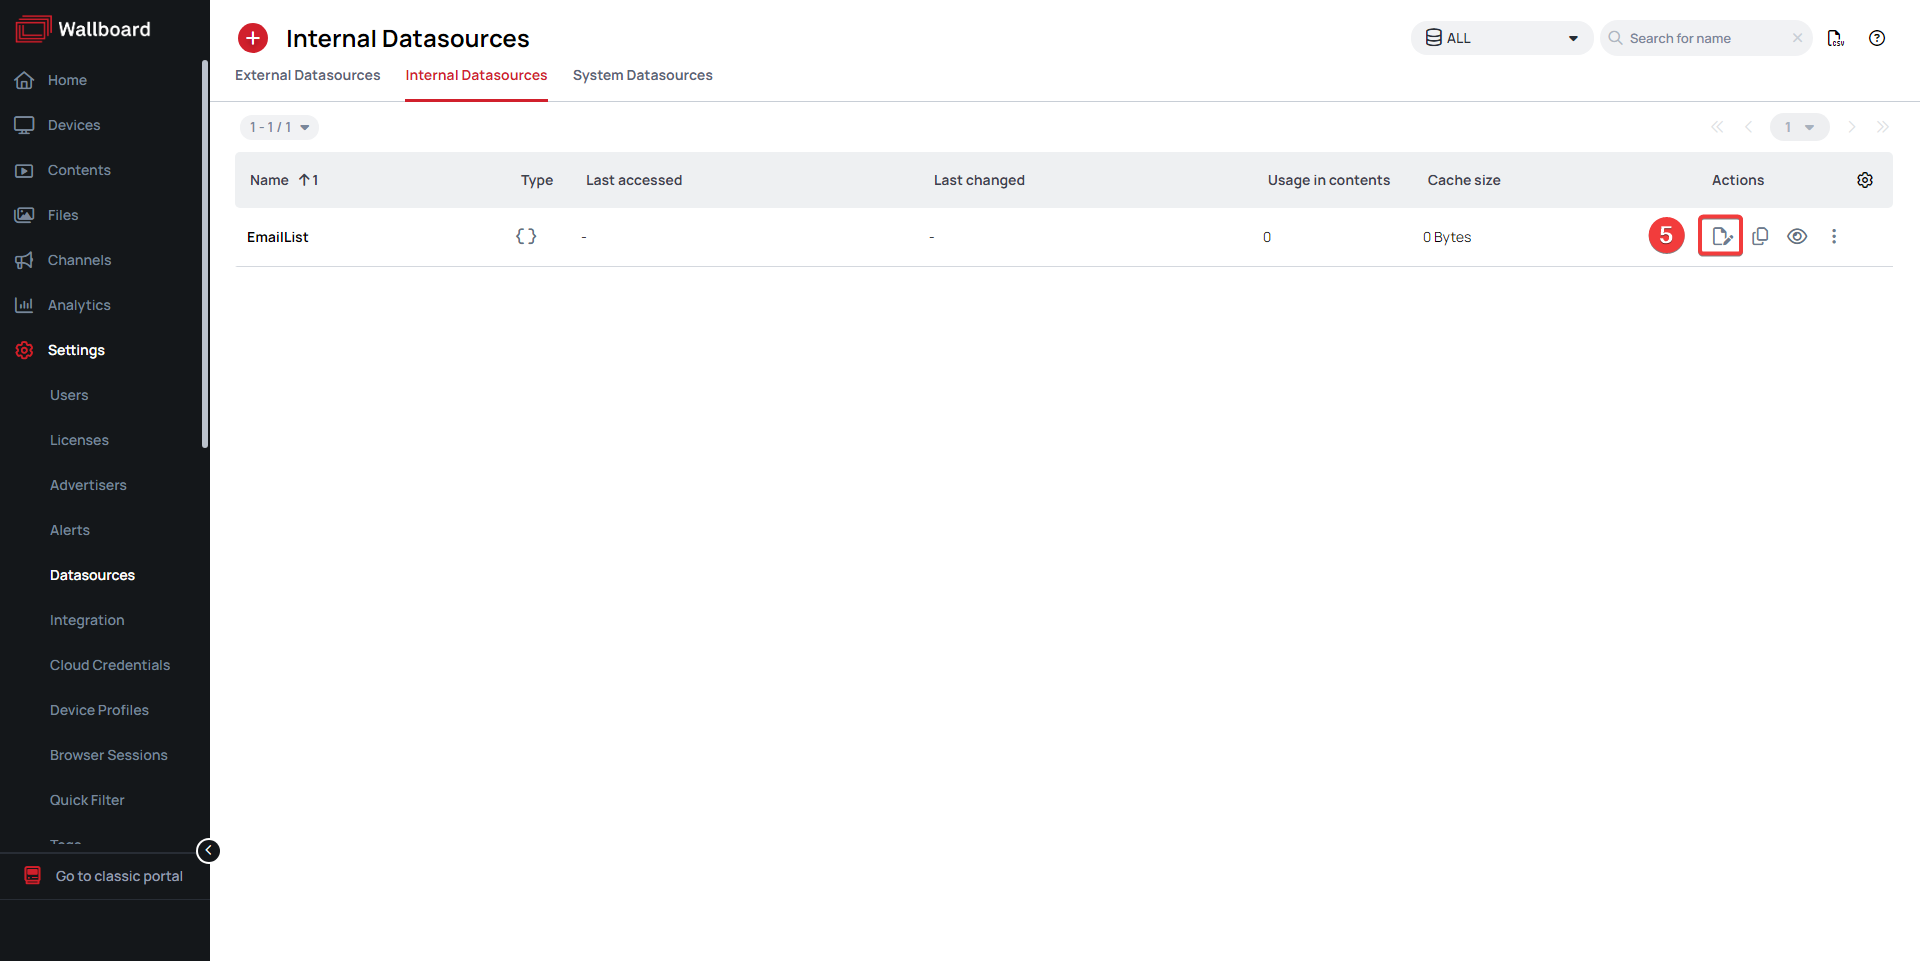
In order to be able to successfully collect data, you will need to add at least one array property to your datasource so you can funnel your data there.
- Click the Editor button in the row of your newly created internal datasource
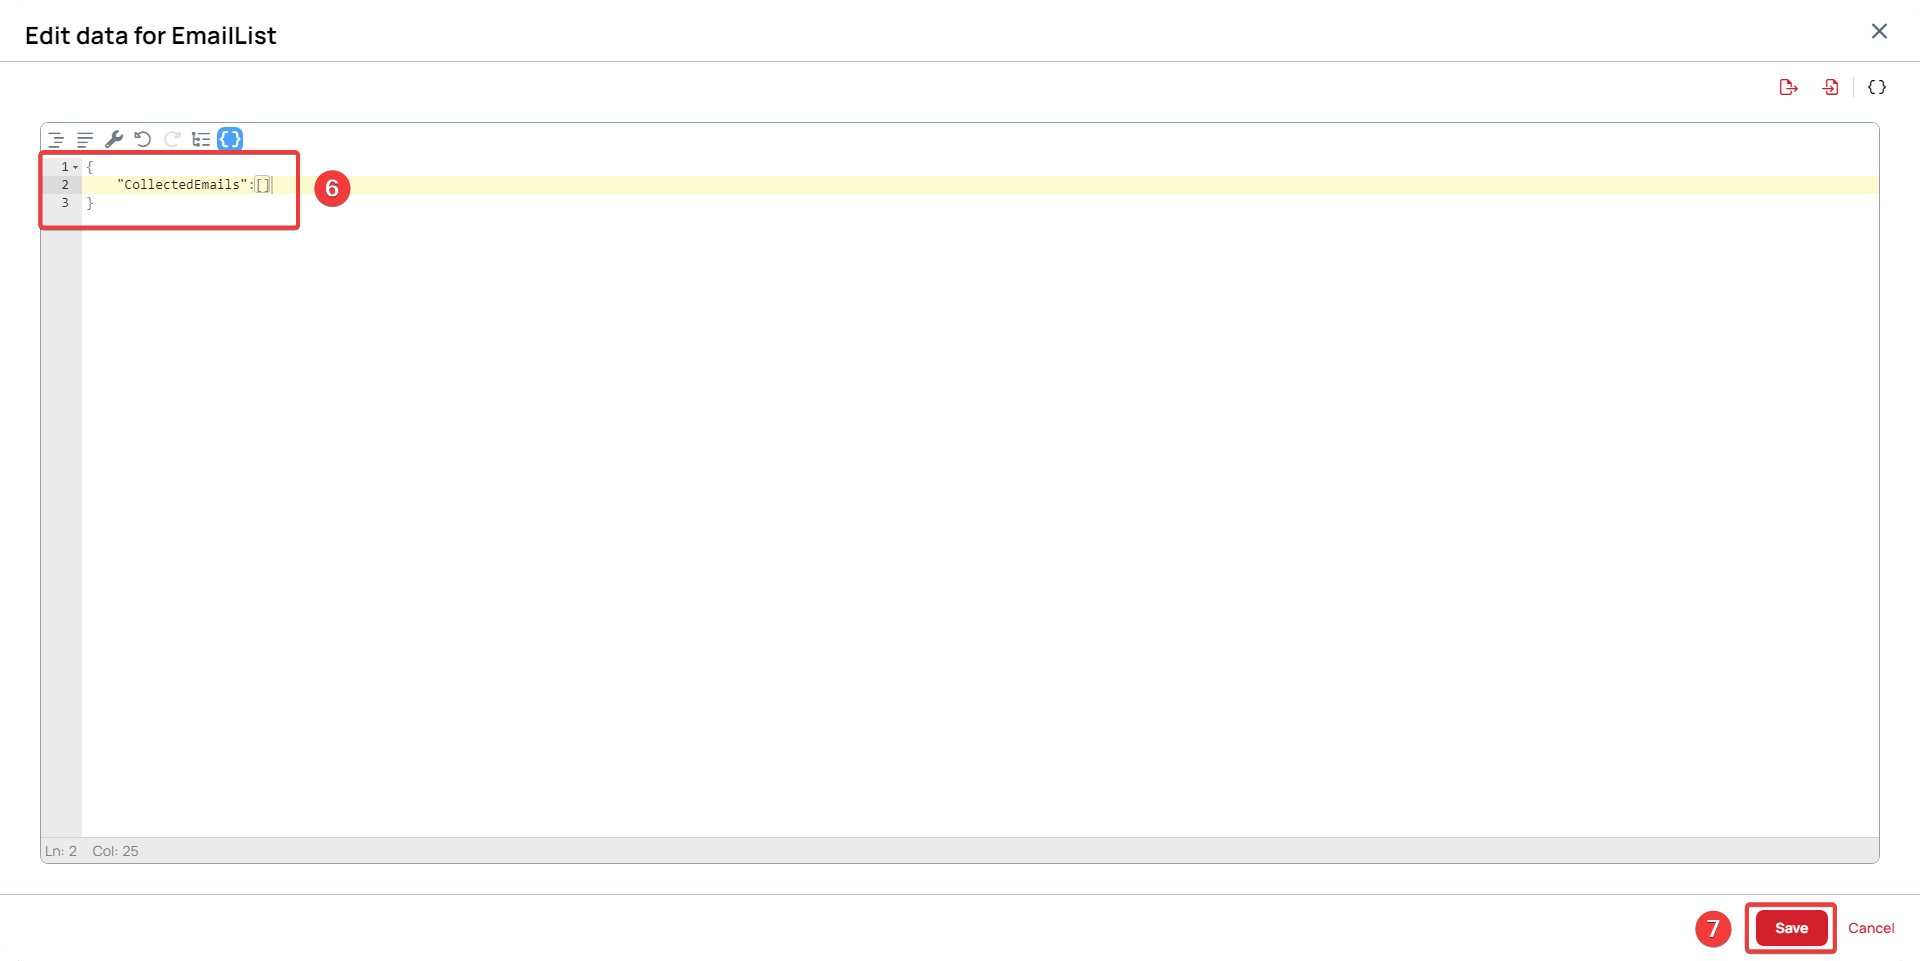
- Input an empty JSON array that your data will be collected into
For example:
{
    "CollectedEmails":[]
}
- Click Save
Create and configure a content with input fields
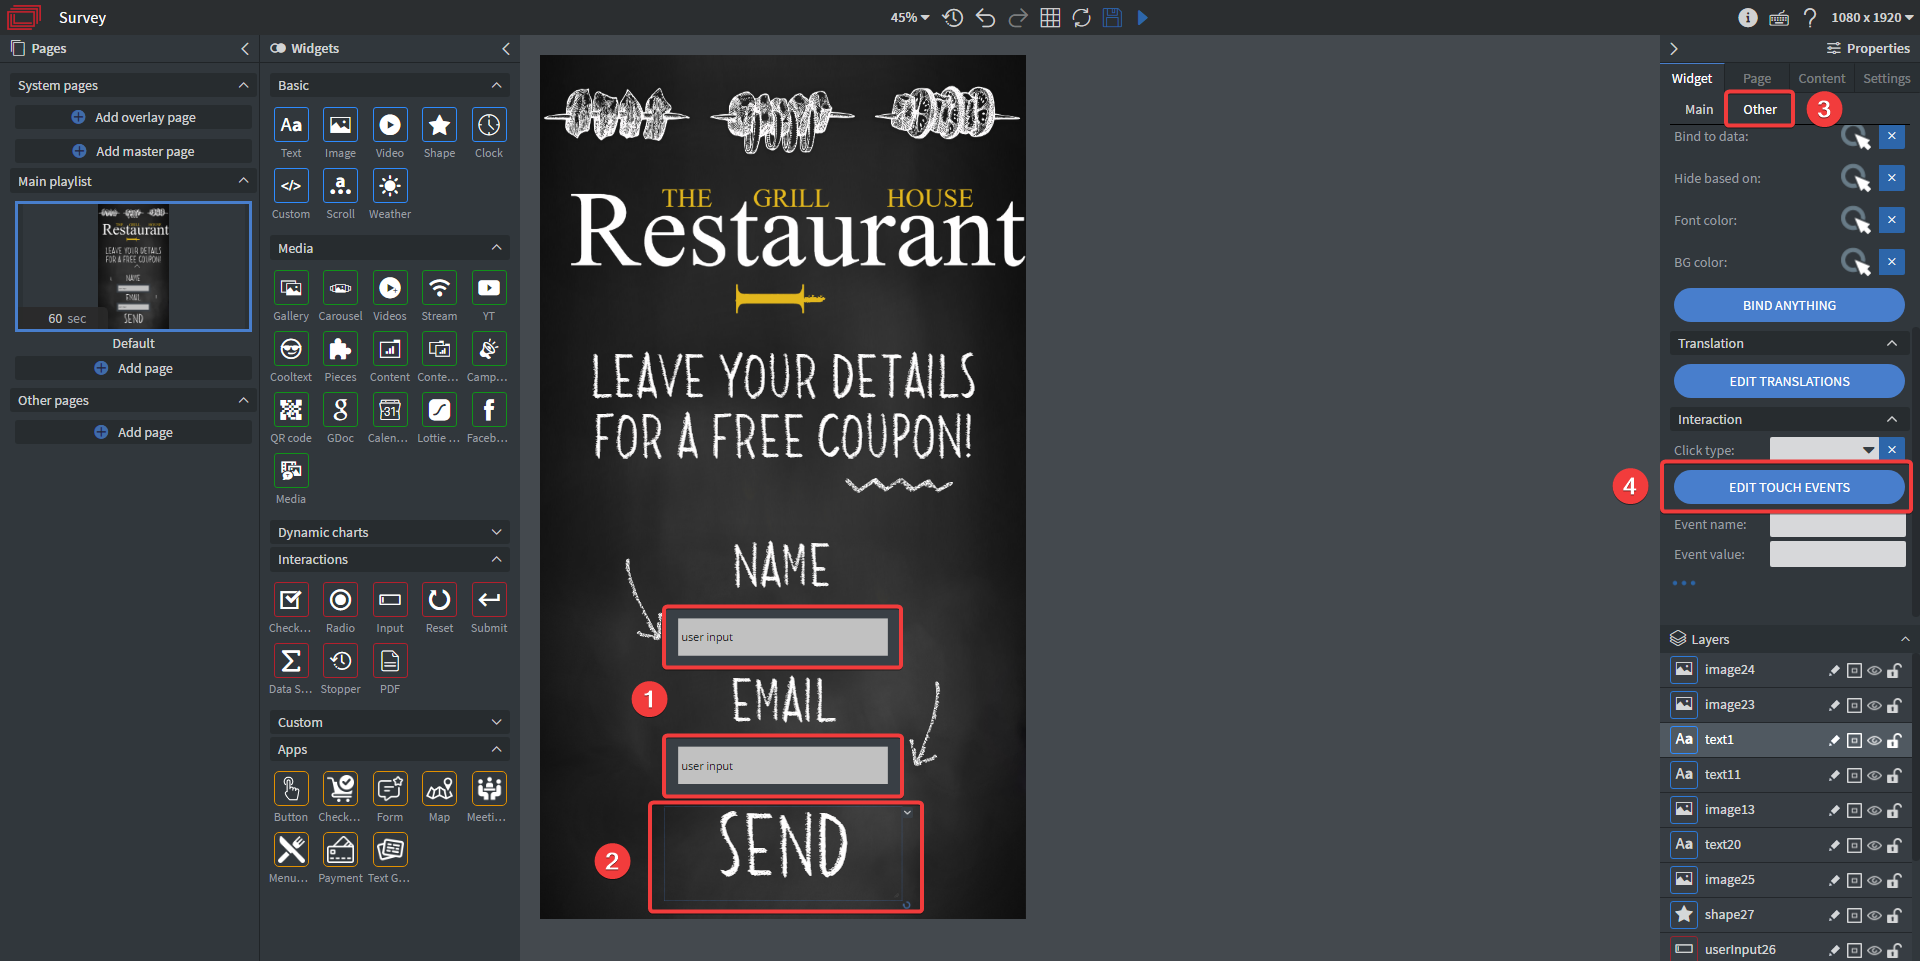
In this example we are collecting names and email addresses so we will need a content that has at least two input fields.
- Place input widgets where users will be able to enter their names and email addresses
- Place a text widget that will be used as our submit button
- Select the text widget you just placed and go to the Other tab
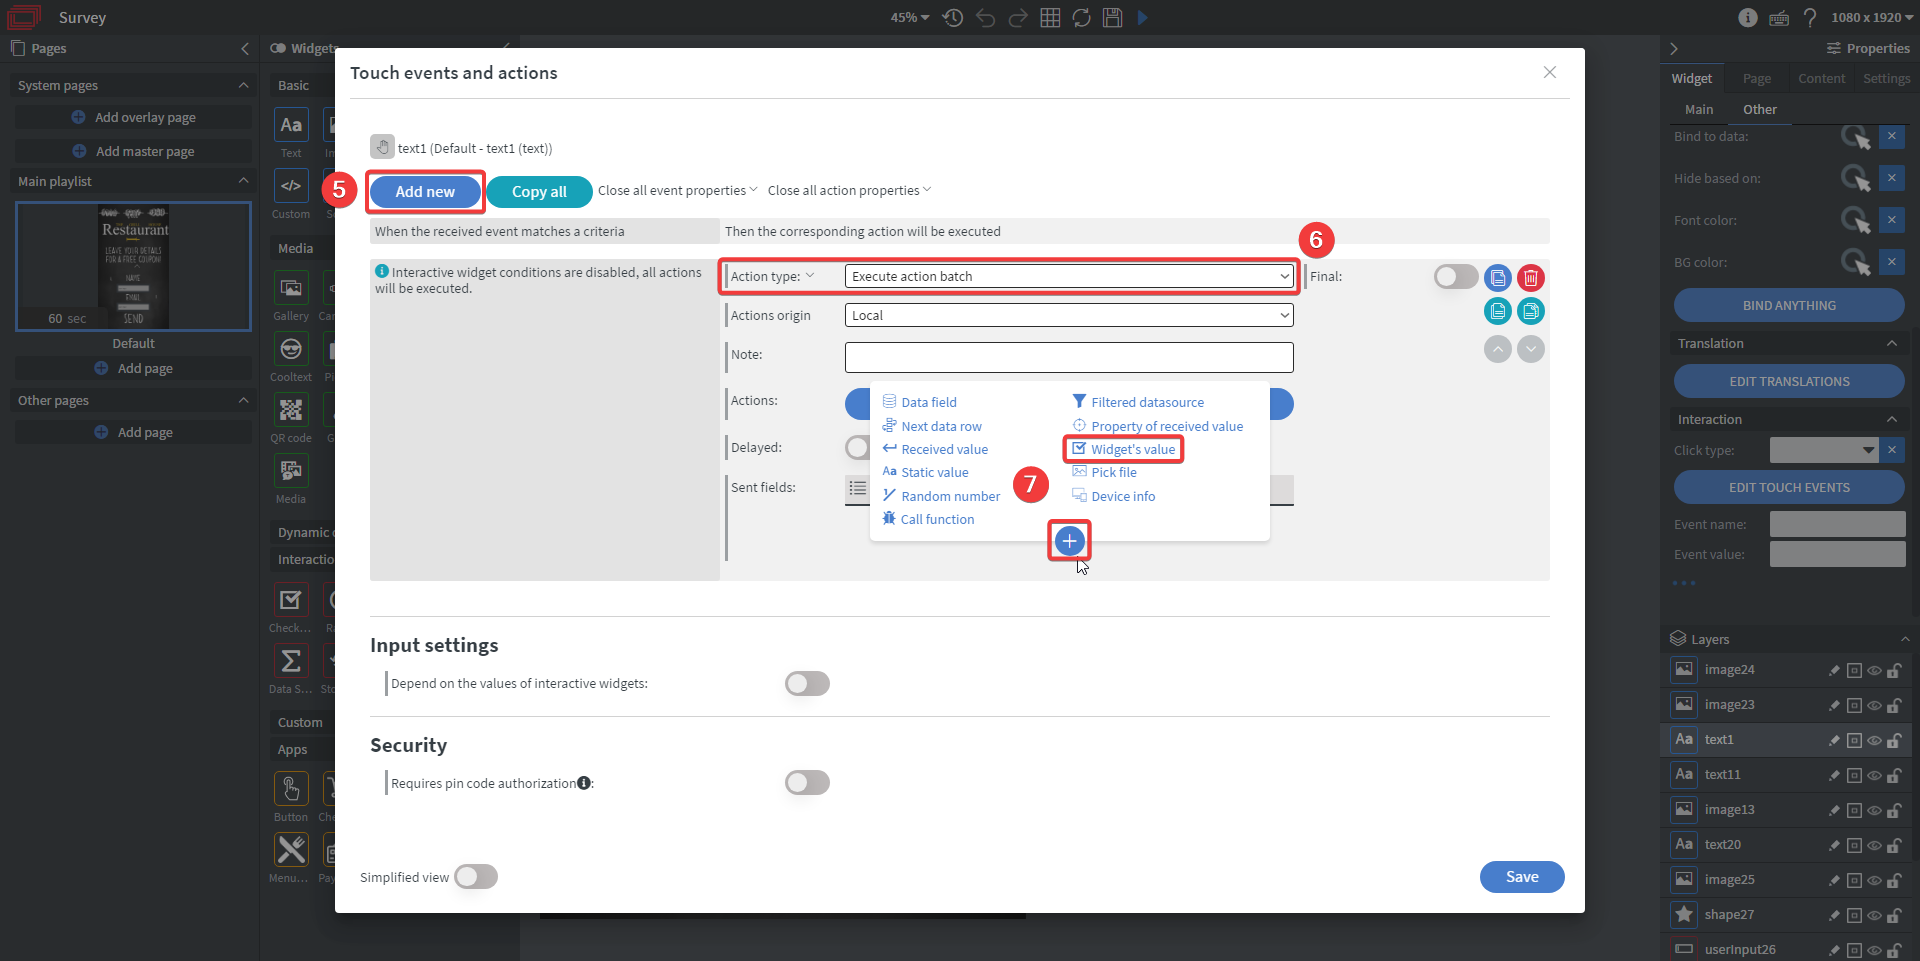
- Scroll to the bottom and click Edit touch events
- Click Add new
- For Action type select Execute action batch
- At Sent fields click the blue Add button and add the Widget's value property twice
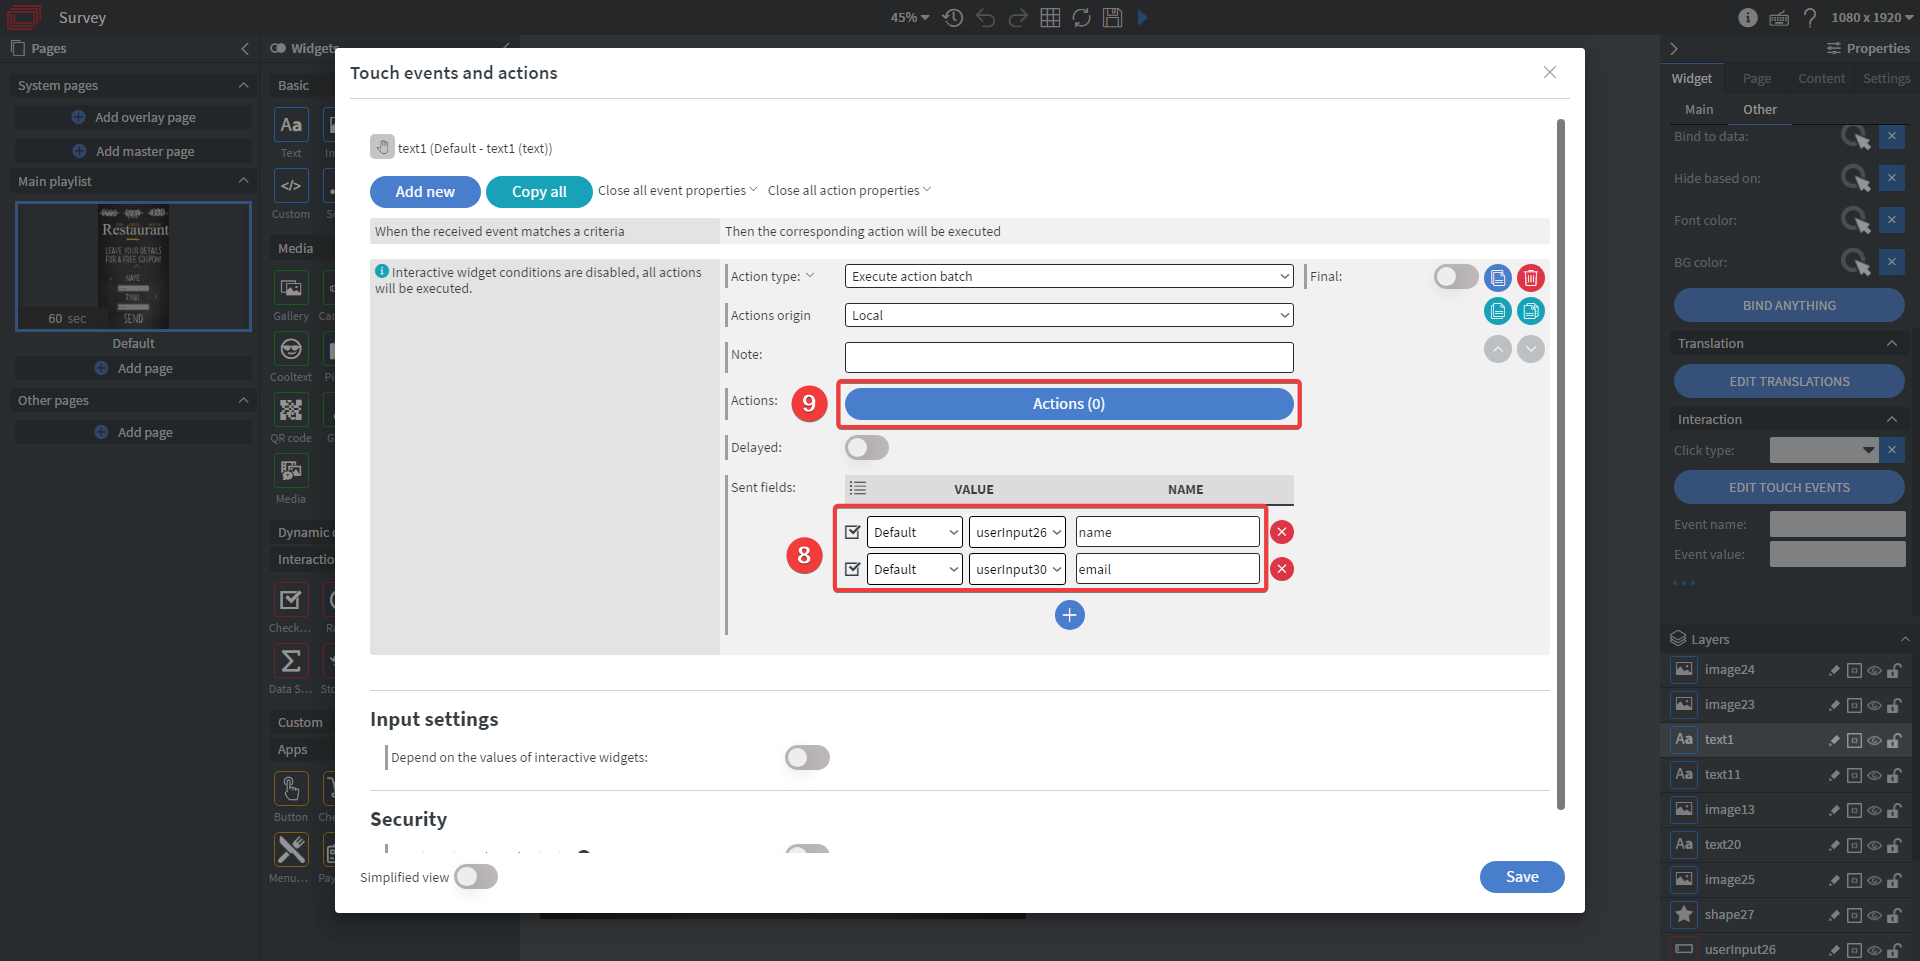
- Select the two input widgets from the dropdowns and name them individually
- Next click on Actions
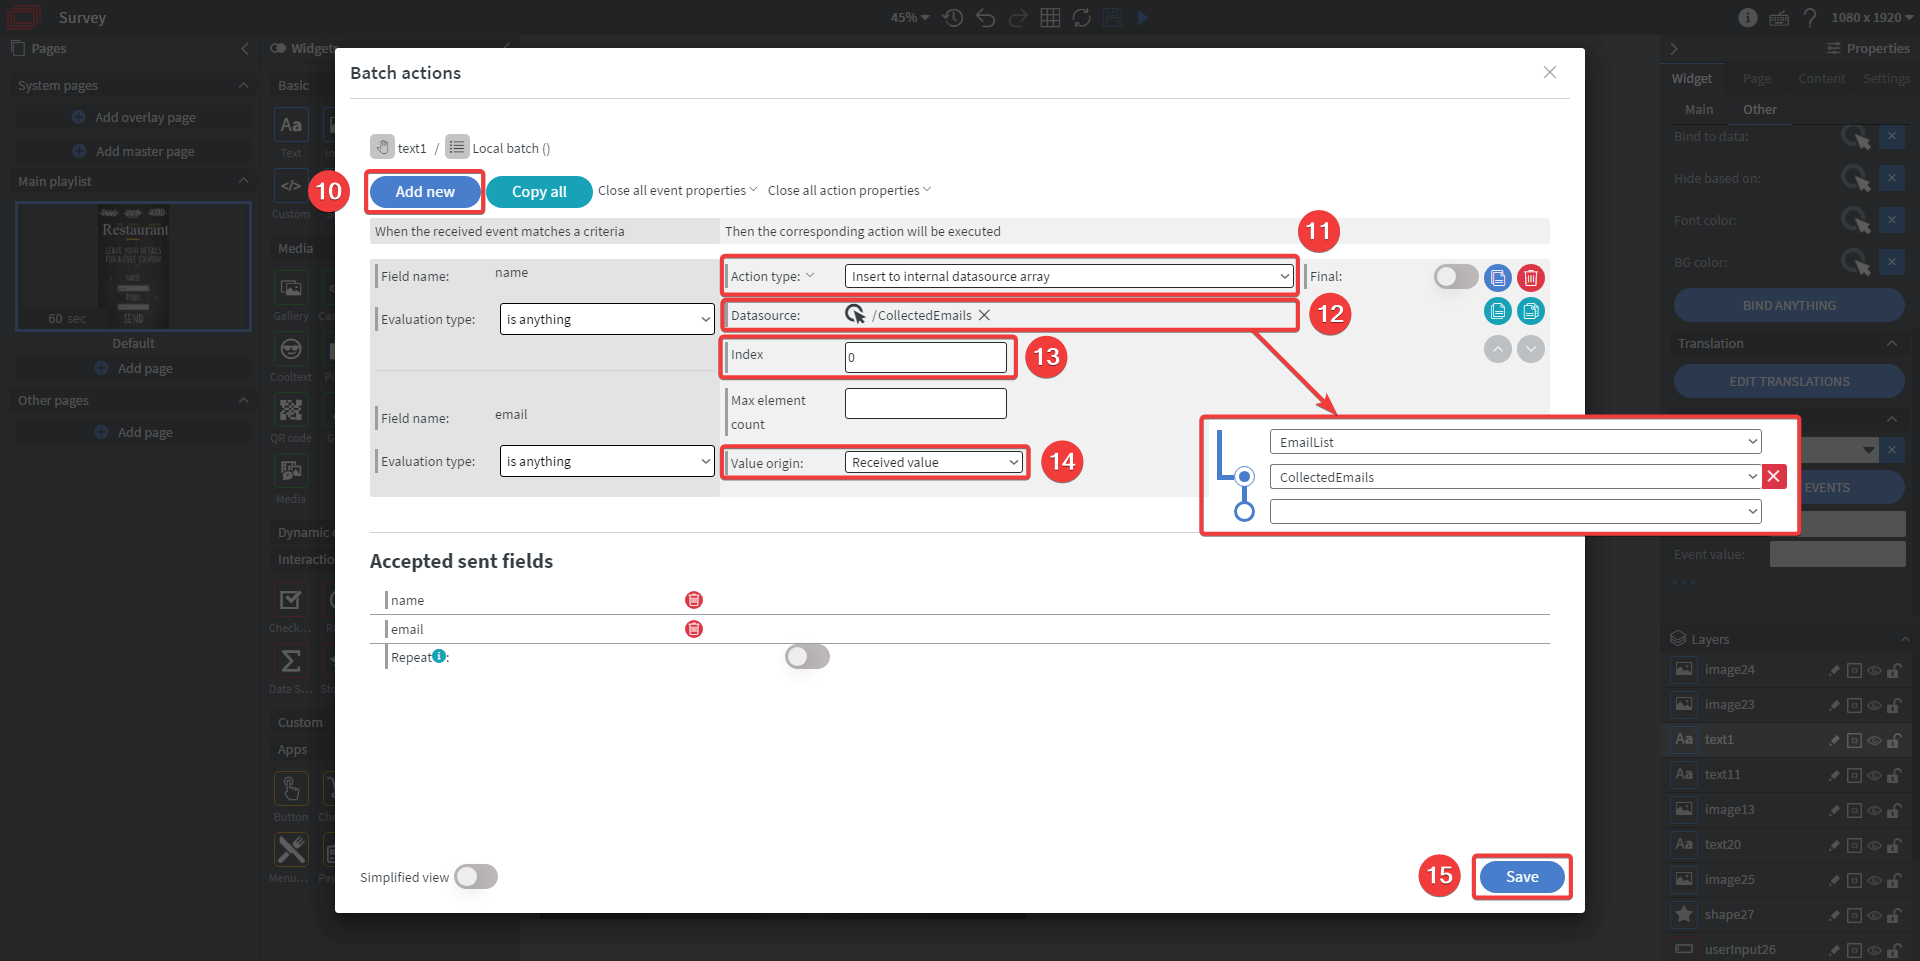
- Click Add new
- For Action type select Insert to internal datasource array
- Click Add binding and select the datasource you created and from the second dropdown the empty array inside the datasource
- Set the Index value to 0 so your data will be always be inserted at the front of your array
- For Value origin select Received value
- Click Save twice
Now once a user fills out the inputs and clicks send their name and email address will be added to your datasource.
How to clear the contents of the inputs after they have been submitted
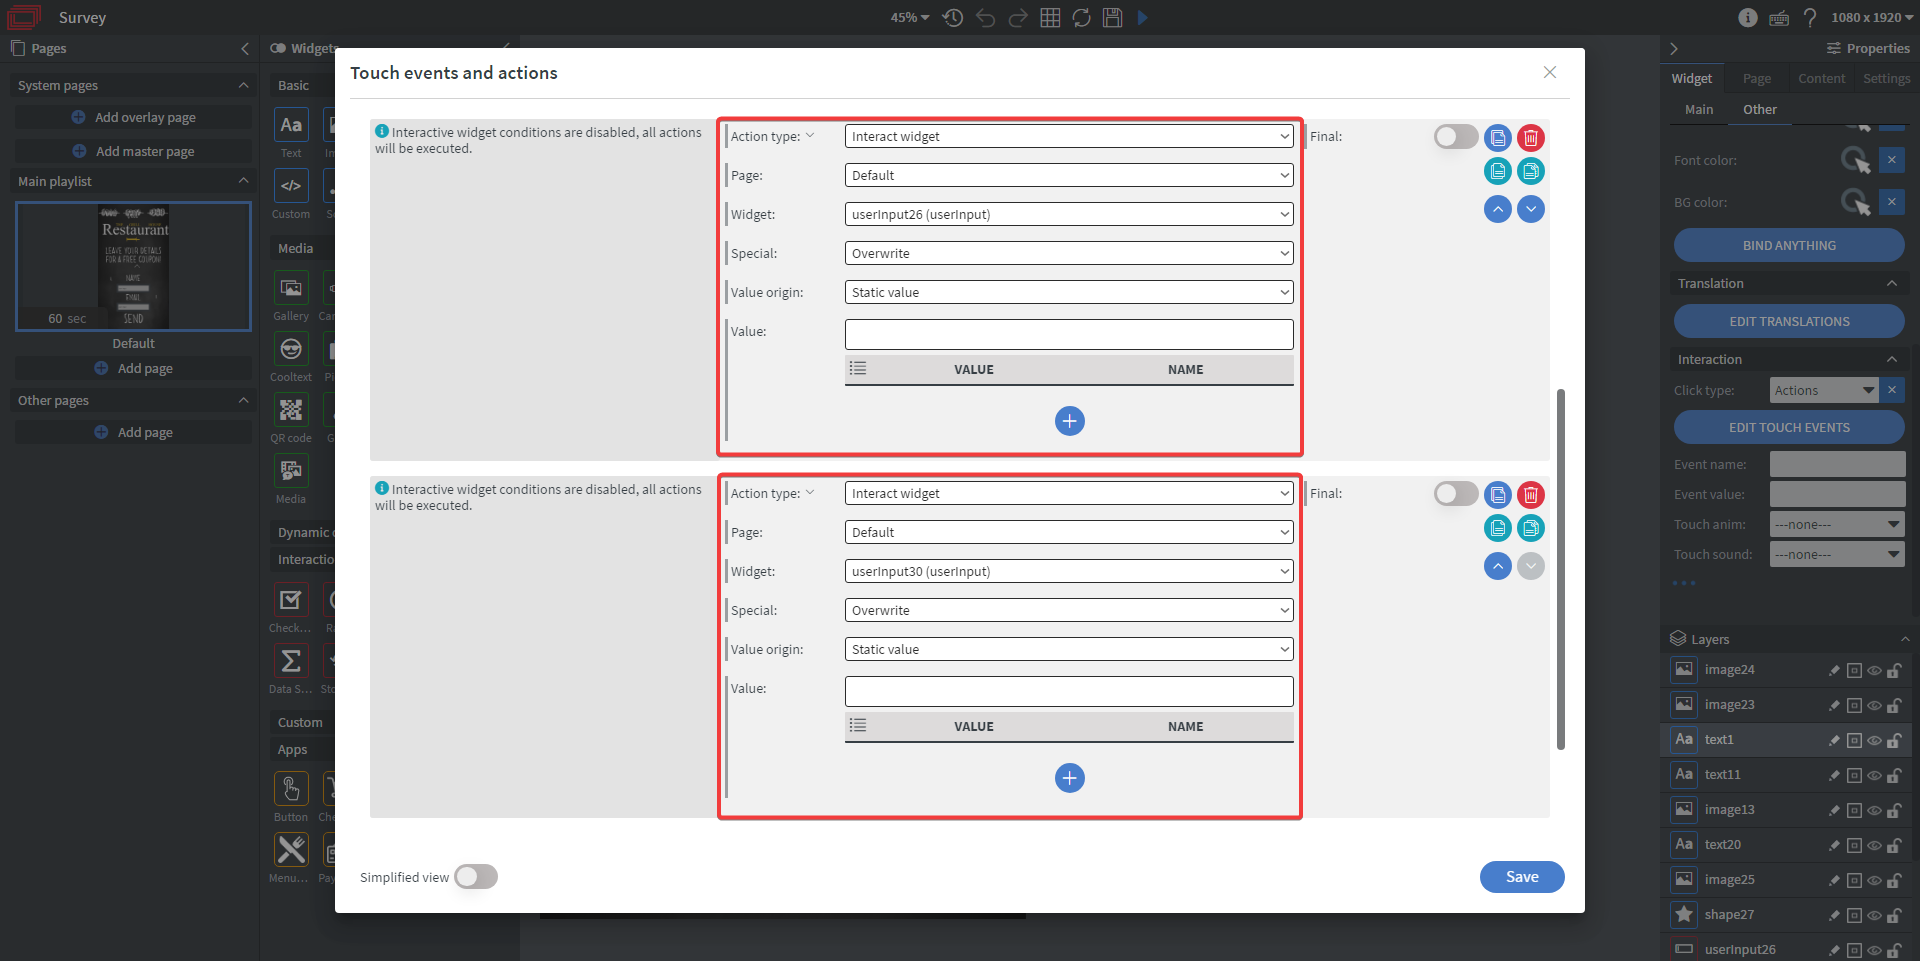
You can optionally add two more touch events to your text widget so once it is clicked, it will clear the contents of the input fields.
All you have to do is add two new actions under your existing action that look like this:
If you have further questions please do not hesitate to contact us at support@wallboard.info. Happy editing!