Webhook actions
- Webhooks are "user-defined HTTP callbacks".
- They are usually triggered by an event like a comment being posted to a blog.
- When that event occurs, the source site makes an HTTP request to the URL configured for the webhook.
- Users can configure them to cause events on one site to invoke behavior on another.
- To separate API calls from each other, you have to create individual API keys for each webhook.
| ⓘ Click here to know more about Webhooks |
|---|
Campaign webhook actions
Campaign webhook actions are helpful when you wish to create an interactive content with campaign widget or simply want to schedule campaign changes for the future.
| ⓘ Click here to know more about Campaigns |
|---|
Change Priority of Campaign
- Create Webhook
- Test Webhook
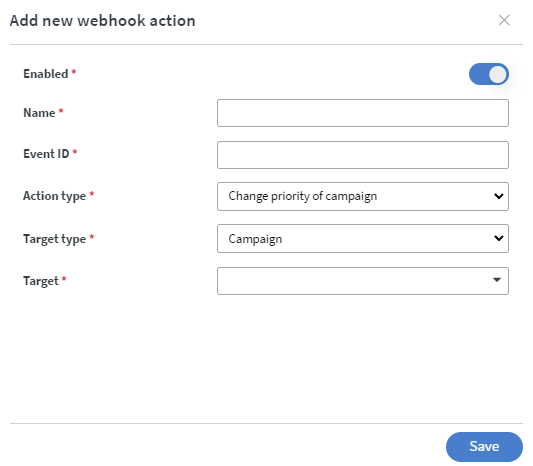
With this webhook you can change the campaign's priority.
-
Event ID:
- You have to use the exact same ID in the content that you sat here to make the webhook work -
Target type:
- You can choose between campaign and campaign tag as target type.
- If you choose campaign, you have to select the affected campaign from the selector.
- If you choose campaign tag, you have to add tags to identify campaigns, and decide whether the campaigns have to contain all tags you defined or it is enough if at least 1 tag matches.
 |
|---|
From here you can test your webhook.
- First, you have to create a Webhook API key
- Then select the generate example link button on the end of the webhook row.
- Select the created API key, then fill the Priority box with the desired Priority number.
Lower number means higher priority!
- To test the Webhook use the Test button. It will proceed the task immediately.
- To use the Webhook in content you have to use the Copy link to clipboard button.
- It will copy the link, what you can use in the Call API action.
Change Saturation of Campaign
- Create Webhook
- Use Webhook
-
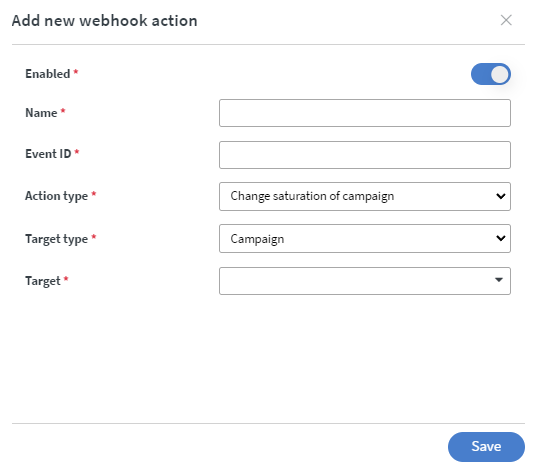
Event ID:
- You have to use the exact same ID in the content that you sat here to make the webhook work -
Target type:
- You can choose between campaign and campaign tag as target type.
- If you choose campaign, you have to select the affected campaign from the selector.
- If you choose campaign tag, you have to add tags to identify campaigns, and decide whether the campaigns have to contain all tags you defined or it is enough if at least 1 tag matches.
 |
|---|
From here you can test your webhook.
- First, you have to create a Webhook API key
- Then select the generate example link button on the end of the webhook row.
- Select the created API key, then fill the Saturation box with the desired Saturation number.
Greater number means higher saturation!
- To test the Webhook use the Test button. It will proceed the task immediately.
- To use the Webhook in content you have to use the Copy link to clipboard button.
- It will copy the link, what you can use in the Call API action.
Disable Campaign
- Create Webhook
- Use Webhook
-
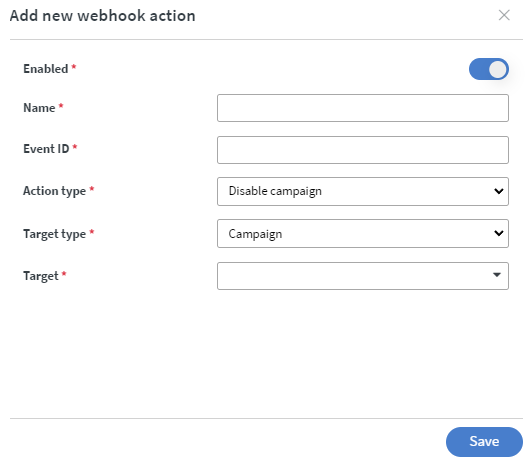
Event ID:
- You have to use the exact same ID in the content that you sat here to make the webhook work -
Target type:
- You can choose between campaign and campaign tag as target type.
- If you choose campaign, you have to select the affected campaign from the selector.
- If you choose campaign tag, you have to add tags to identify campaigns, and decide whether the campaigns have to contain all tags you defined or it is enough if at least 1 tag matches.
 |
|---|
From here you can test your webhook.
- First, you have to create a Webhook API key
- Then select the generate example link button on the end of the webhook row.
- To test the Webhook use the Test button. It will proceed the task immediately.
- To use the Webhook in content you have to use the Copy link to clipboard button.
- It will copy the link, what you can use in the Call API action.
Enable Campaign
- Create Webhook
- Use Webhook
-
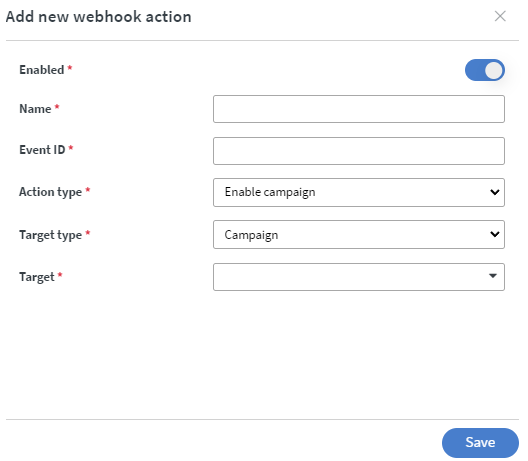
Event ID:
- You have to use the exact same ID in the content that you sat here to make the webhook work -
Target type:
- You can choose between campaign and campaign tag as target type.
- If you choose campaign, you have to select the affected campaign from the selector.
- If you choose campaign tag, you have to add tags to identify campaigns, and decide whether the campaigns have to contain all tags you defined or it is enough if at least 1 tag matches.
 |
|---|
From here you can test your webhook.
- First, you have to create a Webhook API key
- Then select the generate example link button on the end of the webhook row.
- To test the Webhook use the Test button. It will proceed the task immediately.
- To use the Webhook in content you have to use the Copy link to clipboard button.
- It will copy the link, what you can use in the Call API action.
Datasource webhook actions
These datasource webhook actions do the same as Datasource actions but they are easier to use and more suitable when you want to use Action batches in your content.
| ⓘ Click here to know more about Datasource Actions |
|---|
Internal datasource webhook actions
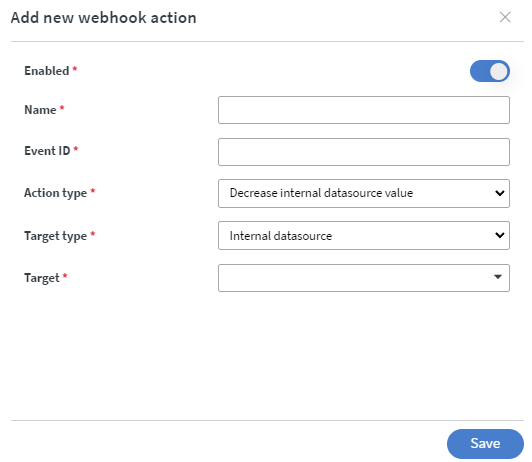
Decrease internal datasource value
- Create Webhook
- Use Webhook
-
Event ID:
- You have to use the exact same ID in the content that you sat here to make the webhook work -
Target type:
- You can choose here only the internal datasource as target type. -
Target:
- As target you can select internal datasource from your datasources.
 |
|---|
From here you can test your webhook.
- First, you have to create a Webhook API key
-
Then select the generate example link button on the end of the webhook
-
In JSON object selector you can define the target value like this:
datasourceName.tableName.rows.0.string.value- It has to be the same when you bind it from datasource:

-
Select the created API key, then fill the Minimum value box with the desired value.
- To test the Webhook use the Test button. It will proceed the task immediately.
- To use the Webhook in content you have to use the Copy link to clipboard button.
- It will copy the link, what you can use in the Call API action.
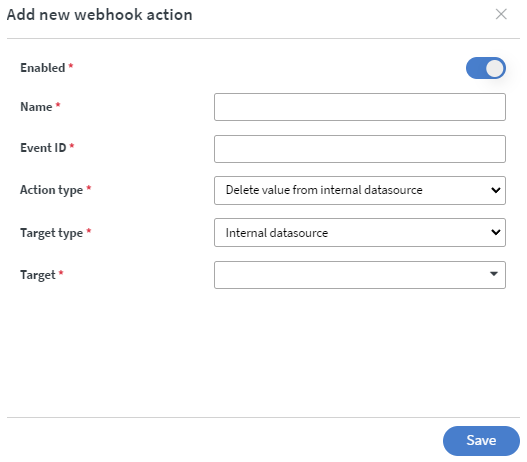
Delete value from internal datasource
- Create Webhook
- Use Webhook
-
Event ID:
- You have to use the exact same ID in the content that you sat here to make the webhook work -
Target type:
- You can choose here only the internal datasource as target type. -
Target:
- As target you can select internal datasource from your datasources.
 |
|---|
From here you can test your webhook.
- First, you have to create a Webhook API key
- Then select the generate example link button on the end of the webhook
- In JSON object selector you can define the target value like this:
datasourceName.tableName.rows.0.string.value - It has to be the same when you bind it from datasource:
 |
|---|
- To test the Webhook use the Test button. It will proceed the task immediately.
- To use the Webhook in content you have to use the Copy link to clipboard button.
- It will copy the link, what you can use in the Call API action.
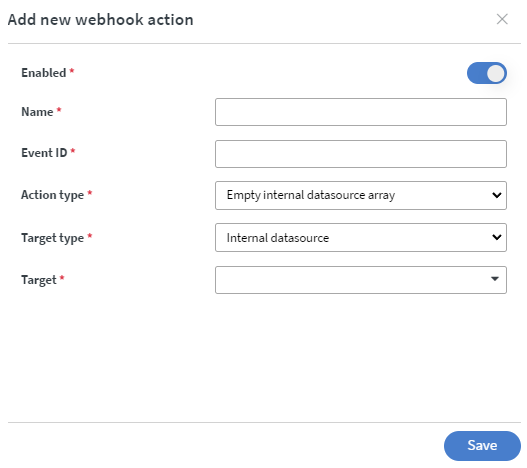
Empty internal datasource array
- Create Webhook
- Use Webhook
-
Event ID:
- You have to use the exact same ID in the content that you sat here to make the webhook work -
Target type:
- You can choose here only the internal datasource as target type. -
Target:
- As target you can select internal datasource from your datasources.
 |
|---|
From here you can test your webhook.
- First, you have to create a Webhook API key
- Then select the generate example link button on the end of the webhook
-
In JSON object selector you can define the target array like this:
datasourceName.tableName.rows.0- It has to be the same when you bind it from datasource:

-
To test the Webhook use the Test button. It will proceed the task immediately.
-
To use the Webhook in content you have to use the Copy link to clipboard button.
-
It will copy the link, what you can use in the Call API action.
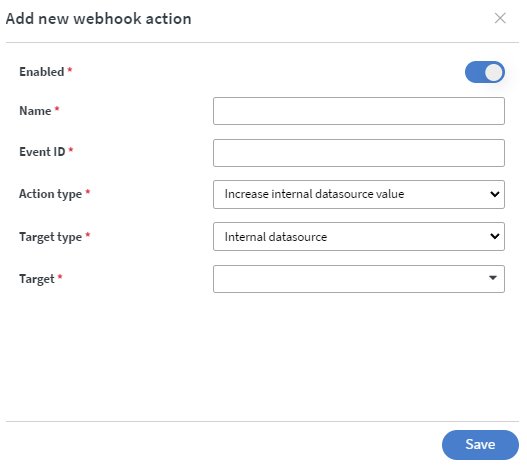
Increase internal datasource value
- Create Webhook
- Use Webhook
-
Event ID:
- You have to use the exact same ID in the content that you sat here to make the webhook work -
Target type:
- You can choose here only the internal datasource as target type. -
Target:
- As target you can select internal datasource from your datasources.
 ) ) |
|---|
From here you can test your webhook.
- First, you have to create a Webhook API key
-
Then select the generate example link button on the end of the webhook
-
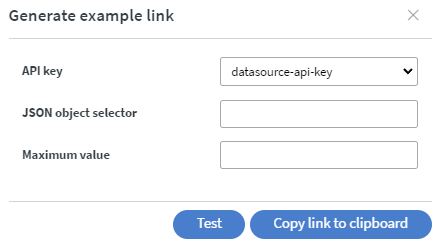
In JSON object selector you can define the target value like this:
datasourceName.tableName.rows.0.string.value- It has to be the same when you bind it from datasource:

-
Select the created API key, then fill the Maximum value box with the desired value.
 |
|---|
- To test the Webhook use the Test button. It will proceed the task immediately.
- To use the Webhook in content you have to use the Copy link to clipboard button.
- It will copy the link, what you can use in the Call API action.
Insert to internal datasource array
- Create Webhook
- Use Webhook
-
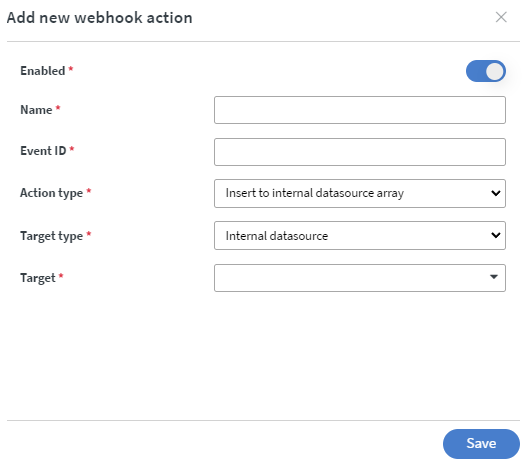
Event ID:
- You have to use the exact same ID in the content that you sat here to make the webhook work -
Target type:
- You can choose here only the internal datasource as target type. -
Target:
- As target you can select internal datasource from your datasources.
 |
|---|
From here you can test your webhook.
- First, you have to create a Webhook API key
-
Then select the generate example link button on the end of the webhook
-
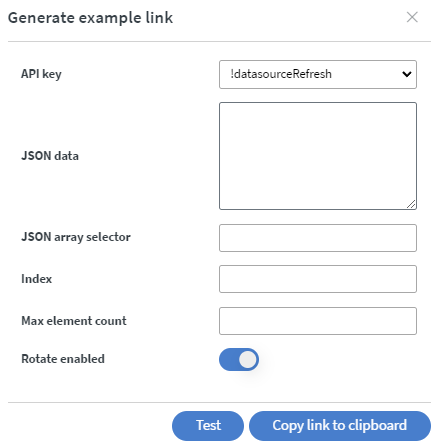
In JSON object selector you can define the target value like this:
datasourceName.tableName.rows.0.string.value- It has to be the same when you bind it from datasource:

-
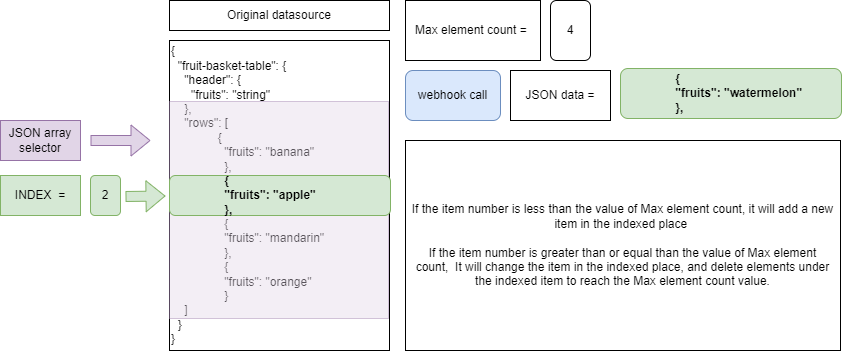
Select the created API key, then fill the Index box with the desired Index(where should the webhook insert the new item).
-
In Max element count you can define how many elements can be inserted to the array.
-
If Rotate enabled, then the items with the given index number will be thrown away from the array to make place to the new items.
 |
|---|
- To test the Webhook use the Test button. It will proceed the task immediately.
- To use the Webhook in content you have to use the Copy link to clipboard button.
- It will copy the link, what you can use in the Call API action.
Merge internal datasource
- Create Webhook
- Use Webhook
-
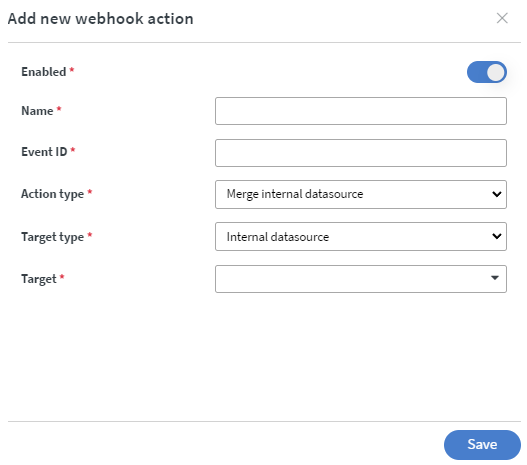
Event ID:
- You have to use the exact same ID in the content that you sat here to make the webhook work -
Target type:
- You can choose here only the internal datasource as target type. -
Target:
- As target you can select internal datasource from your datasources.
 |
|---|
From here you can test your webhook.
- First, you have to create a Webhook API key
- Then select the generate example link button on the end of the webhook
-
Select the created API key, then fill the JSON data box with the desired data.
-
To test the Webhook use the Test button. It will proceed the task immediately.
-
To use the Webhook in content you have to use the Copy link to clipboard button.
-
It will copy the link, what you can use in the Call API action.
Remove from internal datasource array
- Create Webhook
- Use Webhook
-
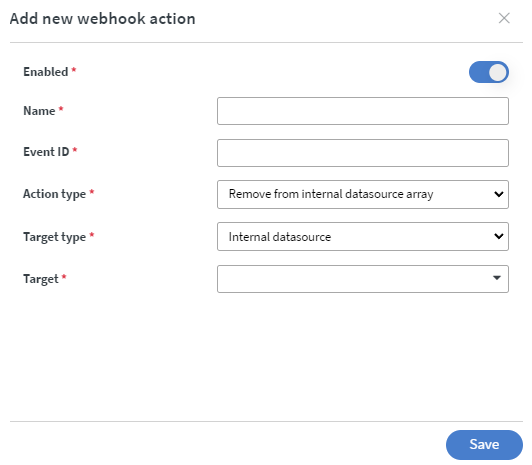
Event ID:
- You have to use the exact same ID in the content that you sat here to make the webhook work -
Target type:
- You can choose here only the internal datasource as target type.
 |
|---|
From here you can test your webhook.
- First, you have to create a Webhook API key
- Then select the generate example link button on the end of the webhook
 |
|---|
-
In the JSON array selector you can define which array you want to delete. You have to define the array like this:
datasourceName.tableName.rows.0- It has to be the same when you bind it from datasource:

-
Select the created API key, then fill the Index box with the desired Index (where should the webhook remove the array you defined in the JSON array selector field).
- To test the Webhook use the Test button. It will proceed the task immediately.
- To use the Webhook in content you have to use the Copy link to clipboard button.
- It will copy the link, what you can use in the Call API action.
Rotate internal datasource array
- Create Webhook
- Use Webhook
-
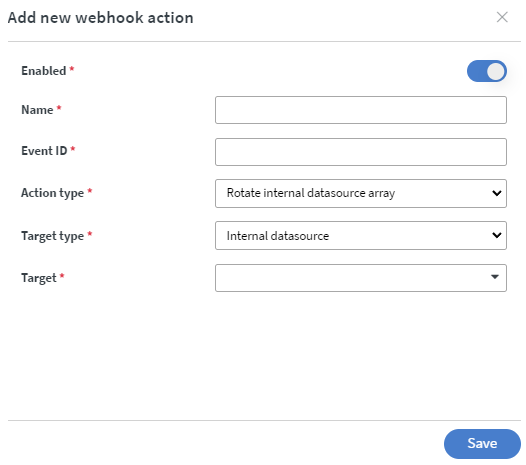
Event ID:
- You have to use the exact same ID in the content that you sat here to make the webhook work -
Target type:
- You can choose here only the internal datasource as target type.
 |
|---|
From here you can test your webhook.
- First, you have to create a Webhook API key
-
Then select the generate example link button on the end of the webhook
-
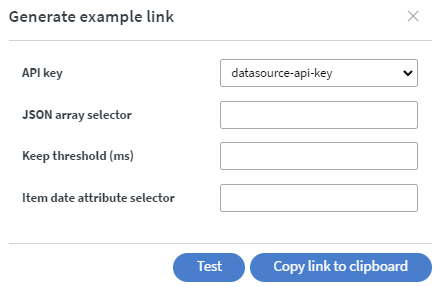
In the JSON array selector you can define which array you want to rotate. You have to define the array like this:
datasourceName.tableName.rows.0 -
It has to be the same when you bind it from datasource:
 |
|---|
- In Keep threshold field you can define the threshold of the rotation. This means if you gave 10000 ms it will add +10 s to the date you selected in Item date attribute selector
- In Item date attribute selector you can add a date to define which items shall be thrown away from the array according to the date of their expiration.
- Select the created API.
 |
|---|
- To test the Webhook use the Test button. It will proceed the task immediately.
- To use the Webhook in content you have to use the Copy link to clipboard button.
- It will copy the link, what you can use in the Call API action.
Set internal datasource
- Create Webhook
- Use Webhook
-
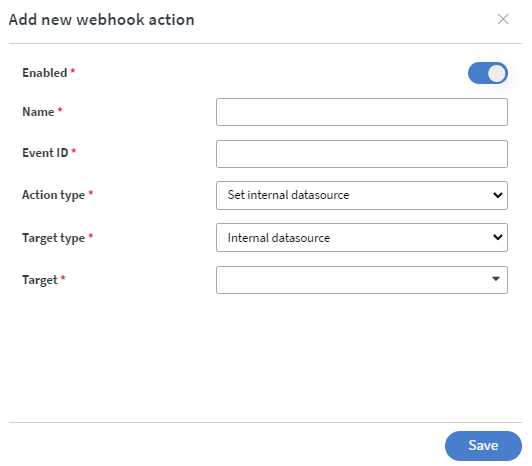
Event ID:
- You have to use the exact same ID in the content that you sat here to make the webhook work -
Target type:
- You can choose here only the internal datasource as target type.
 |
|---|
From here you can test your webhook.
- First, you have to create a Webhook API key
-
Then select the generate example link button on the end of the webhook
-
In the JSON data you can set the new datasource items.
-
Select the created API key.
- To test the Webhook use the Test button. It will proceed the task immediately.
- To use the Webhook in content you have to use the Copy link to clipboard button.
- It will copy the link, what you can use in the Call API action.
External datasource webhook actions
Refresh datasource
- Create Webhook
- Use Webhook
-
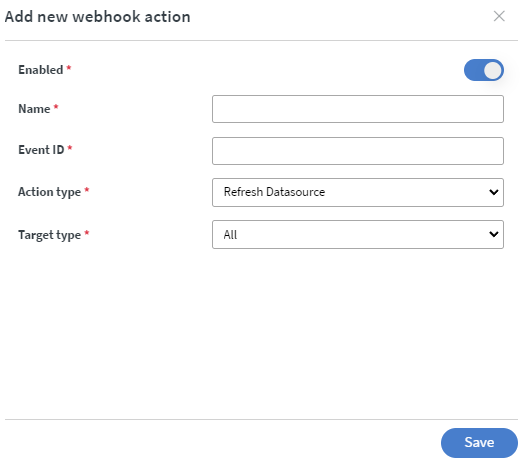
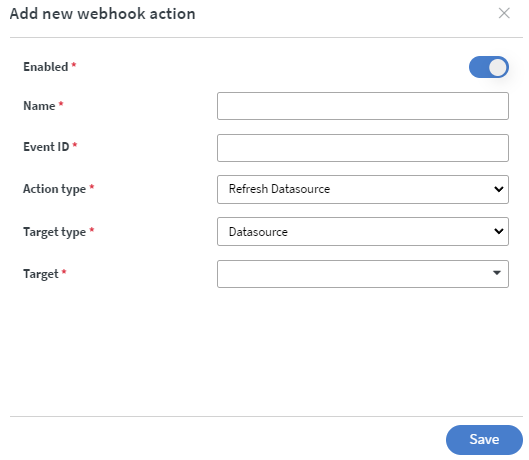
Event ID:
- You have to use the exact same ID in the content that you sat here to make the webhook work -
Target type:
- You can decide that the webhook should be applied to all external datasources or only 1 external datasource.- It cannot be applied to internal or system datasources.
 |  |
|---|
From here you can test your webhook.
- First, you have to create a Webhook API key
- Then select the generate example link button on the end of the webhook
 |
|---|
- Select the created API key.
- To test the Webhook use the Test button. It will proceed the task immediately.
- To use the Webhook in content you have to use the Copy link to clipboard button.
- It will copy the link, what you can use in the Call API action.
Device webhook actions
Assign content
- Create Webhook
- Use Webhook
-
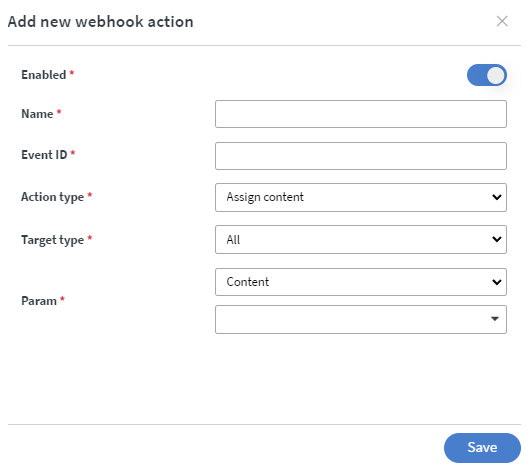
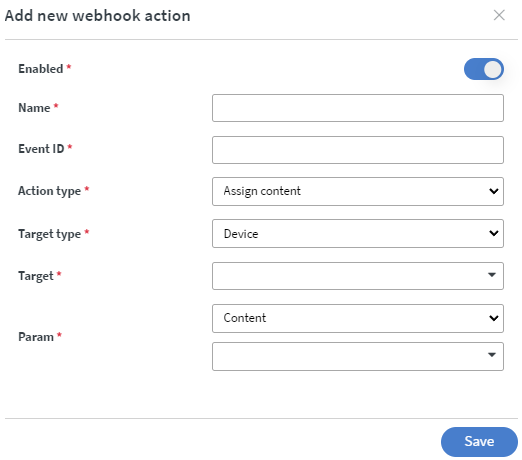
Event ID:
- You have to use the exact same ID in the content that you sat here to make the webhook work -
Param
-You can choose Loop, Content or Schedule.- Here you can select the affected item.
-
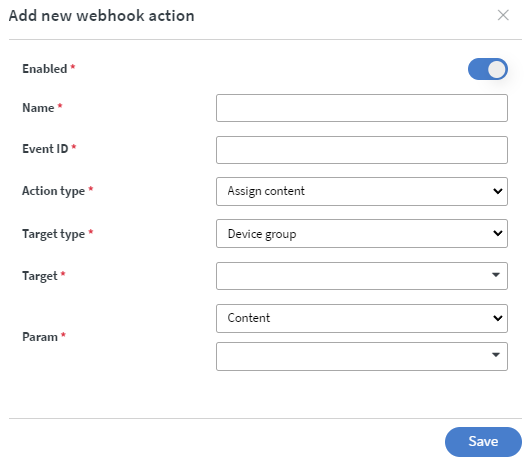
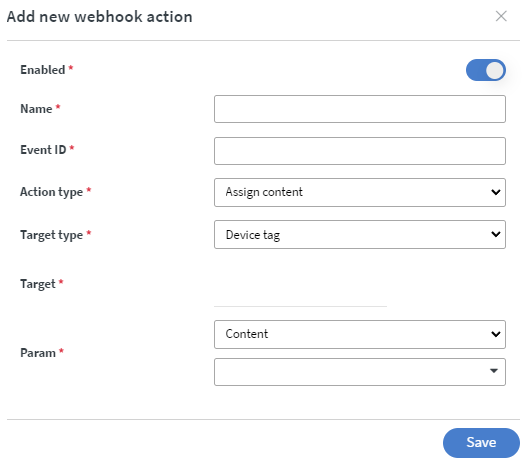
Target type:
- You can choose All, Device, Device Group or Device tag as target type.
 |  |
|---|---|
 |  |
From here you can test your webhook.
- First, you have to create a Webhook API key
- Then select the generate example link button on the end of the webhook
- Select the created API key.
- To test the Webhook use the Test button. It will proceed the task immediately.
- To use the Webhook in content you have to use the Copy link to clipboard button.
- It will copy the link, what you can use in the Call API action.
Disable emergency
- Create Webhook
- Use Webhook
-
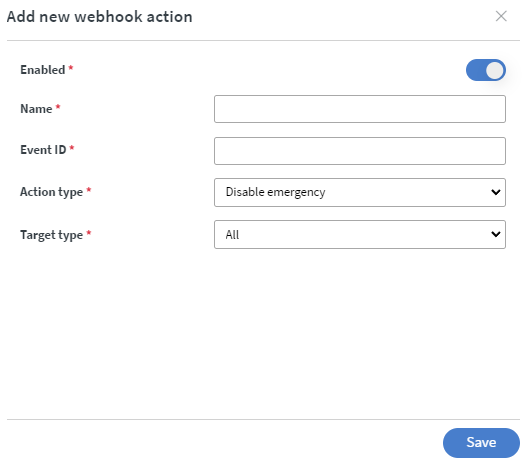
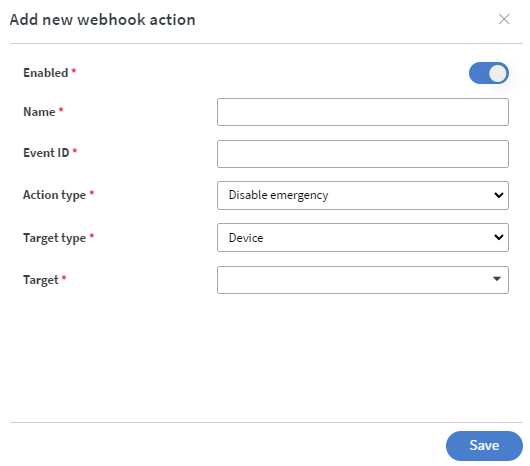
Event ID:
- You have to use the exact same ID in the content that you sat here to make the webhook work -
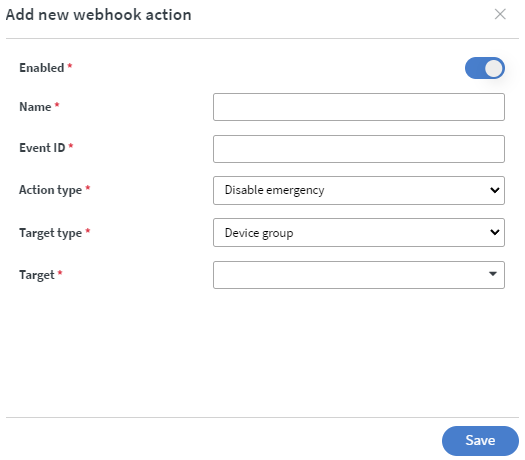
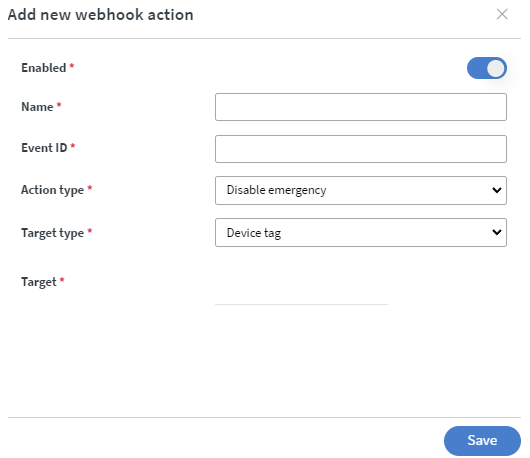
Target type:
- You can choose All, Device, Device Group or Device tag as target type.
 |  |
|---|---|
 |  |
From here you can test your webhook.
- First, you have to create a Webhook API key
- Then select the generate example link button on the end of the webhook
- Select the created API key.
- To test the Webhook use the Test button. It will proceed the task immediately.
- To use the Webhook in content you have to use the Copy link to clipboard button.
- It will copy the link, what you can use in the Call API action.
Enable emergency
- Create Webhook
- Use Webhook
-
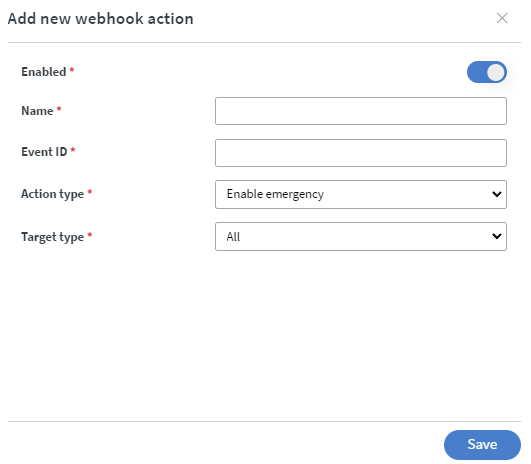
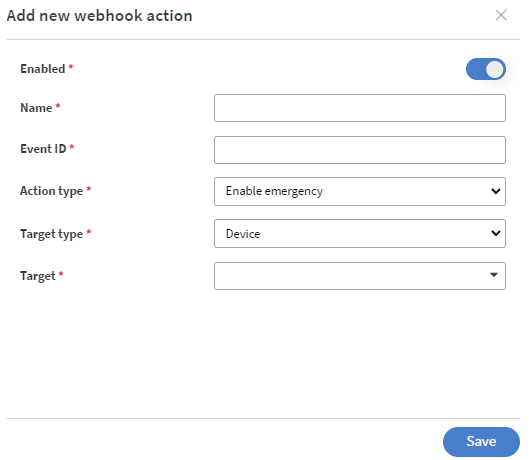
Event ID:
- You have to use the exact same ID in the content that you sat here to make the webhook work -
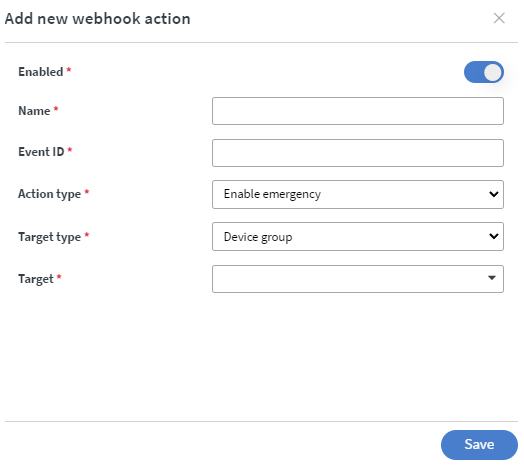
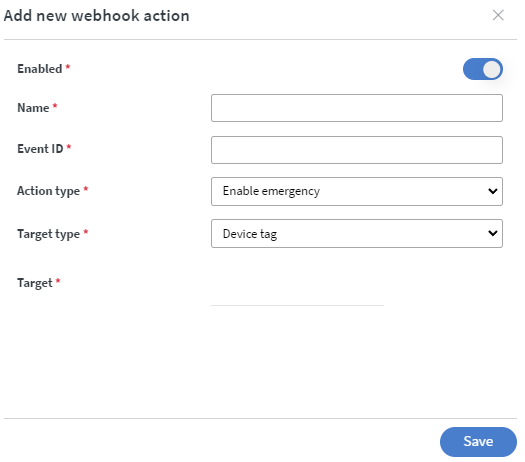
Target type:
- You can choose All, Device, Device Group or Device tag as target type.
 |  |
|---|---|
 |  |
From here you can test your webhook.
- First, you have to create a Webhook API key
- Then select the generate example link button on the end of the webhook
- Select the created API key.
- To test the Webhook use the Test button. It will proceed the task immediately.
- To use the Webhook in content you have to use the Copy link to clipboard button.
- It will copy the link, what you can use in the Call API action.
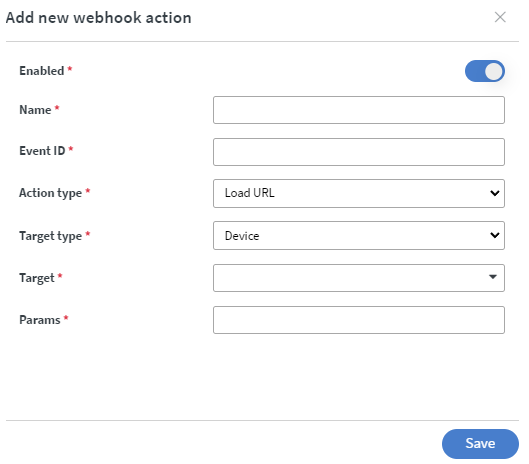
Load URL
- Create Webhook
- Use Webhook
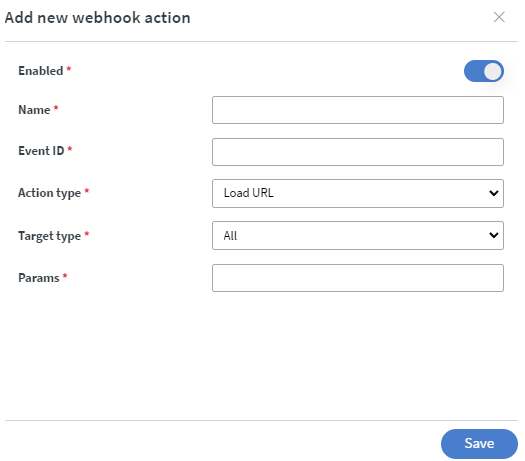
- Event ID:
- You have to use the exact same ID in the content that you sat here to make the webhook work. - Param:
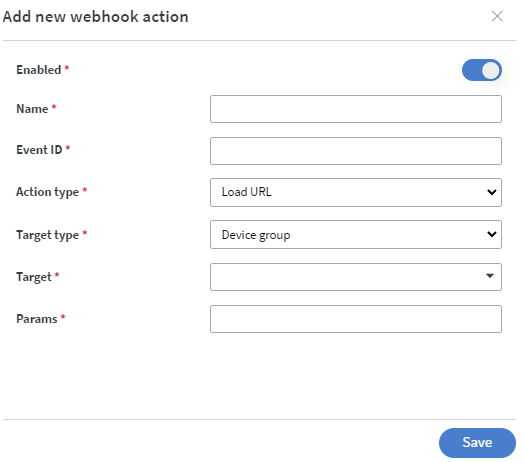
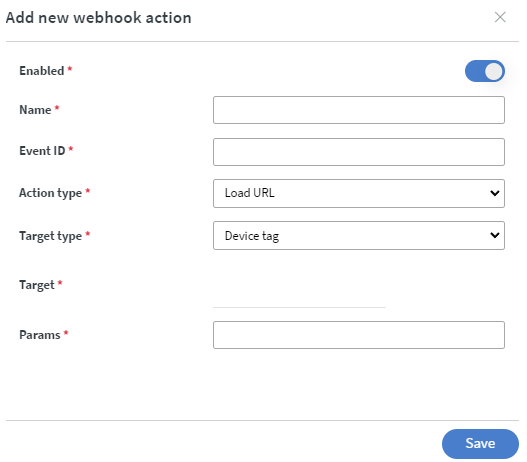
- Here you can add the desired URL. - Target type:
- You can choose All, Device, Device Group or Device tag as target type.
 |  |
|---|---|
 |  |
From here you can test your webhook.
- First, you have to create a Webhook API key
- Then select the generate example link button on the end of the webhook
- Select the created API key.
- To test the Webhook use the Test button. It will proceed the task immediately.
- To use the Webhook in content you have to use the Copy link to clipboard button.
- It will copy the link, what you can use in the Call API action.
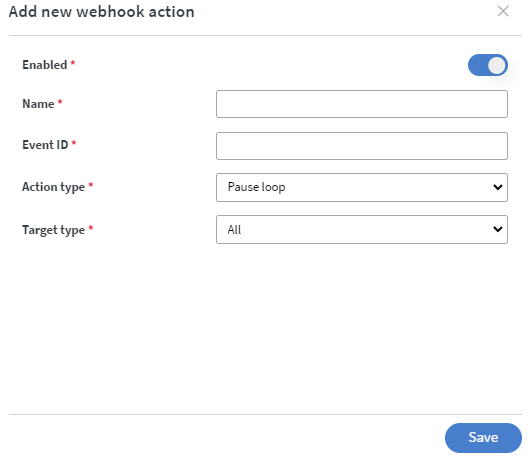
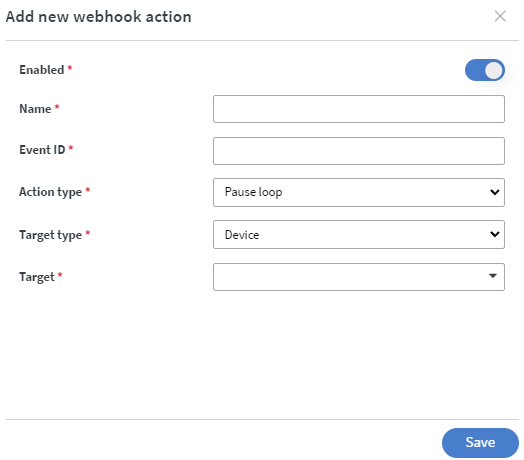
Pause loop
- Create Webhook
- Use Webhook
-
Event ID:
- You have to use the exact same ID in the content that you sat here to make the webhook work -
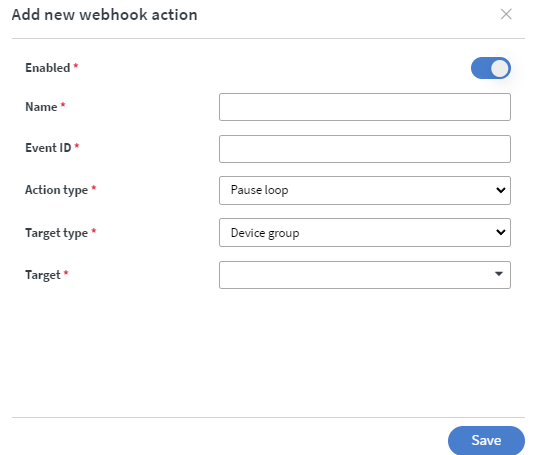
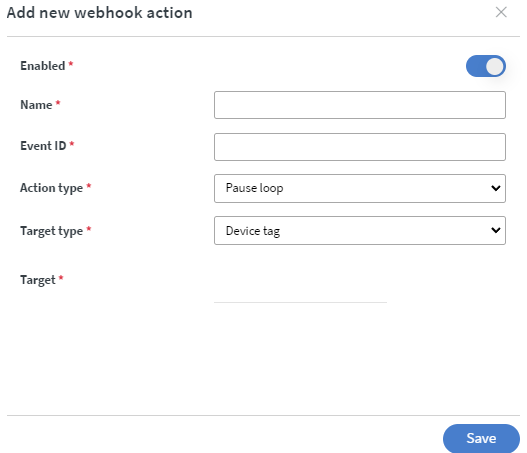
Target type:
- You can choose All, Device, Device Group or Device tag as target type.
 |  |
|---|---|
 |  |
From here you can test your webhook.
- First, you have to create a Webhook API key
- Then select the generate example link button on the end of the webhook
- Select the created API key.
- To test the Webhook use the Test button. It will proceed the task immediately.
- To use the Webhook in content you have to use the Copy link to clipboard button.
- It will copy the link, what you can use in the Call API action.
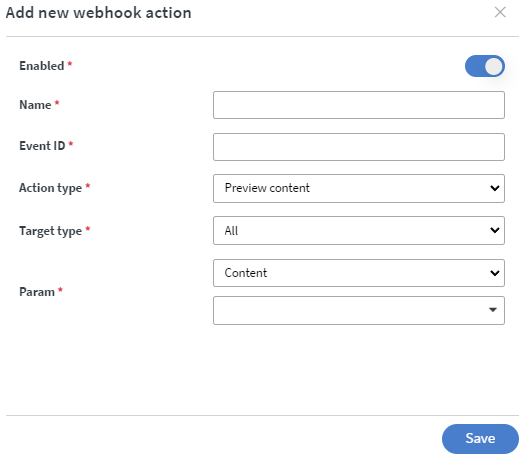
Preview content
- Create Webhook
- Use Webhook
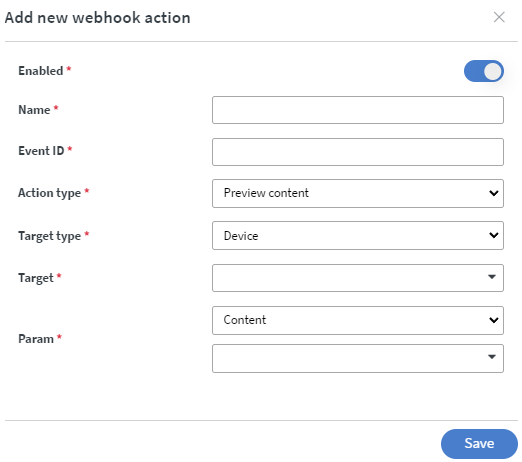
- Event ID:
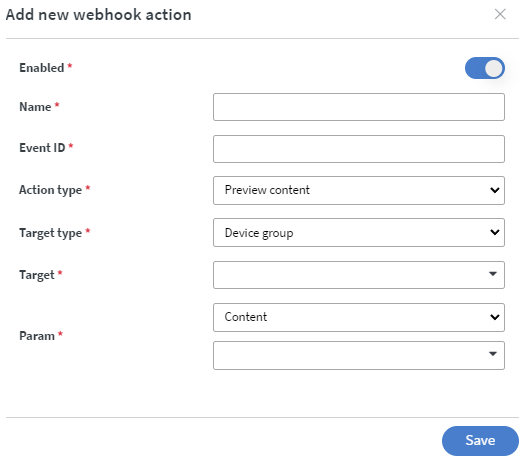
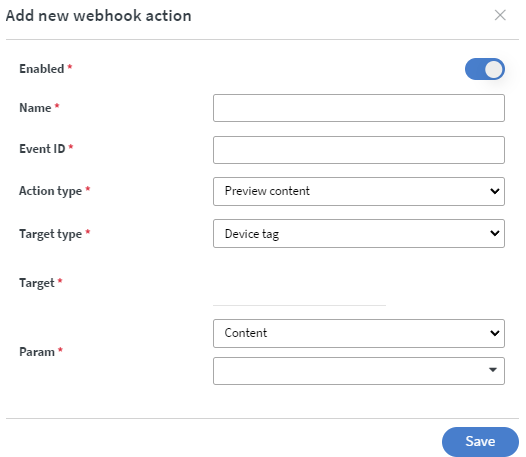
- You have to use the exact same ID in the content that you sat here to make the webhook work - Param
-You can choose Loop, Content or Schedule. - Target type:
- You can choose All, Device, Device Group or Device tag as target type.
 |  |
|---|---|
 |  |
From here you can test your webhook.
- First, you have to create a Webhook API key
- Then select the generate example link button on the end of the webhook
- Select the created API key.
- To test the Webhook use the Test button. It will proceed the task immediately.
- To use the Webhook in content you have to use the Copy link to clipboard button.
- It will copy the link, what you can use in the Call API action.
Refresh content
- Create Webhook
- Use Webhook
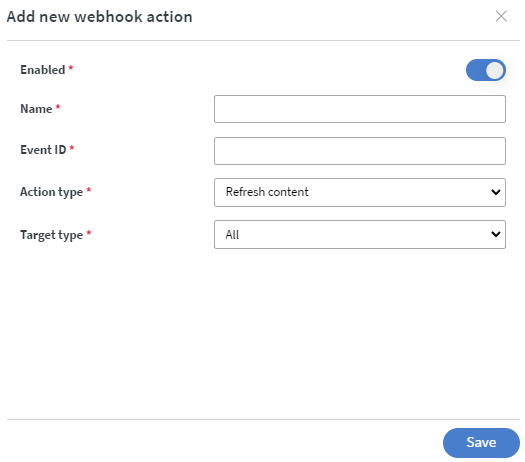
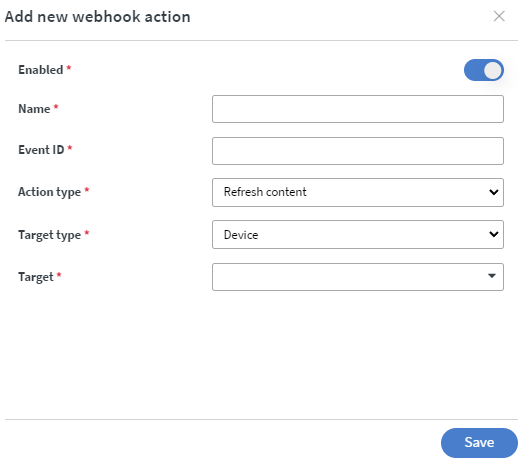
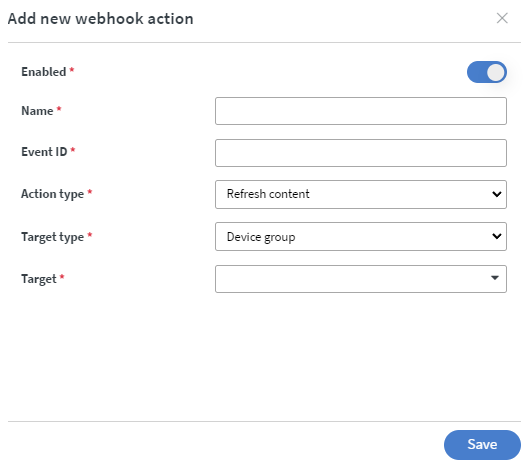
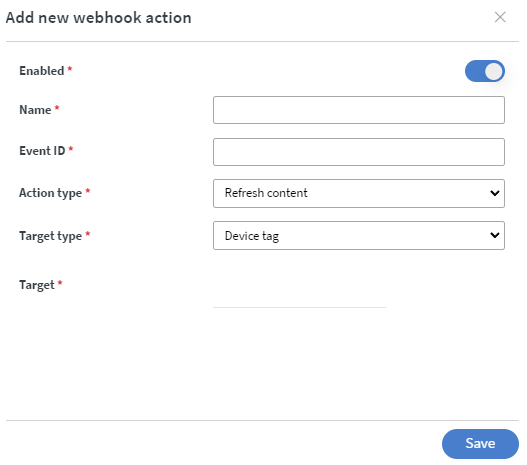
- Event ID:
- You have to use the exact same ID in the content that you sat here to make the webhook work - Target type:
- You can choose All, Device, Device Group or Device tag as target type.
 |  |
|---|---|
 |  |
From here you can test your webhook.
- First, you have to create a Webhook API key
- Then select the generate example link button on the end of the webhook
- Select the created API key.
- To test the Webhook use the Test button. It will proceed the task immediately.
- To use the Webhook in content you have to use the Copy link to clipboard button.
- It will copy the link, what you can use in the Call API action.
Restart device
- Create Webhook
- Use Webhook
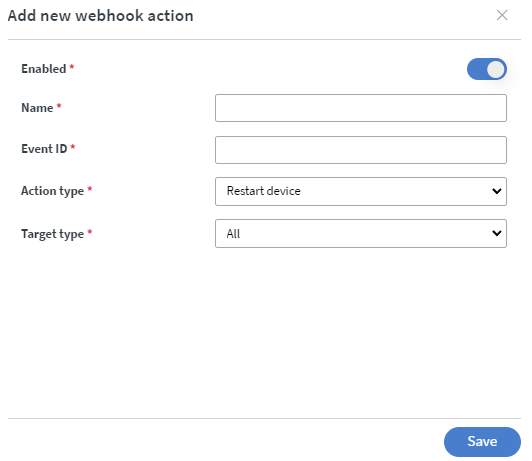
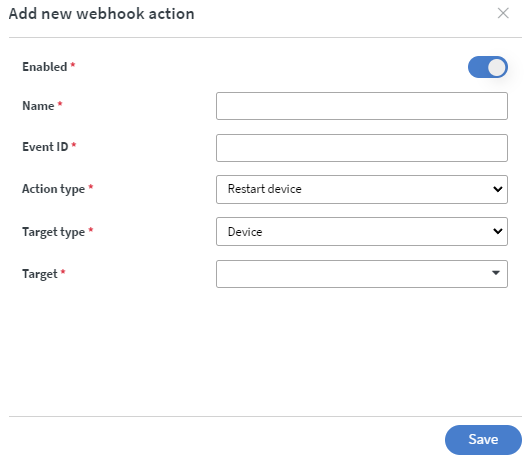
- Event ID:
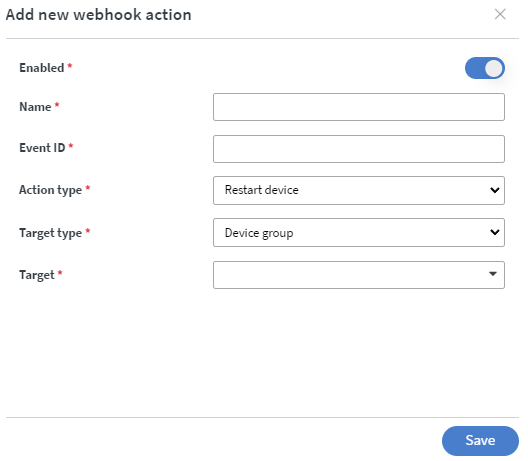
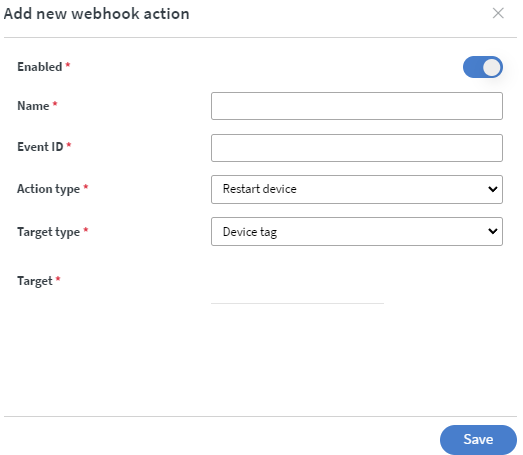
- You have to use the exact same ID in the content that you sat here to make the webhook work - Target type:
- You can choose All, Device, Device Group or Device tag as target type.
 |  |
|---|---|
 |  |
From here you can test your webhook.
- First, you have to create a Webhook API key
- Then select the generate example link button on the end of the webhook
- Select the created API key.
- To test the Webhook use the Test button. It will proceed the task immediately.
- To use the Webhook in content you have to use the Copy link to clipboard button.
- It will copy the link, what you can use in the Call API action.
Resume loop
- Create Webhook
- Use Webhook
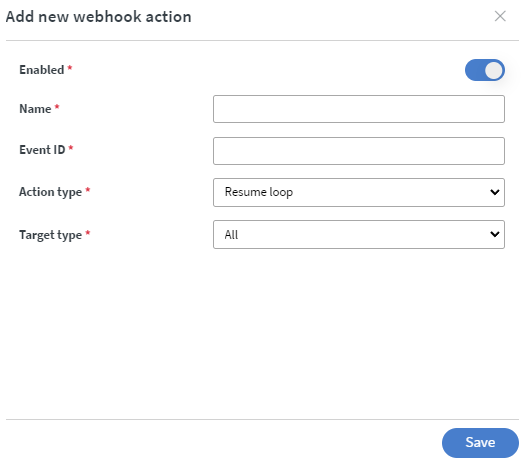
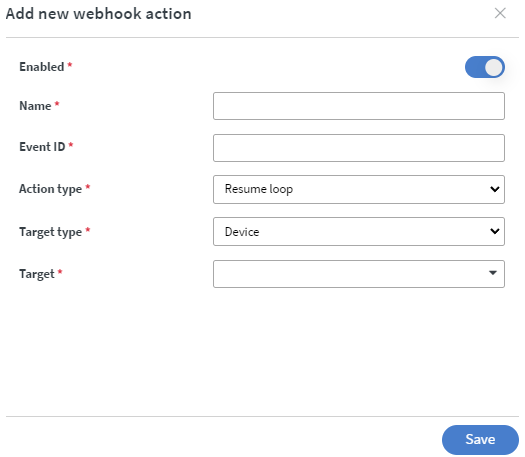
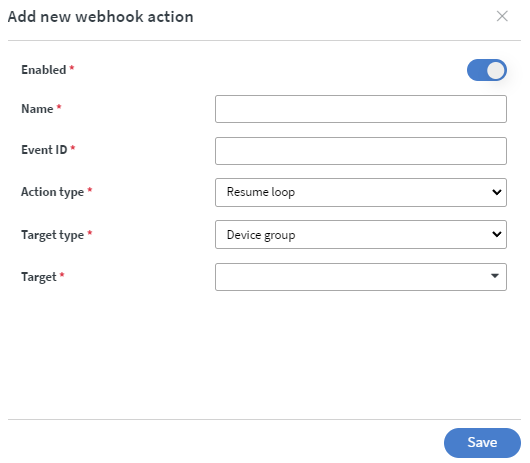
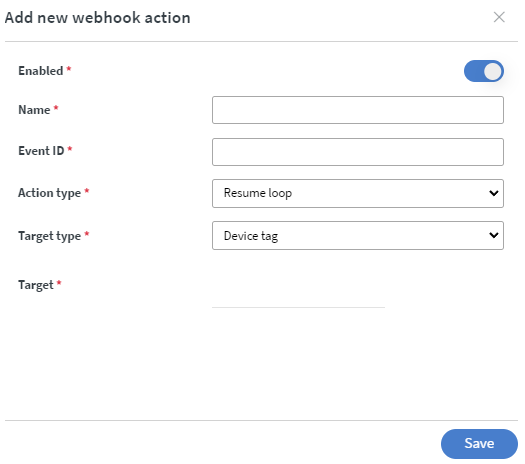
- Event ID:
- You have to use the exact same ID in the content that you sat here to make the webhook work - Target type:
- You can choose All, Device, Device Group or Device tag as target type.
 |  |
|---|---|
 |  |
From here you can test your webhook.
- First, you have to create a Webhook API key
- Then select the generate example link button on the end of the webhook
- Select the created API key.
- To test the Webhook use the Test button. It will proceed the task immediately.
- To use the Webhook in content you have to use the Copy link to clipboard button.
- It will copy the link, what you can use in the Call API action.
Send sensor event data
- Create Webhook
- Use Webhook
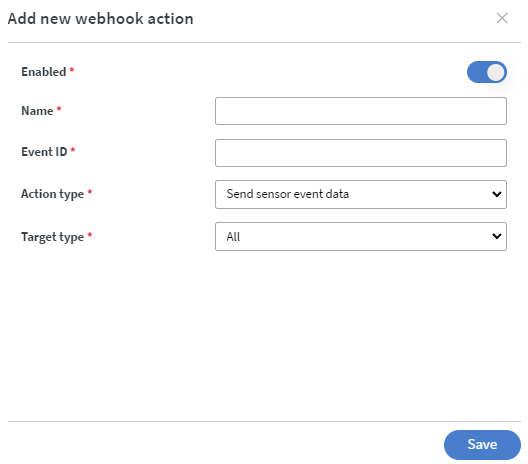
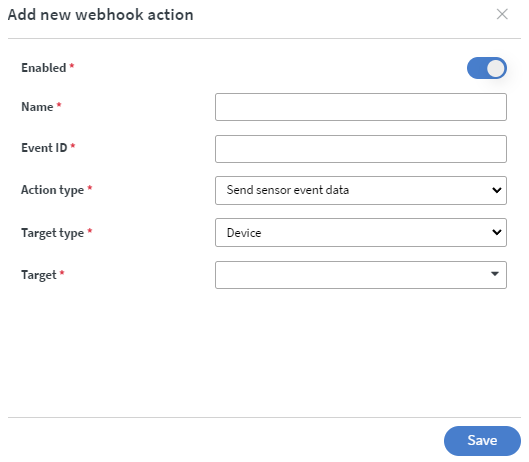
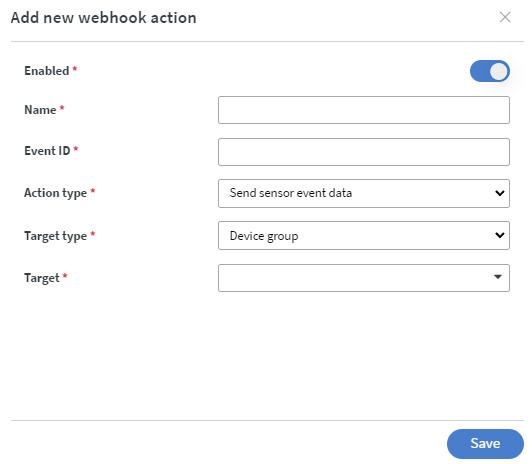
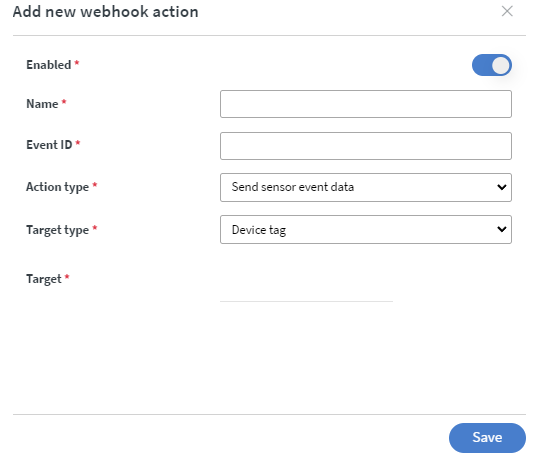
- Event ID:
- You have to use the exact same ID in the content that you sat here to make the webhook work - Target type:
- You can choose All, Device, Device Group or Device tag as target type.
 |  |
|---|---|
 |  |
From here you can test your webhook.
-
First, you have to create a Webhook API key
-
Then select the generate example link button on the end of the webhook
-
Select the created API key.
- In Sensor output you can define the sensor event you want to send via Webhook.
- To test the Webhook use the Test button. It will proceed the task immediately.
- To use the Webhook in content you have to use the Copy link to clipboard button.
- It will copy the link, what you can use in the Call API action.
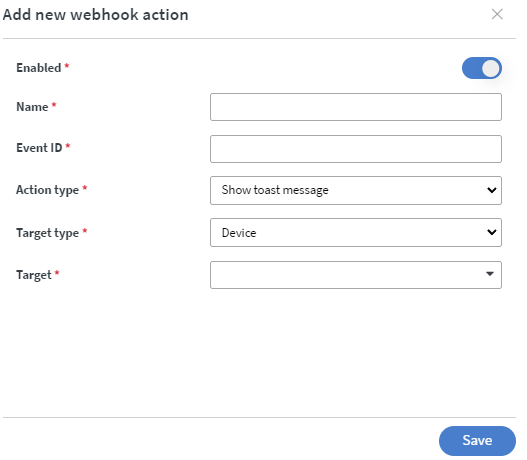
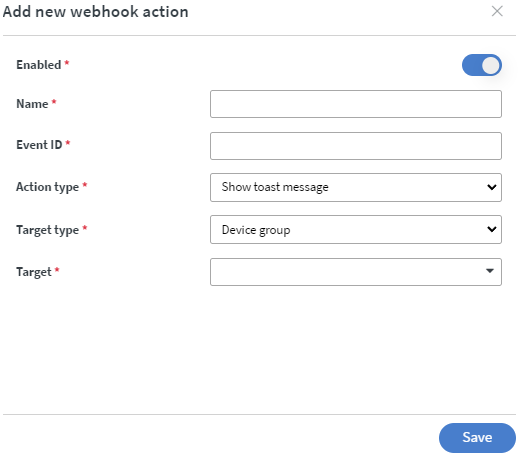
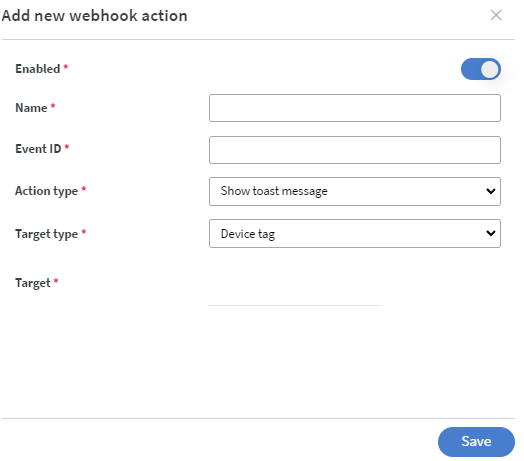
Show toast message data
- Create Webhook
- Use Webhook
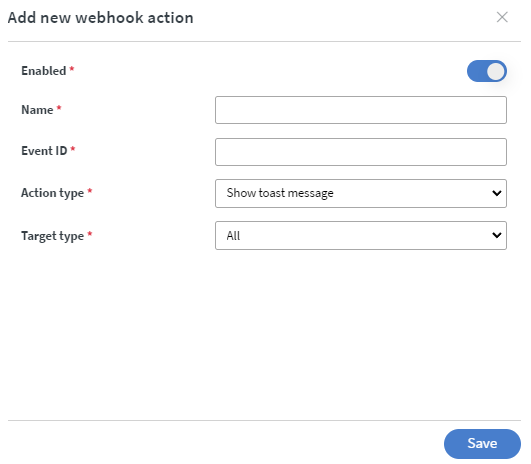
- Event ID:
- You have to use the exact same ID in the content that you sat here to make the webhook work - Target type:
- You can choose All, Device, Device Group or Device tag as target type.
 |  |
|---|---|
 |  |
From here you can test your webhook.
- First, you have to create a Webhook API key
- Then select the generate example link button on the end of the webhook
- Select the created API key.
- To test the Webhook use the Test button. It will proceed the task immediately.
- To use the Webhook in content you have to use the Copy link to clipboard button.
- It will copy the link, what you can use in the Call API action.
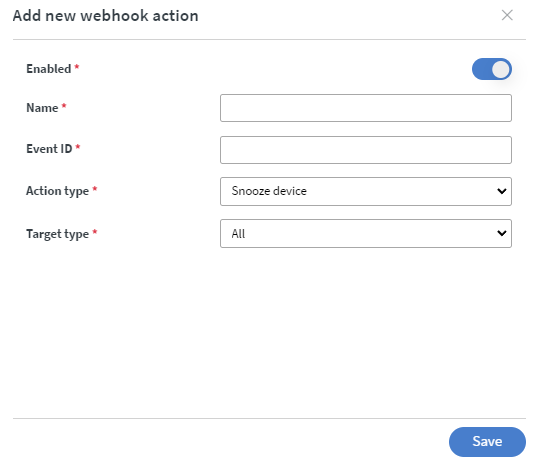
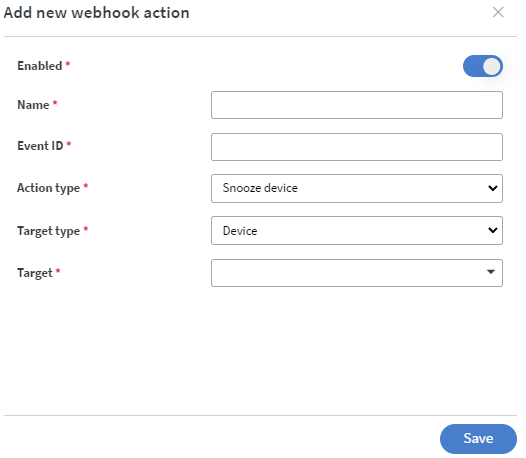
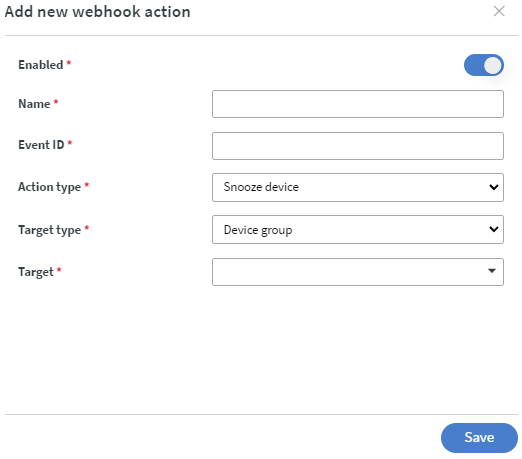
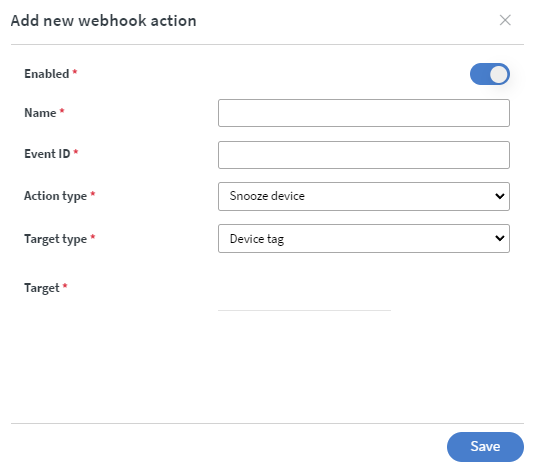
Snooze device
- Create Webhook
- Use Webhook
- Event ID:
- You have to use the exact same ID in the content that you sat here to make the webhook work - Target type:
- You can choose All, Device, Device Group or Device tag as target type.
 |  |
|---|---|
 |  |
From here you can test your webhook.
- First, you have to create a Webhook API key
- Then select the generate example link button on the end of the webhook
- Select the created API key.
- To test the Webhook use the Test button. It will proceed the task immediately.
- To use the Webhook in content you have to use the Copy link to clipboard button.
- It will copy the link, what you can use in the Call API action.
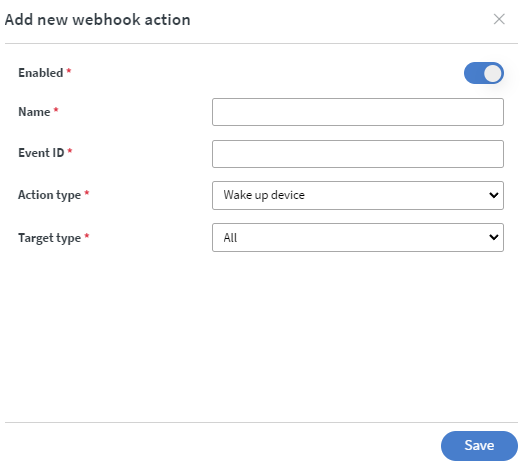
Wake up device
- Create Webhook
- Use Webhook
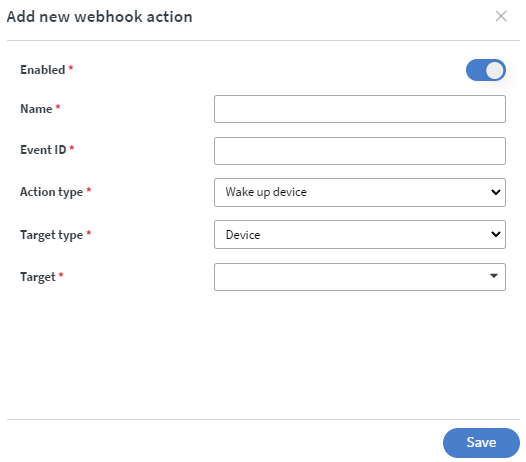
- Event ID:
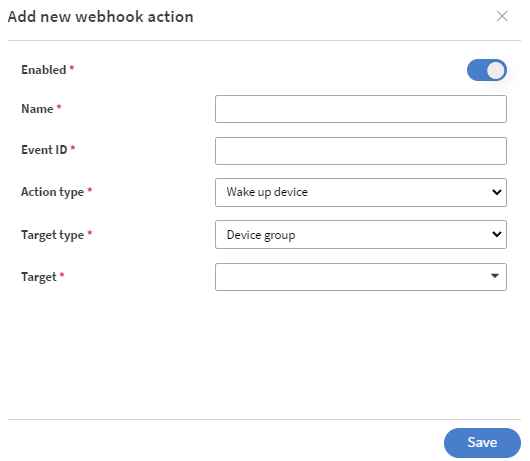
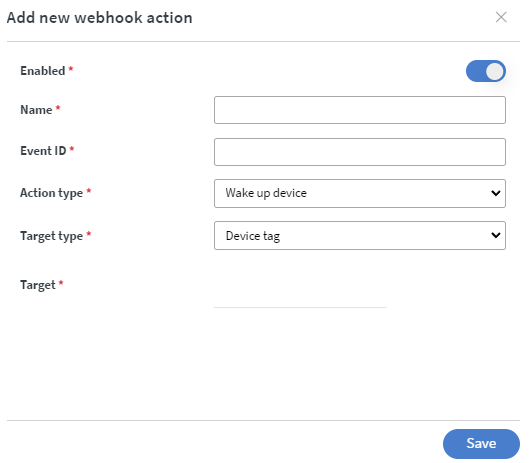
- You have to use the exact same ID in the content that you sat here to make the webhook work - Target type:
- You can choose All, Device, Device Group or Device tag as target type.
 |  |
|---|---|
 |  |
From here you can test your webhook.
- First, you have to create a Webhook API key
- Then select the generate example link button on the end of the webhook
- Select the created API key.
- To test the Webhook use the Test button. It will proceed the task immediately.
- To use the Webhook in content you have to use the Copy link to clipboard button.
- It will copy the link, what you can use in the Call API action.
Folder webhook actions
Force sync
- Create Webhook
- Use Webhook
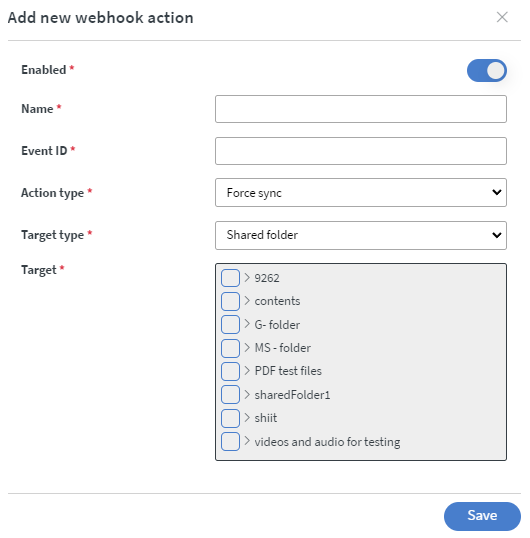
- Event ID:
- You have to use the exact same ID in the content that you sat here to make the webhook work - Target type:
- You can choose only shared folder as target type. - Target:
- Select the affected shared folder from your File manager.
 |
|---|
From here you can test your webhook.
- First, you have to create a Webhook API key
- Then select the generate example link button on the end of the webhook
- Select the created API key.
- To test the Webhook use the Test button. It will proceed the task immediately.
- To use the Webhook in content you have to use the Copy link to clipboard button.
- It will copy the link, what you can use in the Call API action.
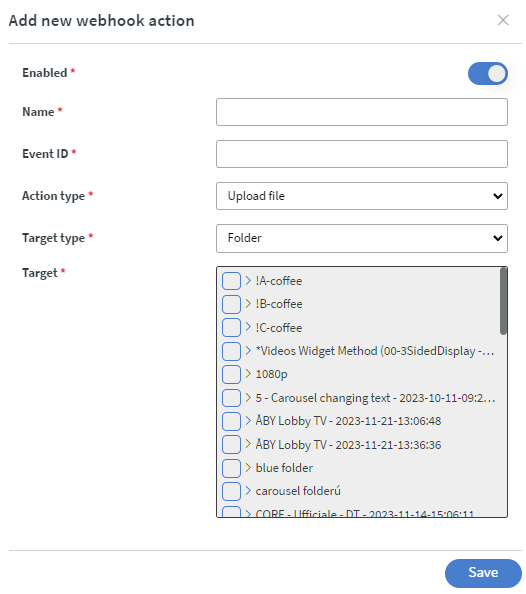
Upload file
- Create Webhook
- Use Webhook
- Event ID:
- You have to use the exact same ID in the content that you sat here to make the webhook work - Target type:
- You can choose only folder as target type. - Target:
- Select the affected folder from your File manager.
 |
|---|
From here you can test your webhook.
- First, you have to create a Webhook API key
- Then select the generate example link button on the end of the webhook
- Select the created API key.
- To test the Webhook use the Test button. It will proceed the task immediately.
- To use the Webhook in content you have to use the Copy link to clipboard button.
- It will copy the link, what you can use in the Call API action.