How to integrate a custom RESTAPI over Google Script
This article shows you how to integrate a custom RESTAPI using Google Script.
Why do you need an integration?
- You have data, either a menu of a restaurant or any kind of live data that is maintained in a third party system.
- The data that you have is not in the structure you need it.
- You want to bring that data to Wallboard to visualize it and display it on multiple screens.
- The data in the third party system needs authentication to access it so you can't use it as a simple JSON or XML file.
- You want to collect multiple data from a third party system so that you can filter or merge different data sources.
RESTAPI is a communication protocol, not a standard. This means that even if you can technically access the data it will be structured and named as the developers of the third party system intended for their main use case. You have to understand what's behind the RESTAPI, not just access the data. You need to have an understanding of the connections behind the datasources, functions and have knowledge of the system's logic. Lastly you'll need to know what data you need in Wallboard and in what kind of structure. You as the implementer of the integration can only collect the necessary data, not more or less.
Initial steps
In this integration example we use Google Script, a scripting tool from Google.
If you exceed the Google Script limit of 20.000 calls/day, you will need a paid service.
Head over to https://script.google.com/home and login with your google account or create one if you don't already have a google account.
You will need to have at least JavaScript coding knowledge to create your own script with Google Script!
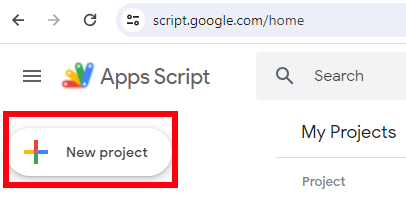
After logging into Google Script create a new project. You can have multiple project simultaneously.
Name your project and deploy it! Remember to
- Run it as a Web App
- Execute it as Me
- Give access to Anyone so you have access to it using a public URL

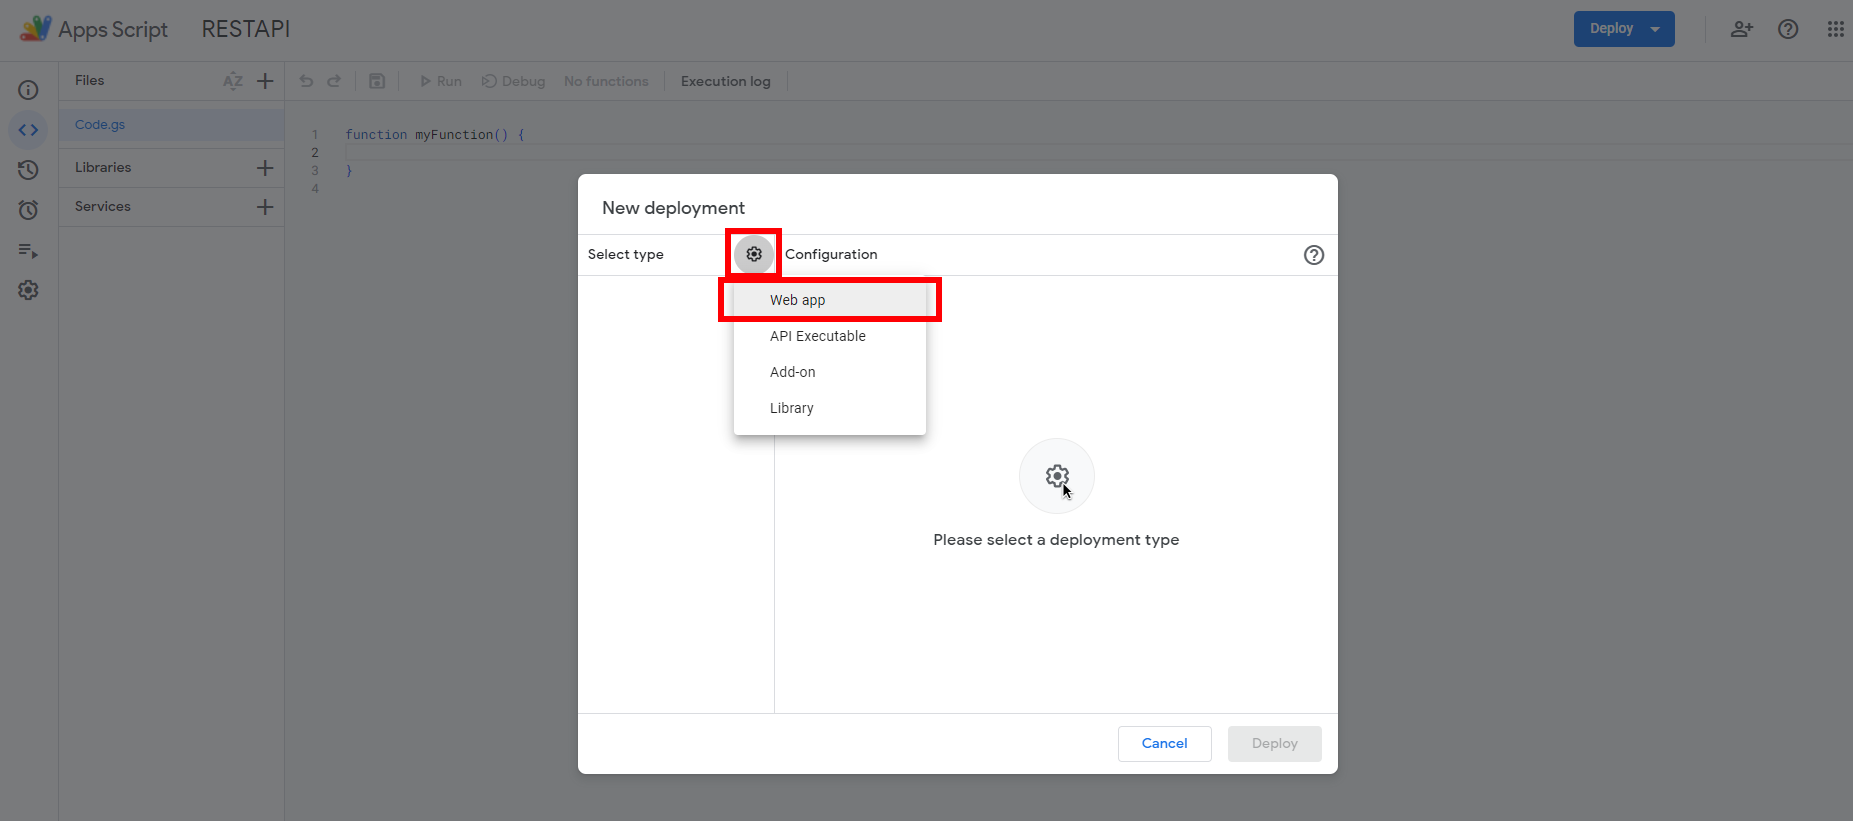
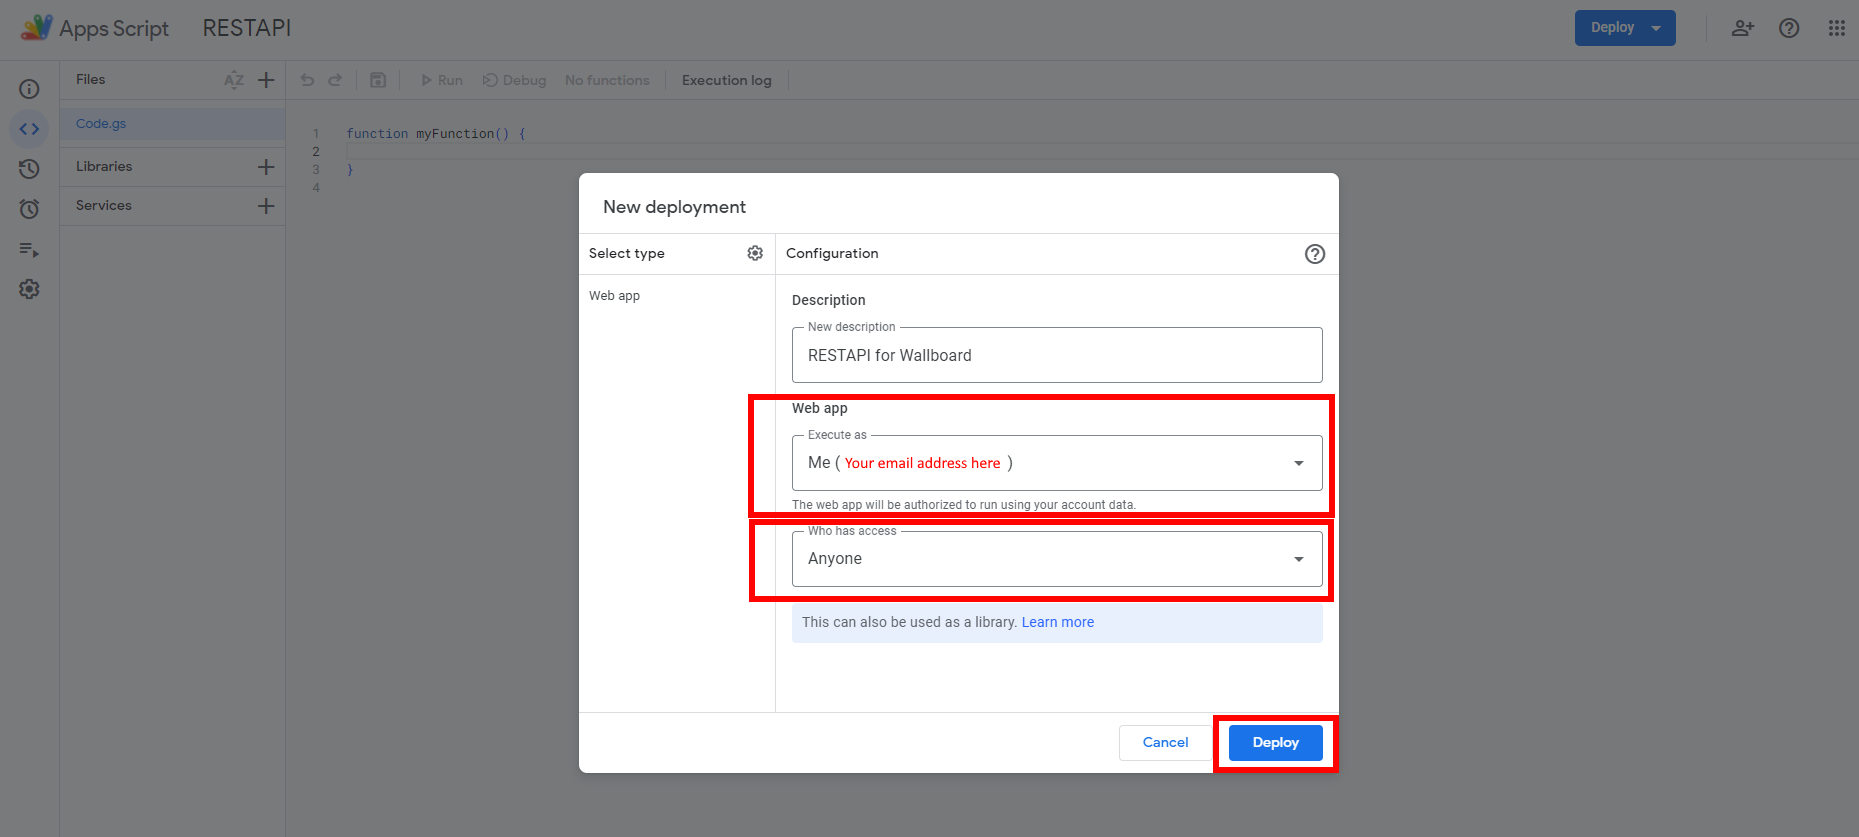
When you've clicked Deploy a new window will appear shortly. Copy the web app's URL as show below, this is how
your Wallboard datasource can read it.
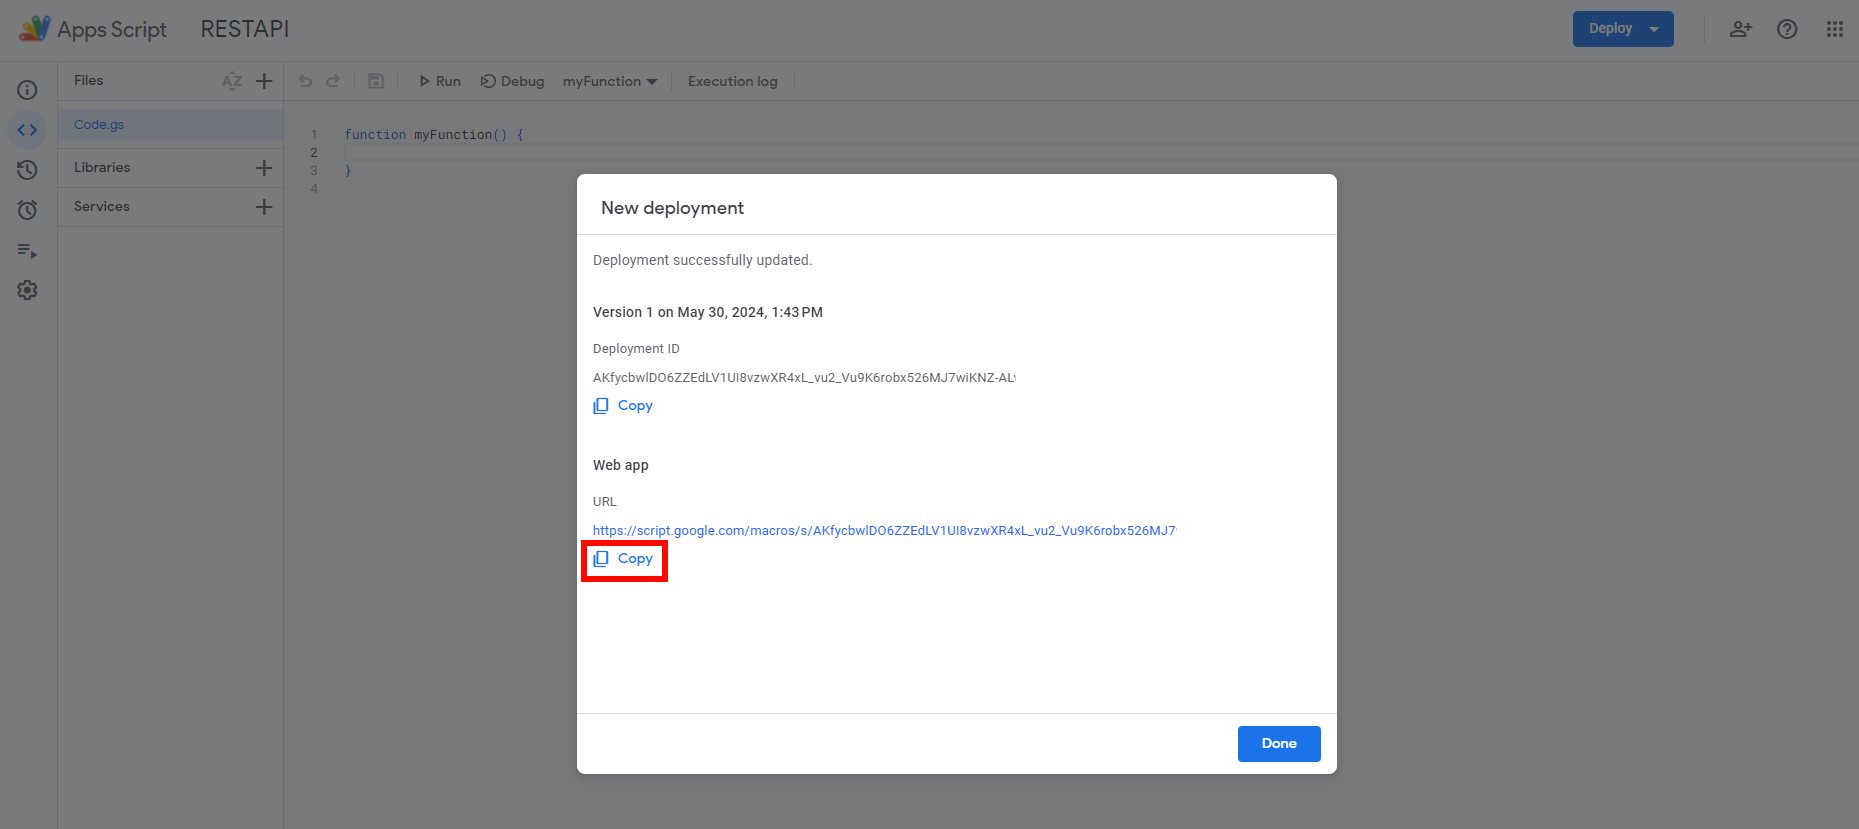
Please note that every time you deploy a new app this URL will change. We recommend testing your script first then deploying it.
Creating your app
The first step is always going to be authenticating your app and getting a token back.
- Here you call the authentication endpoint of Toast API and from the response you get the access token(* myCommunicationToken*) for later use.
var myServer = "https://ws-sandbox-api.eng.toasttab.com";

var body = JSON.stringify({

    'clientId': 'you need a clientid paste here',

    'clientSecret': 'you need a client secret paste here',

    'userAccessType': 'TOAST_MACHINE_CLIENT'

});

var myheaders = {

    'Content-Type': 'application/json',

};

var options = {

    'method': 'post',

    'headers': myheaders,

    'payload': body,

};

try {

    response = UrlFetchApp.fetch(myServer + "/authentication/v1/authentication/login", options);

} catch (e) {

    console.info(e);

}

var data = JSON.parse(response.getContentText());

var myCommunicationToken = data.token.accessToken;
There are cases when with the token you can immediately get back what you need, but in most cases you have to do intermediate steps.
- In this use case we have to get back all our restaurants first, select one restaurant from them and then we can use that restaurantID for further requests.
const query = "lastModified: '2023-08-15',pageSize:'1',pageToken:'string'";

myheaders = {

    Authorization: 'Bearer ' + myCommunicationToken

};

options = {

    'method': 'get',

    'headers': myheaders

};

try {

    response = UrlFetchApp.fetch(myServer + "/partners/v1/connectedRestaurants?" + query, options);

} catch (e) {

    console.info(e);

}

data = JSON.parse(response.getContentText());

var myRestaurantGUID = data.results[1].restaurantGuid;
We can already use this restaurantID to retreive its menus.
- As visible in all the RESTAPI calls it is up to the actual endpoint what parameters it requires and in what * format* to pass it over.
- Here we just have to pass the restaurantID in the headers.
- As a result we can now get all the menus of the selected restaurant.
myheaders = {

    'Toast-Restaurant-External-ID': myRestaurantGUID,

    Authorization: 'Bearer ' + myCommunicationToken

};

options = {

    'method': 'get',

    'headers': myheaders

};

// lets get the menu for the restaurant

try {

    response = UrlFetchApp.fetch(myServer + "/menus/v2/menus", options);

} catch (e) {

    console.info(e);

}
Now we are moving on to cleaning up the data.
Even if you have the data that you need, you might want to visualize it in a different format so here you have the opportunity to:
- Delete the data that you don't need
- Add more data using another API call
- Select only a subset of data (less rows or less columns)
var items = [];

for (i = 0; i < data.menus.length; i++) {

  var groupItem = [];

  for (j = 0; j < data.menus[i].menuGroups.length; j++) {

    var itemAndPrices = [];

    for (k = 0; k < data.menus[i].menuGroups[j].menuItems.length; k++) {

        itemAndPrices.push({ 'name' : data.menus[i].menuGroups[j].menuItems[k].name, 'price' : data.menus[i].menuGroups[j].menuItems[k].price });

    }

    groupItem.push({'groupName' : data.menus[i].menuGroups[j].name , 'items' : itemAndPrices } );

}

  items.push({'menuName' : data.menus[i].name , 'groupItems' : groupItem } );

}
Let's prepare the return value.
- We are returning with a JSON object.
ret = items;

console.info(ret);

return ContentService.createTextOutput(JSON.stringify(ret)).setMimeType(ContentService.MimeType.JSON);
Deploying your Web App and creating a datasource in Wallboard
With the scripting finished we can now deploy our Web App as discussed previously and create a datasource in Wallboard using the URL we copied.
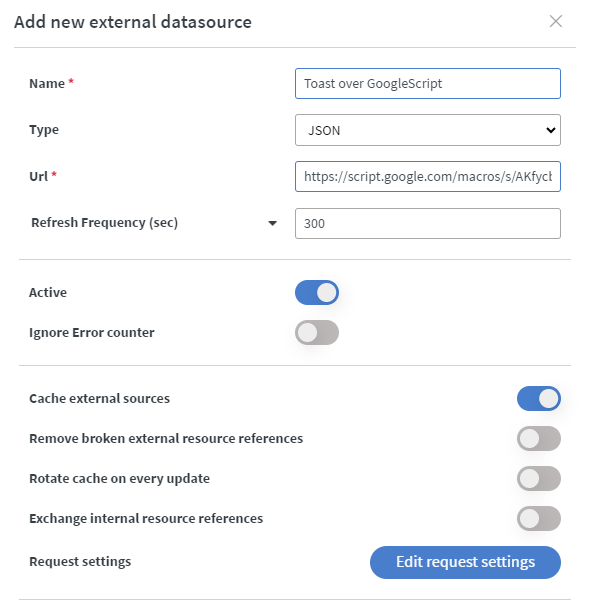
- Wallboard can also cache the images from your datasource but they have to be publicly available.
- Do not use an excessively low refresh frequency as it could use up your API call limit with Google. Only refresh as often as necessary.
- Preview your data source before you begin using it.
If you have further questions please do not hesitate to contact us at support@wallboard.info. Happy editing!