How to resize widgets with sensors
In this tutorial we will use an M5 stack fire with a light sensor unit attached to port B.
Sensor configuration
{
 {
	"m5devices": [
		{
			"uid": "M5",
			"sensors": [
				{
					"id": "light",
					"type": "lightSensor",
					"events": {
						"onDark": {
							"event": "dark"
						},
						"onBright": {
							"event": "bright"
						}
					},
					"settings": {
						"log": false,
						"pin": 36,
						"ranges": {
							"onDark": {
								"max": 4096,
								"min": 3000
							},
							"onBright": {
								"max": 2919,
								"min": 0
							}
						}
					}
				}
			]
		}
	]
}
After you sat the configuration, enable the Show console window on your device, when you interact with the board it will show the actual sensor's ID, Event and Value, which will be needed in content creation.
Content
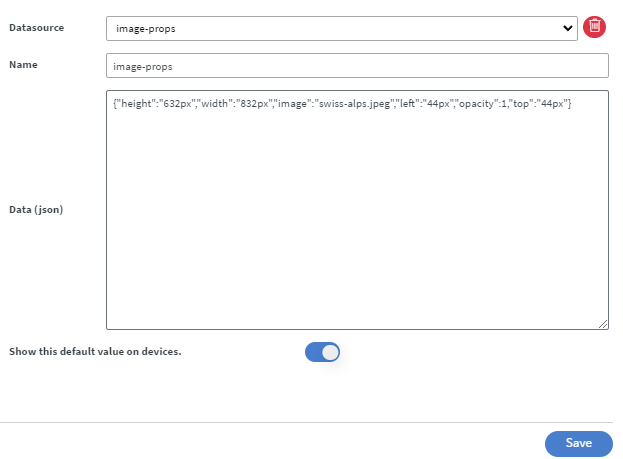
Firstly, we need to create a mock datasource with our image parameters. (width, height, top, left, etc...)
- Navigate yourself to
Properties >> Content >> base data paththen selectcreate mock datasource
In the mock datasource you need to give the data in JSON format.
 |
|---|
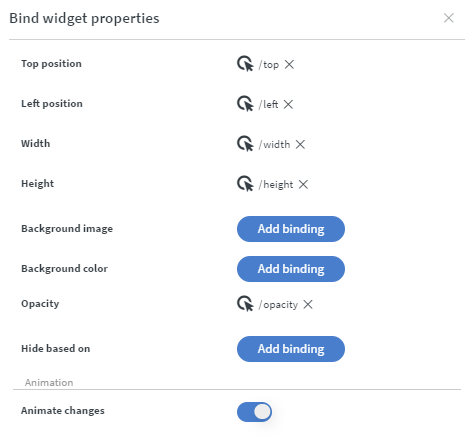
- Put down the widget you wish to resize, then select
Bind anythingin Properties >> Widget >> Other tab. - Bind the Positions from the datasource
 |
|---|
Example binding data:
 |
|---|
-
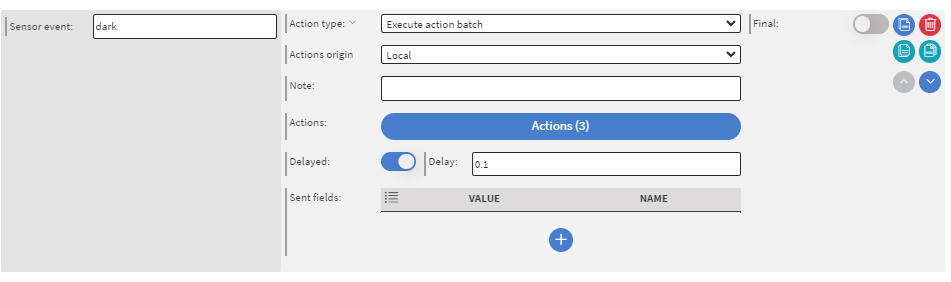
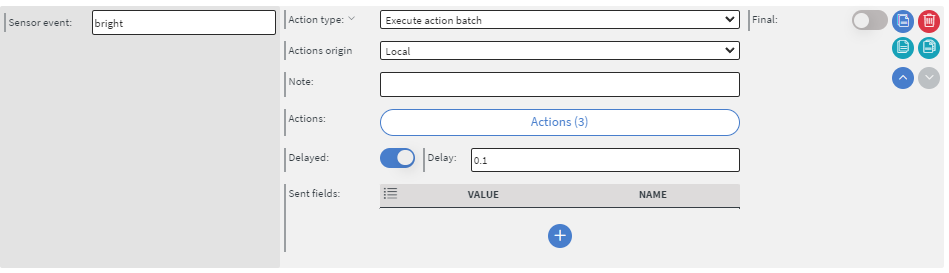
If you are done with these steps, you can configure the sensor events.
-
Here we will listen to some events like "bright" and "dark".
-
With the Change datasource action type we will change the documents mock datasource with overwrite property action, where we want to change our mock datasource data like height, width..etc.
-
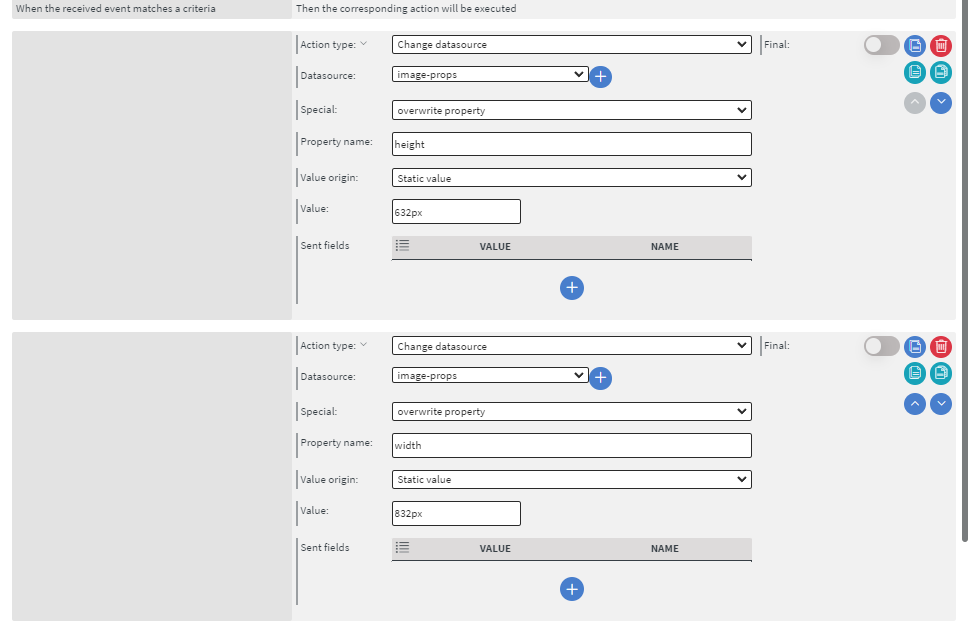
Create an action batch for the event
dark -
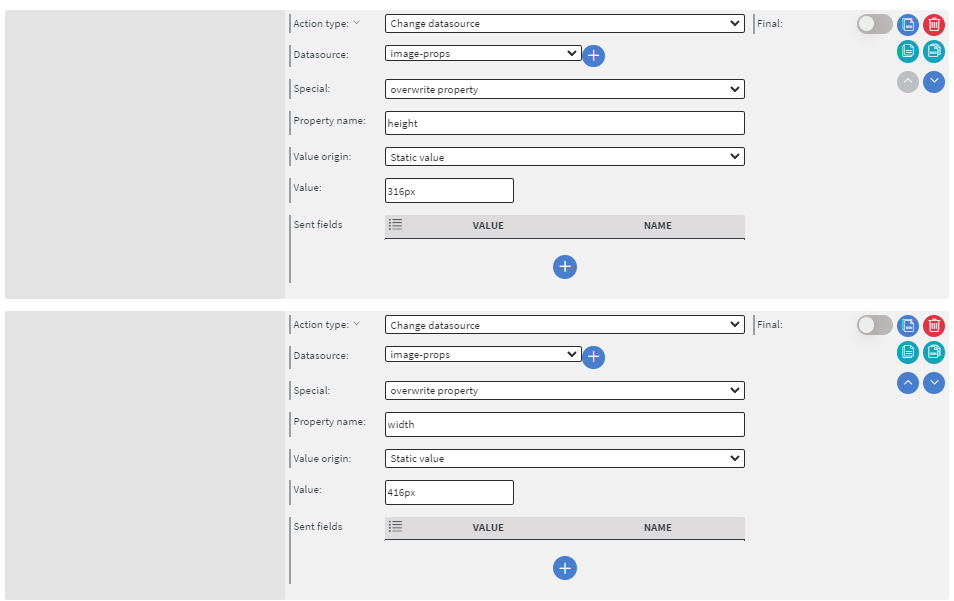
Click on the actions then add
Change datasourceaction, select the mock datasource you created before and add the property name and the value like this:
 |  |
|---|
- Create an action batch for event
brightthen repeat the previous steps:
 |  |
|---|
After you created all the actions, save it, save the content, then try it out
Downloadable content
Content widget resize with light sensor
resize-widgets-with-sensor-events.zip
Please enable Import as Content in the import modal!