How to create a form using a template
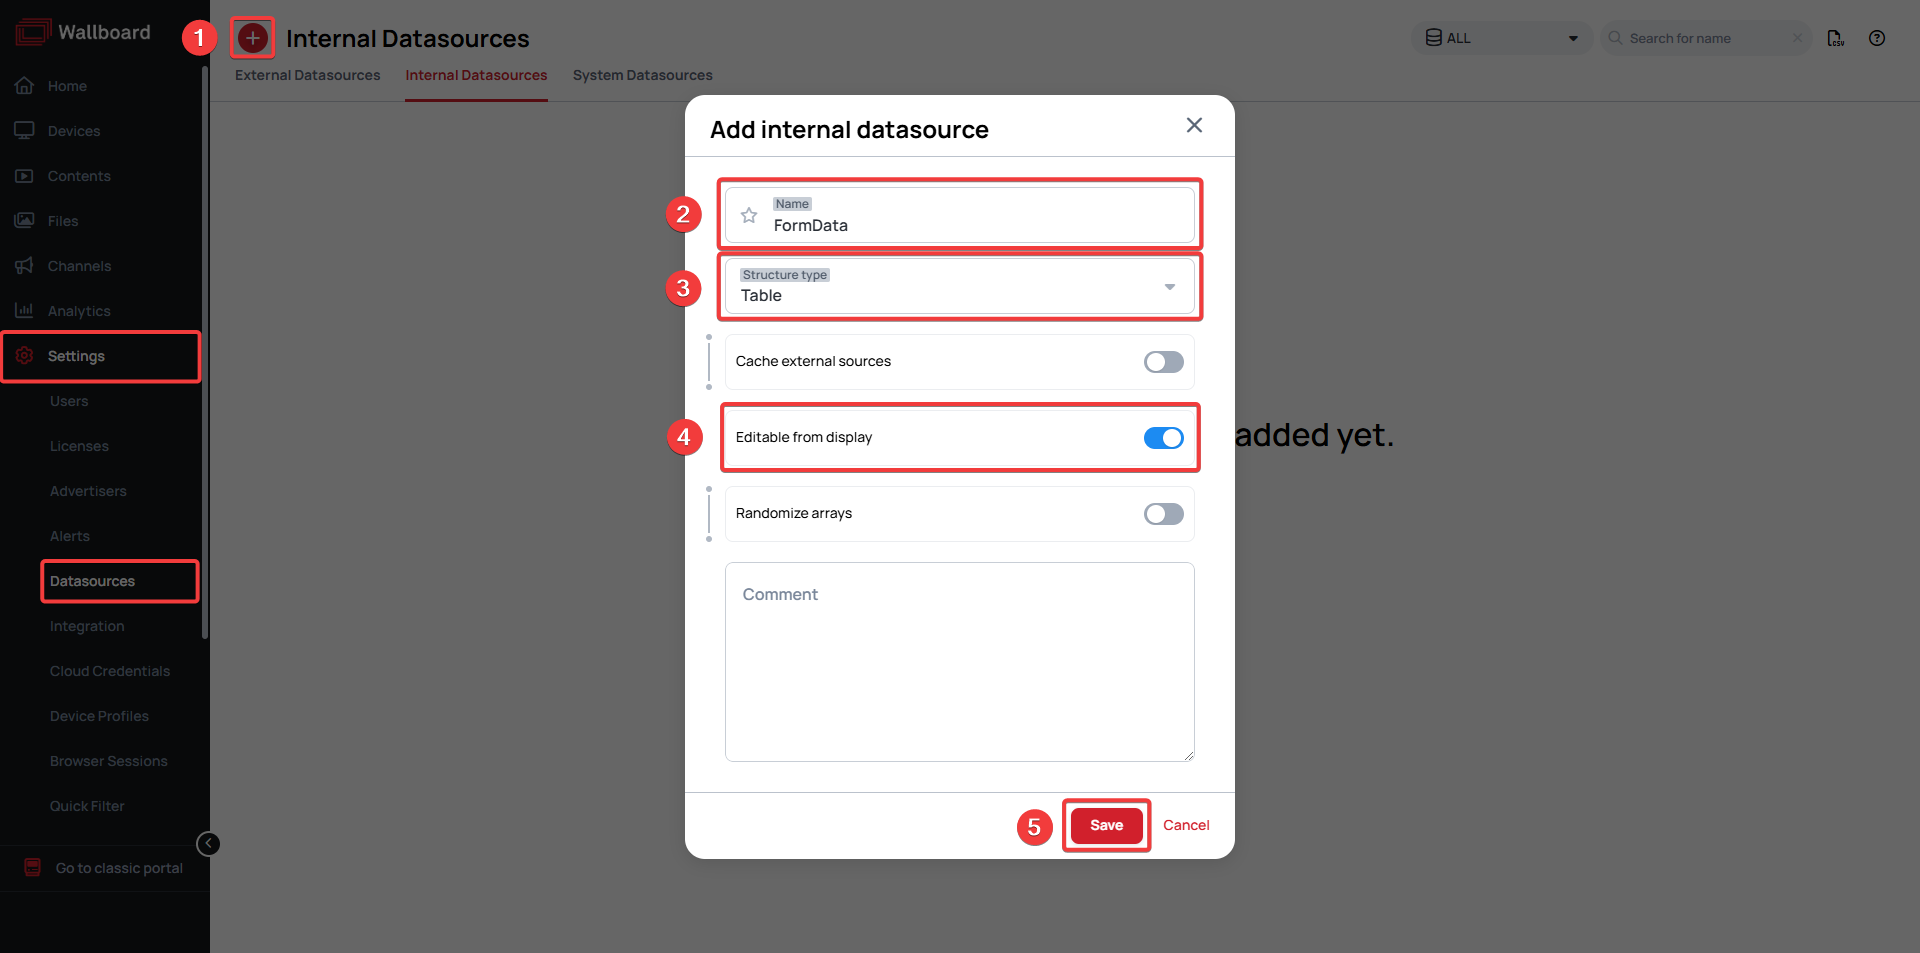
Create an internal datasource for the results
- Go to Settings > Datasources > Internal Datasources and click Add internal datasource
- Name your datasource
- From the dropdown select the Table structure type
- Enable the Editable from display option
- Click Save
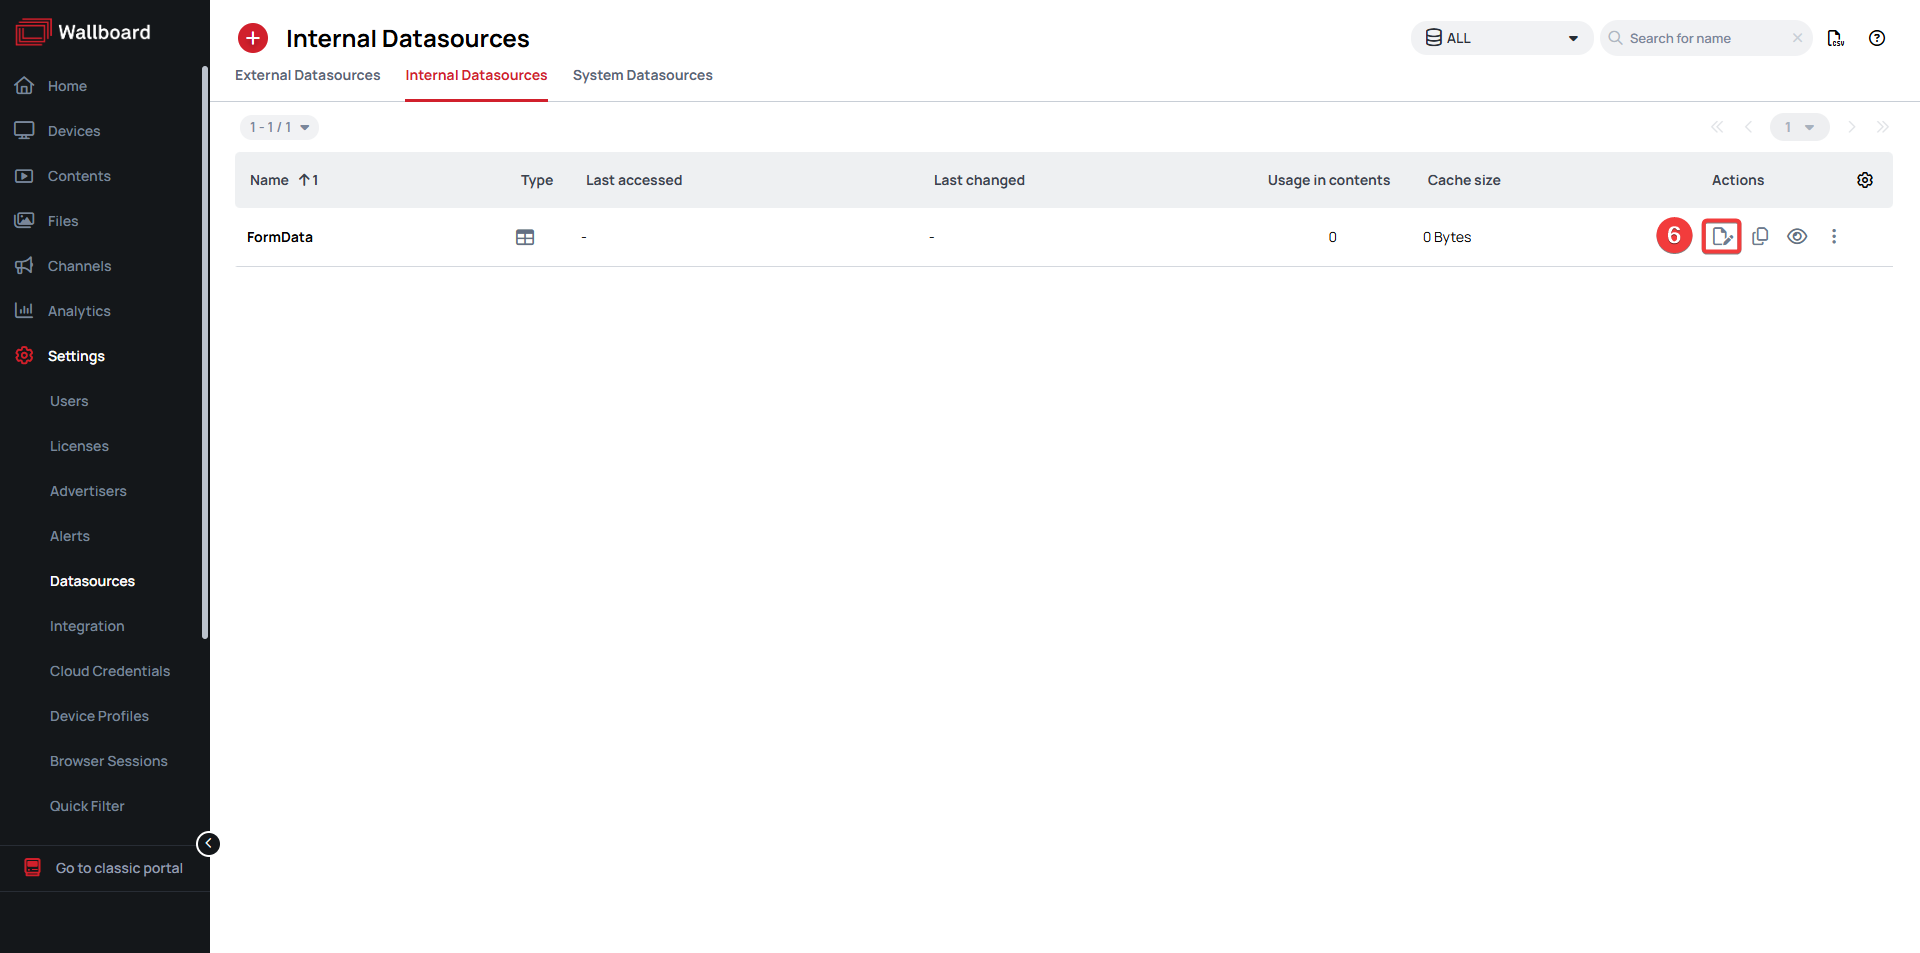
- Click the Editor button in the row of your newly created internal datasource
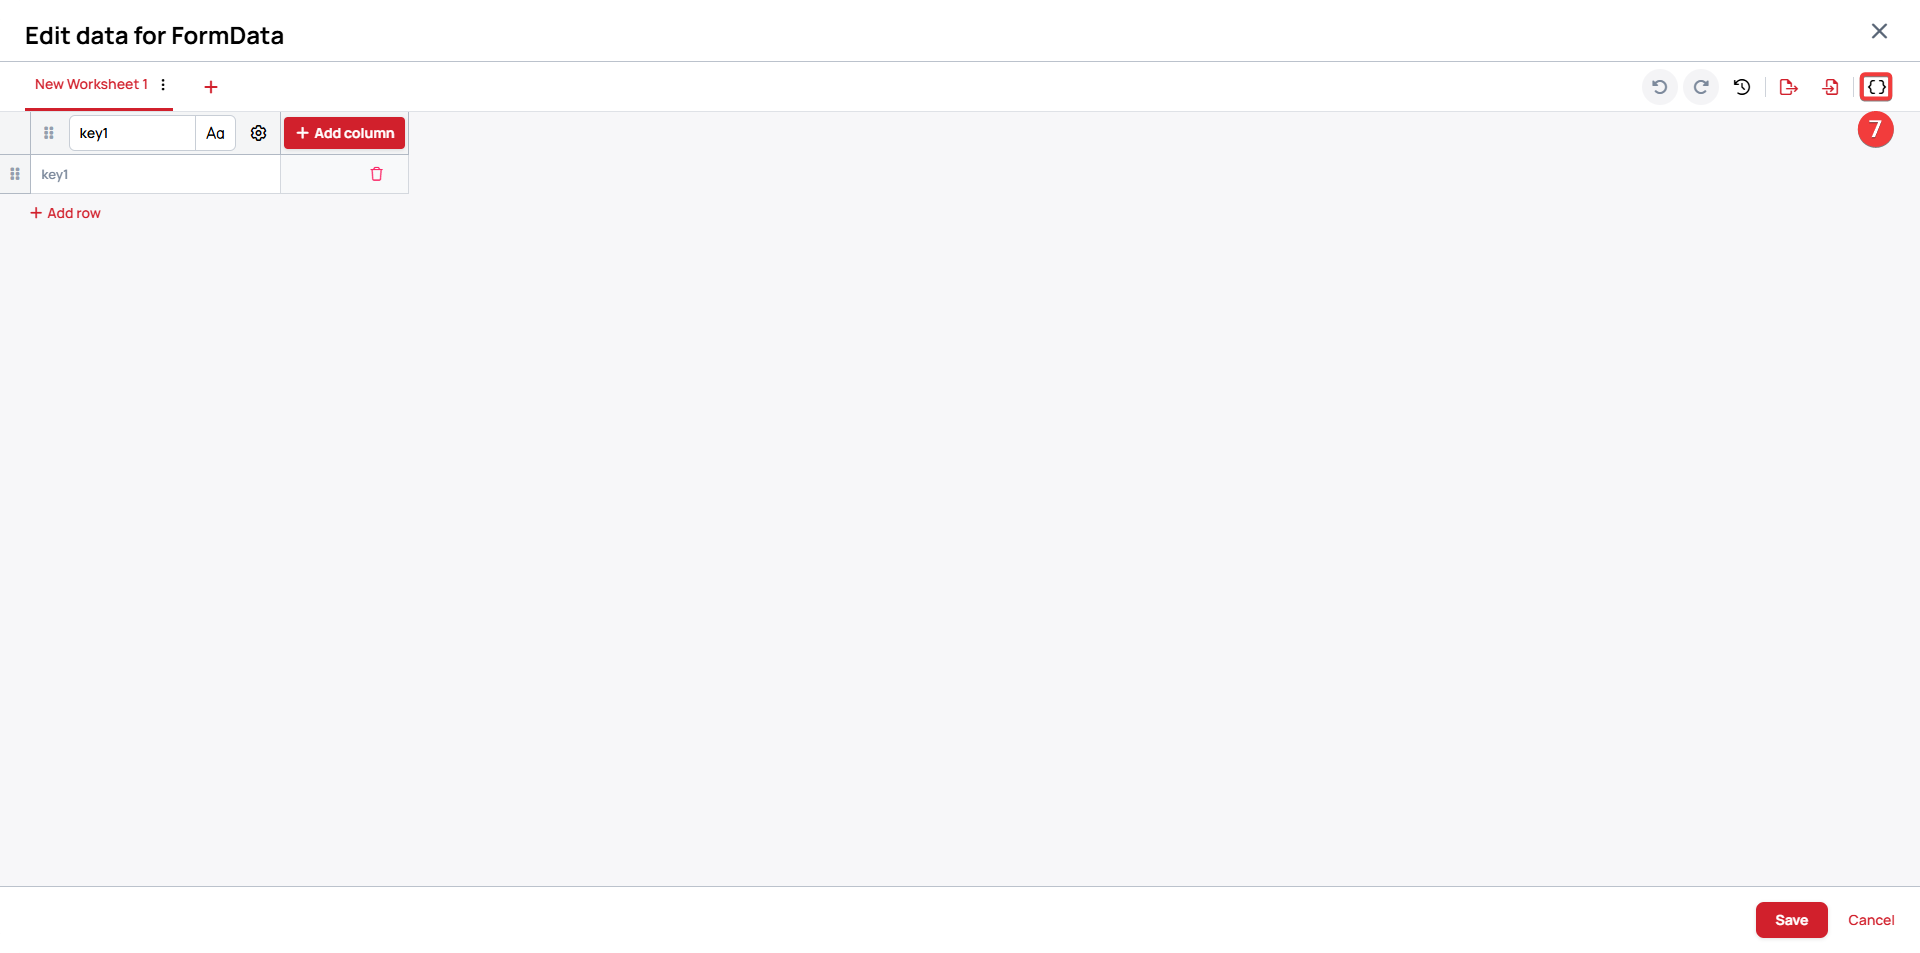
- Select the custom view at the top right
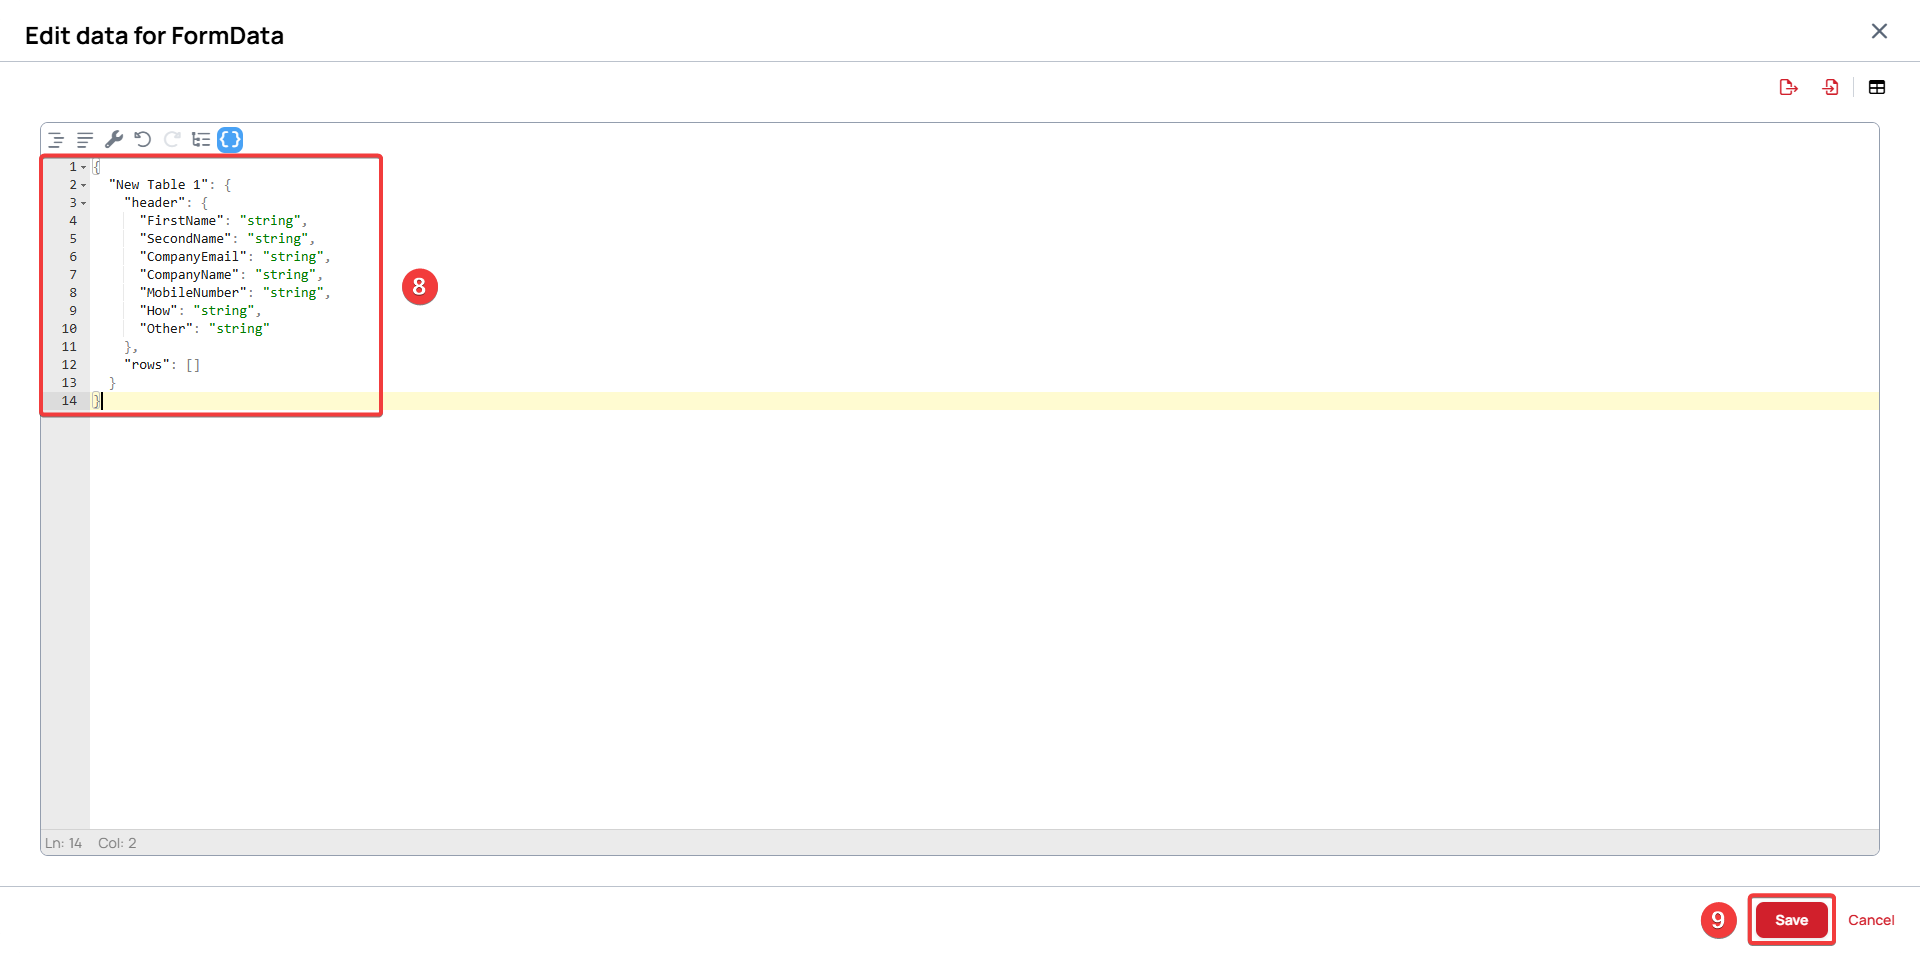
- Copy and paste the following structure, this way your data will be collected into a table that's easy to view and edit.
Datasource structure:
{
  "New Table 1": {
    "header": {
      "FirstName": "string",
      "SecondName": "string",
      "CompanyEmail": "string",
      "CompanyName": "string",
      "MobileNumber": "string",
      "How": "string",
      "Other": "string"
    },
    "rows": []
  }
}
- Click Save
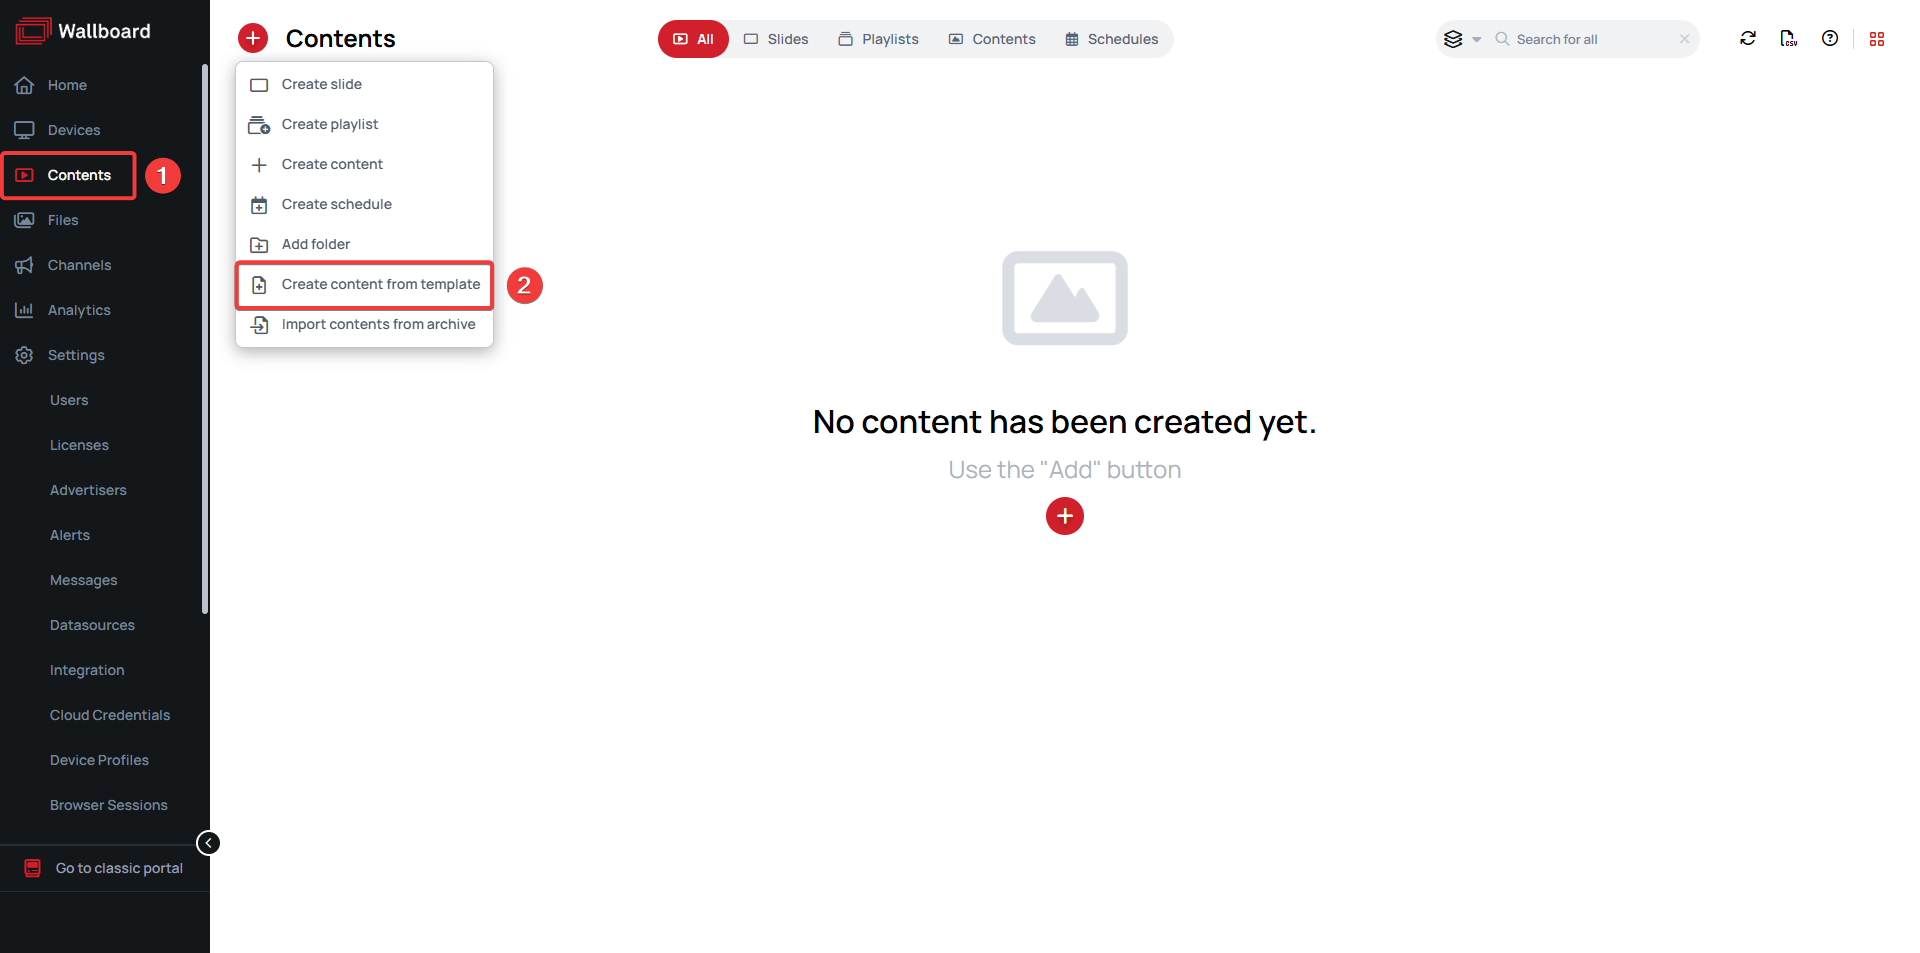
Create a content from template
- Go to Contents
- Click Add new >> Create content from template
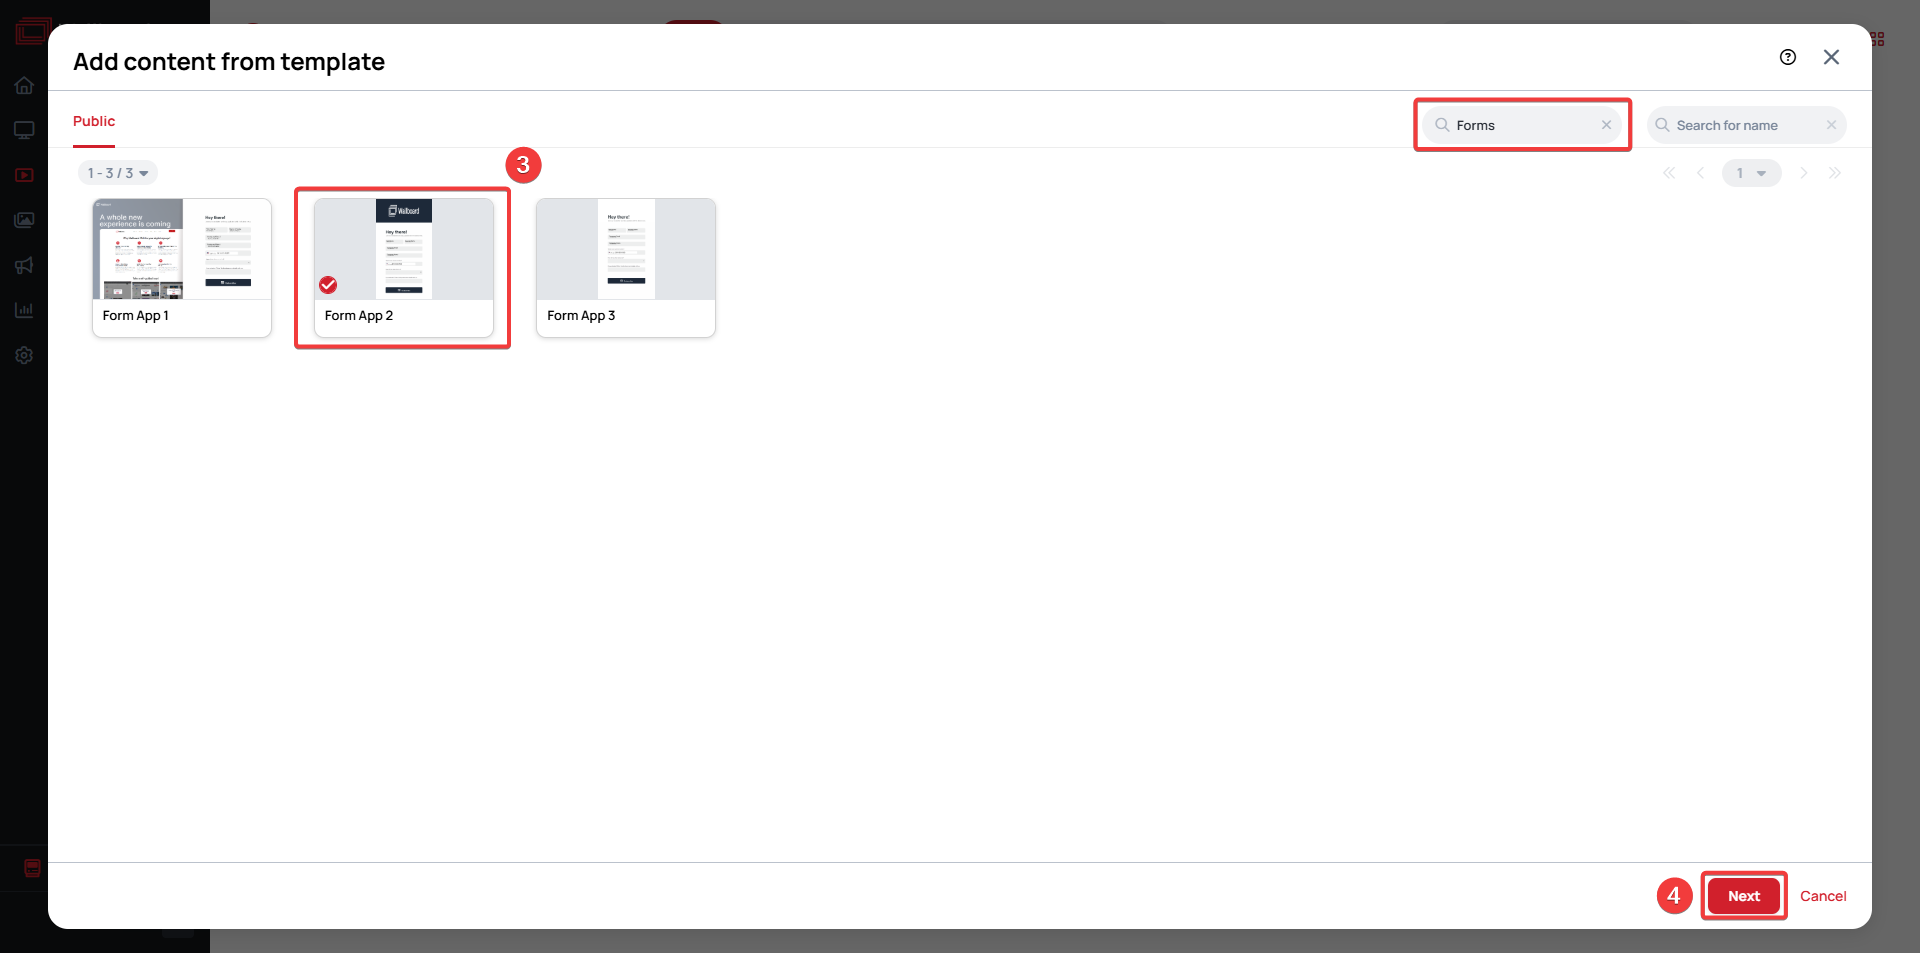
- Search for the tag Forms and select the Form App 2 template
- Click Next
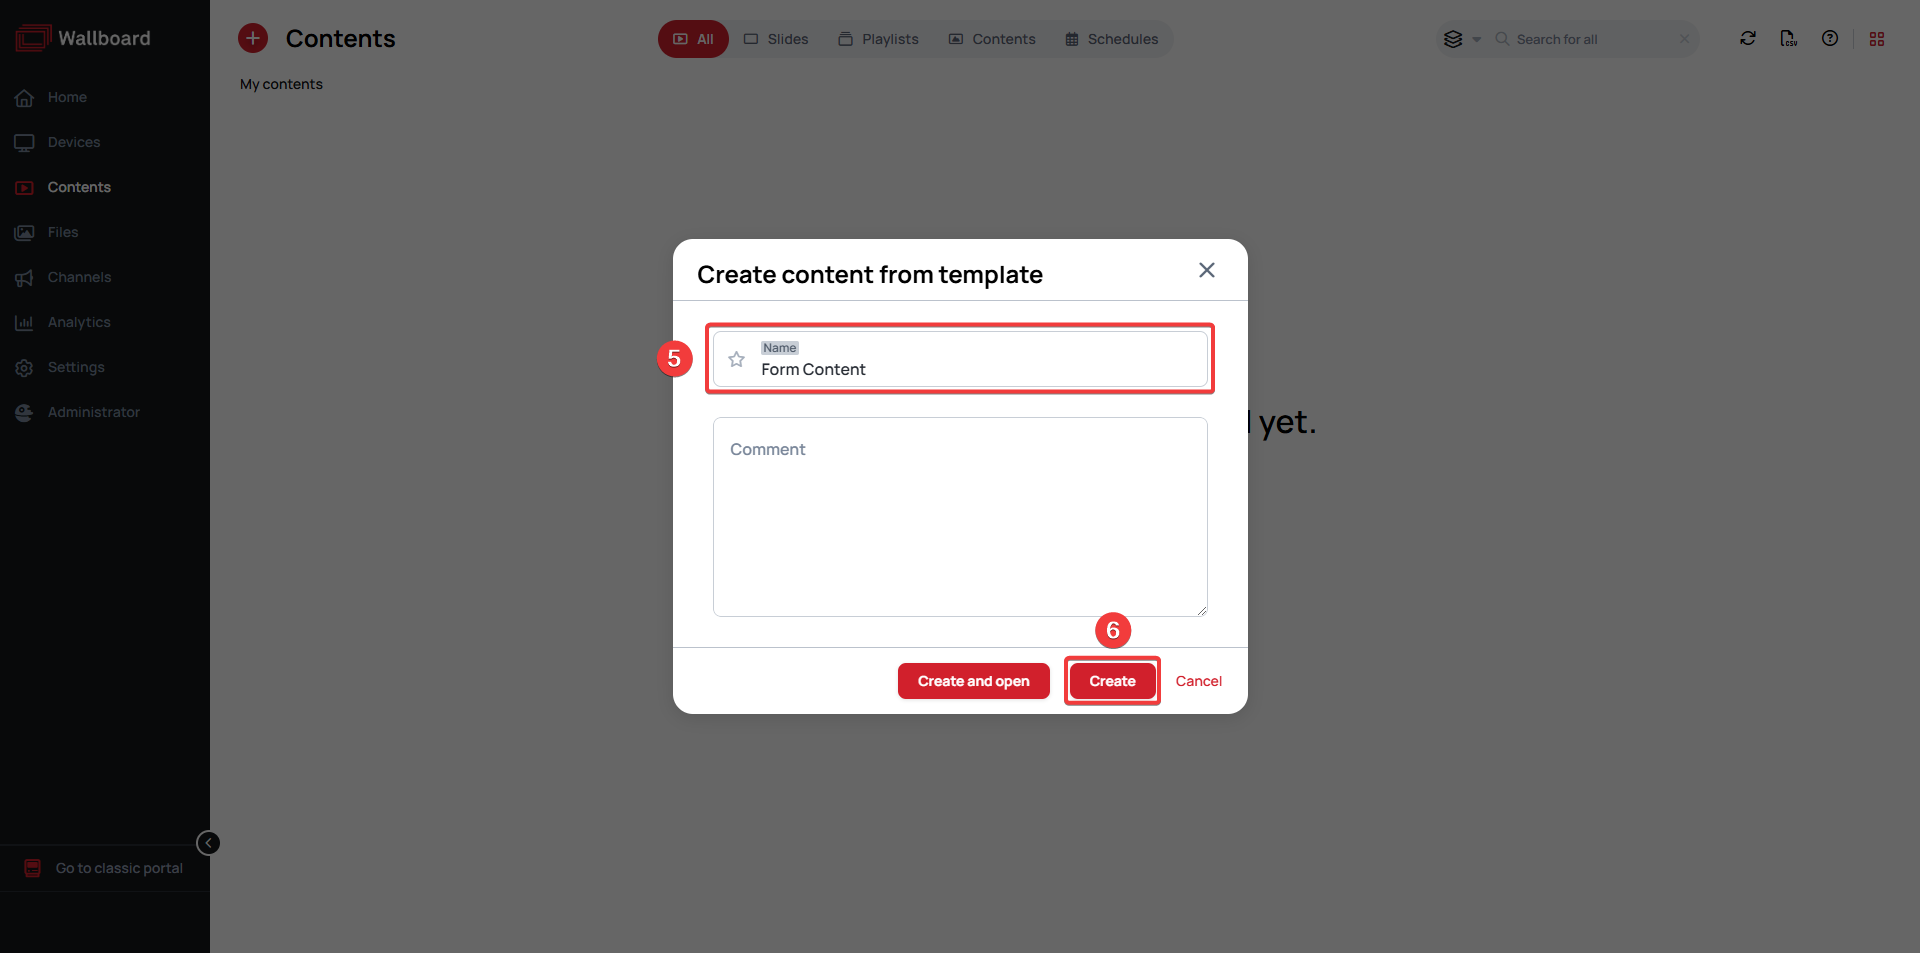
- Name your content
- Click Create
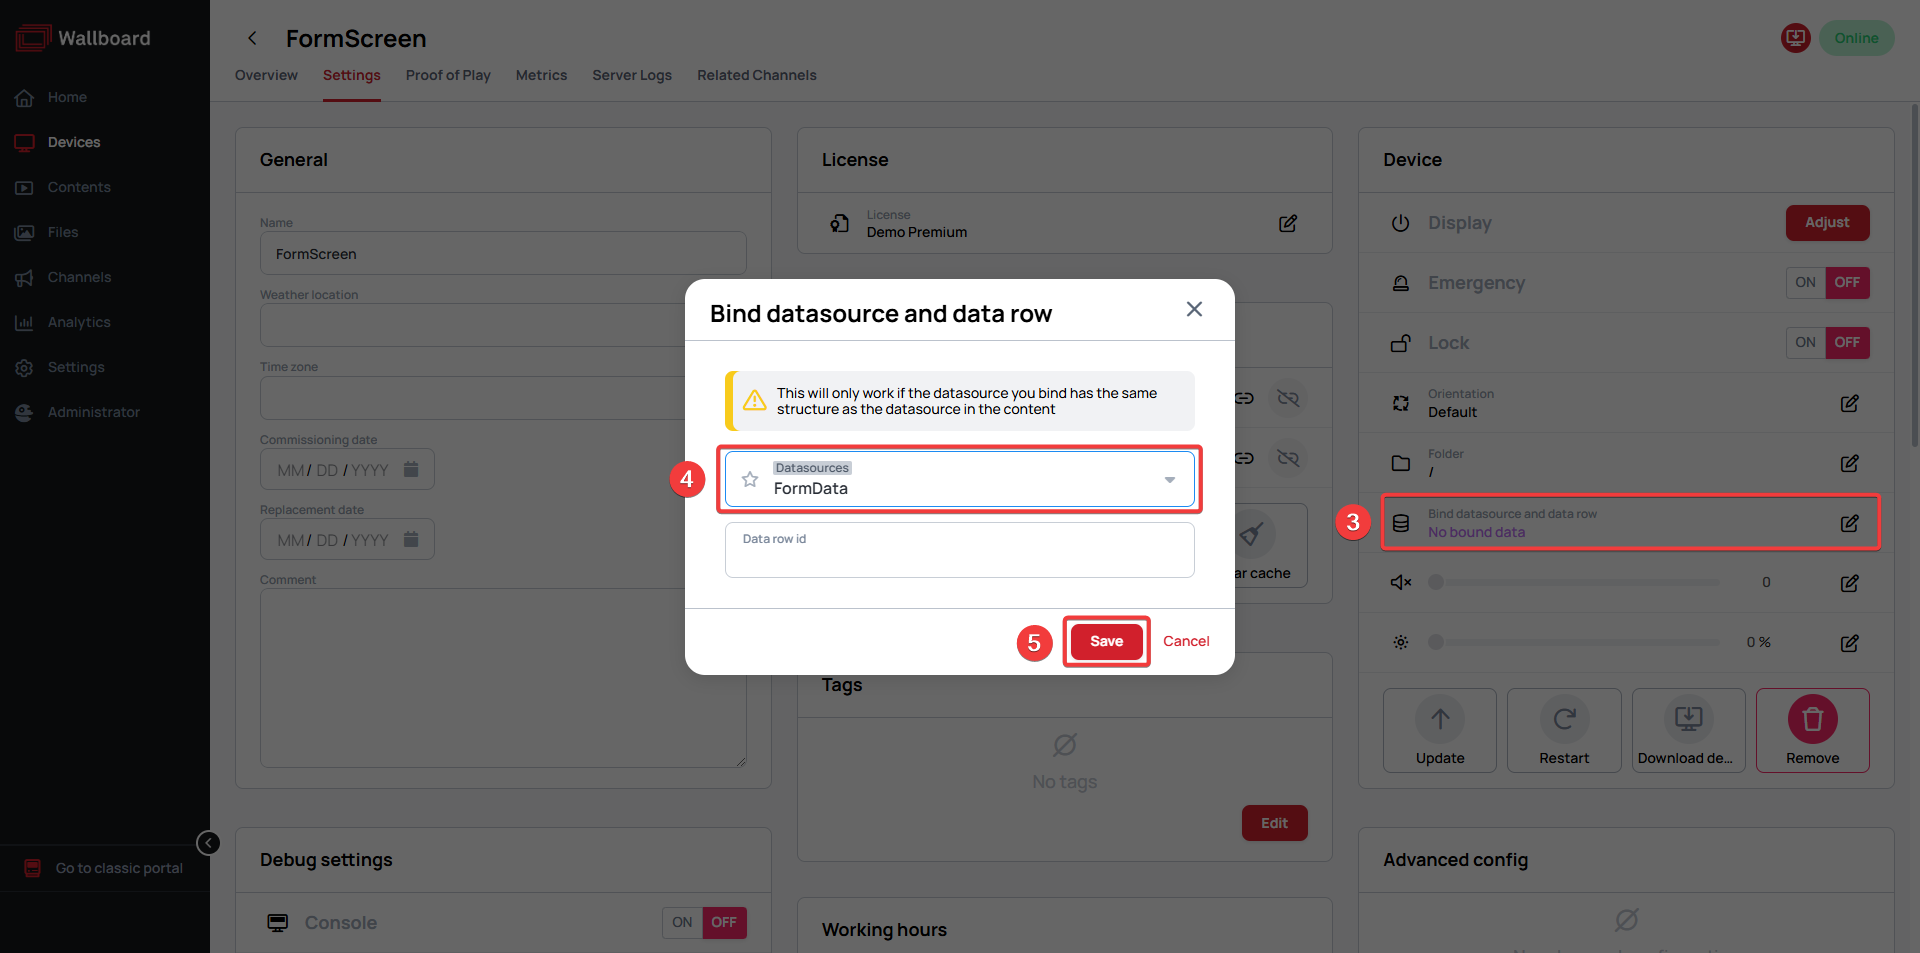
Bind your datasource to the screen
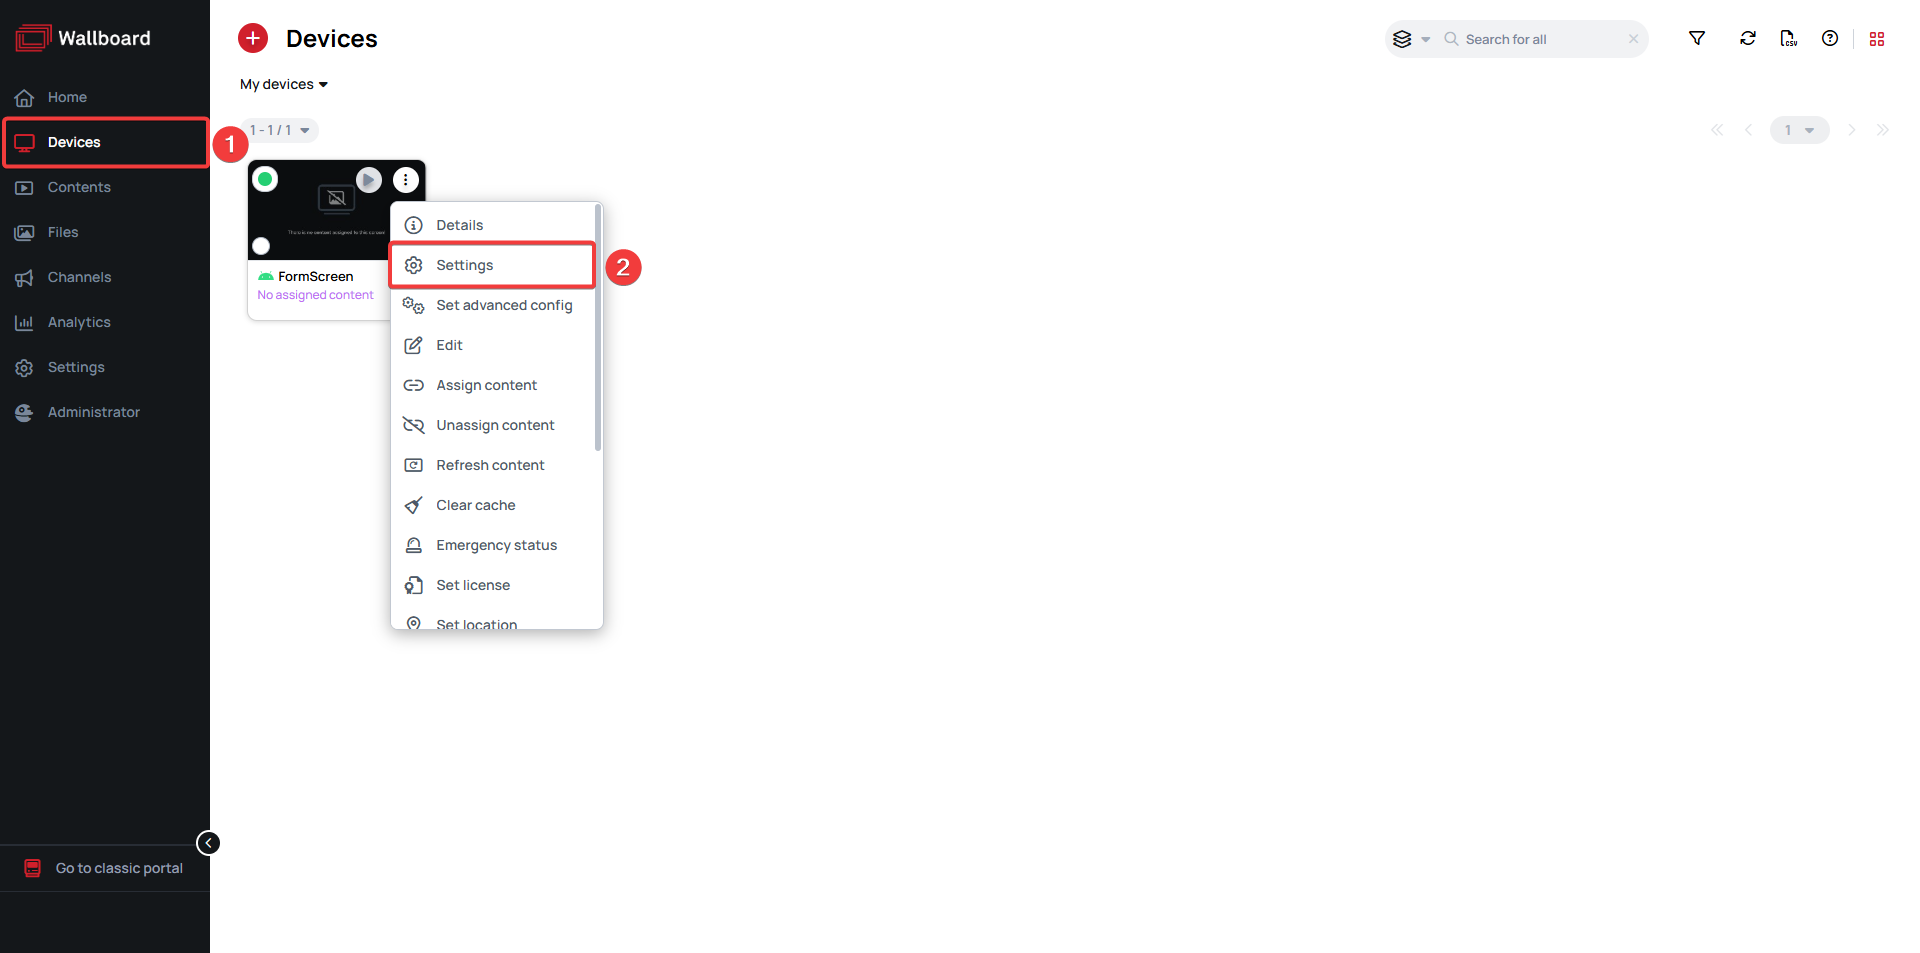
- Go to Devices
- Right click on your device and go to Settings
- Click bind datasource and data row
- Select the internal datasource you created
- Click Save
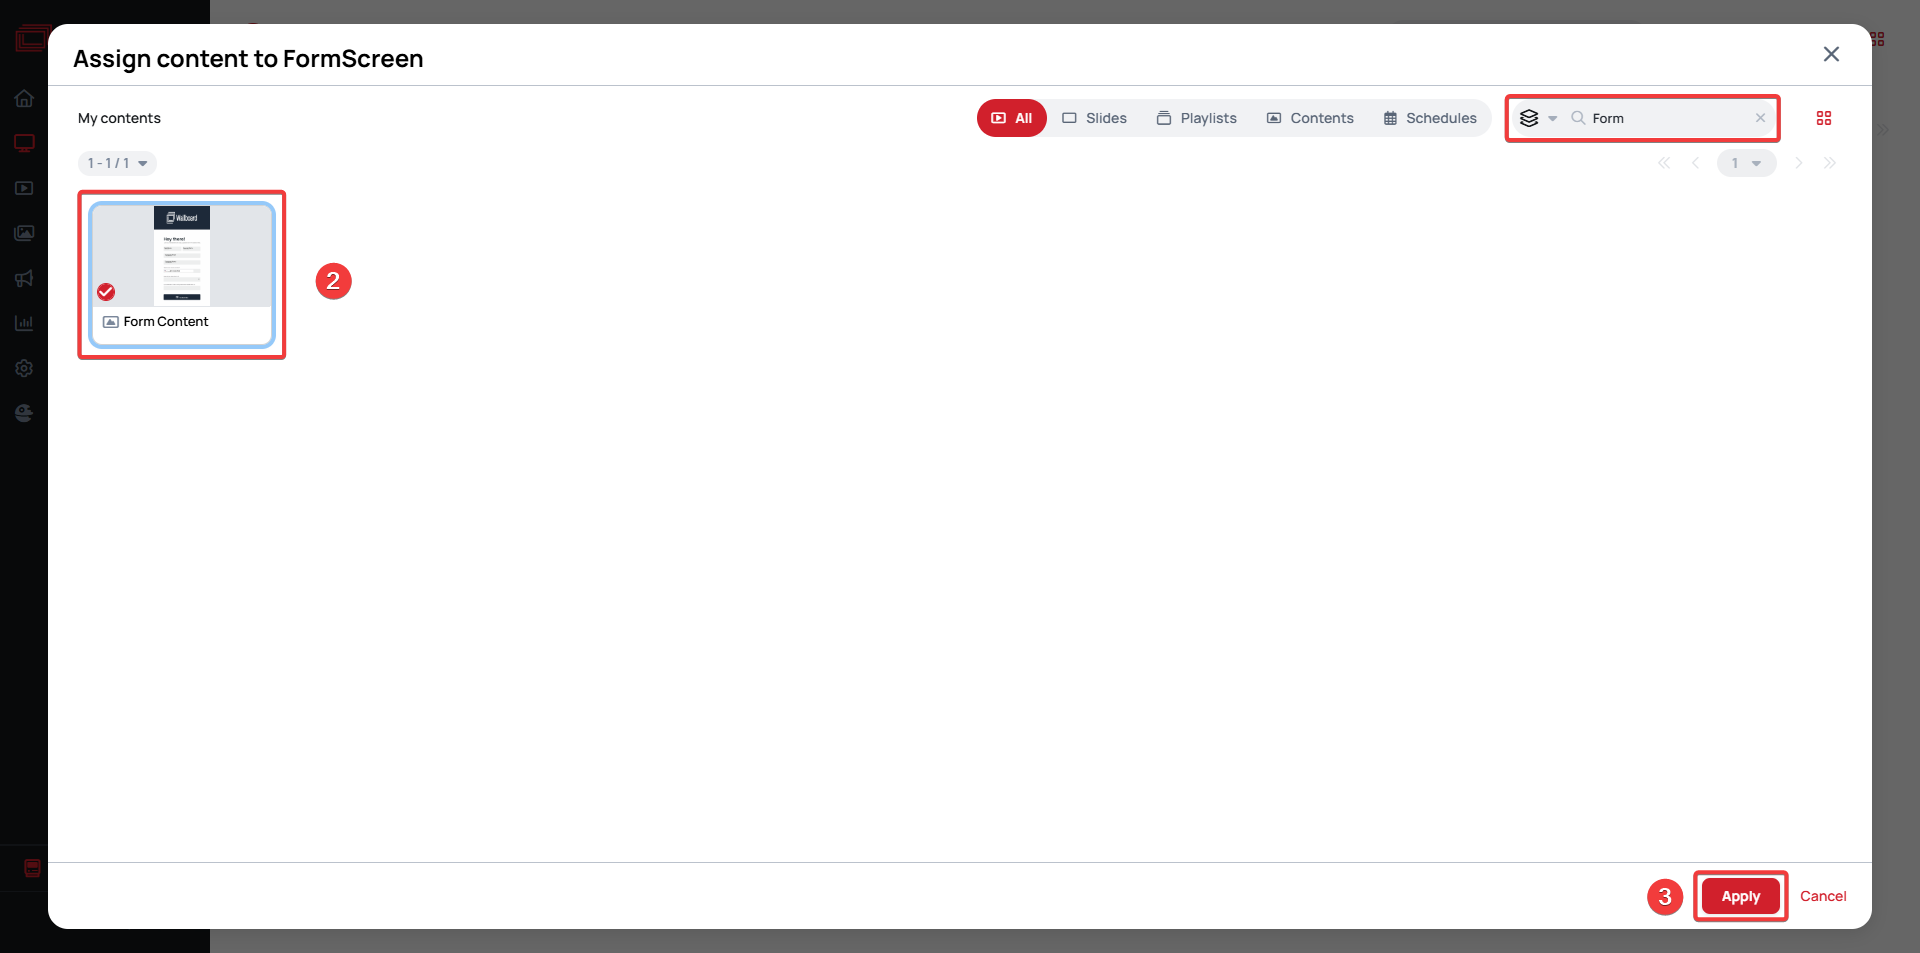
Assign the content to your screen
- Right click on your device and select Assign content
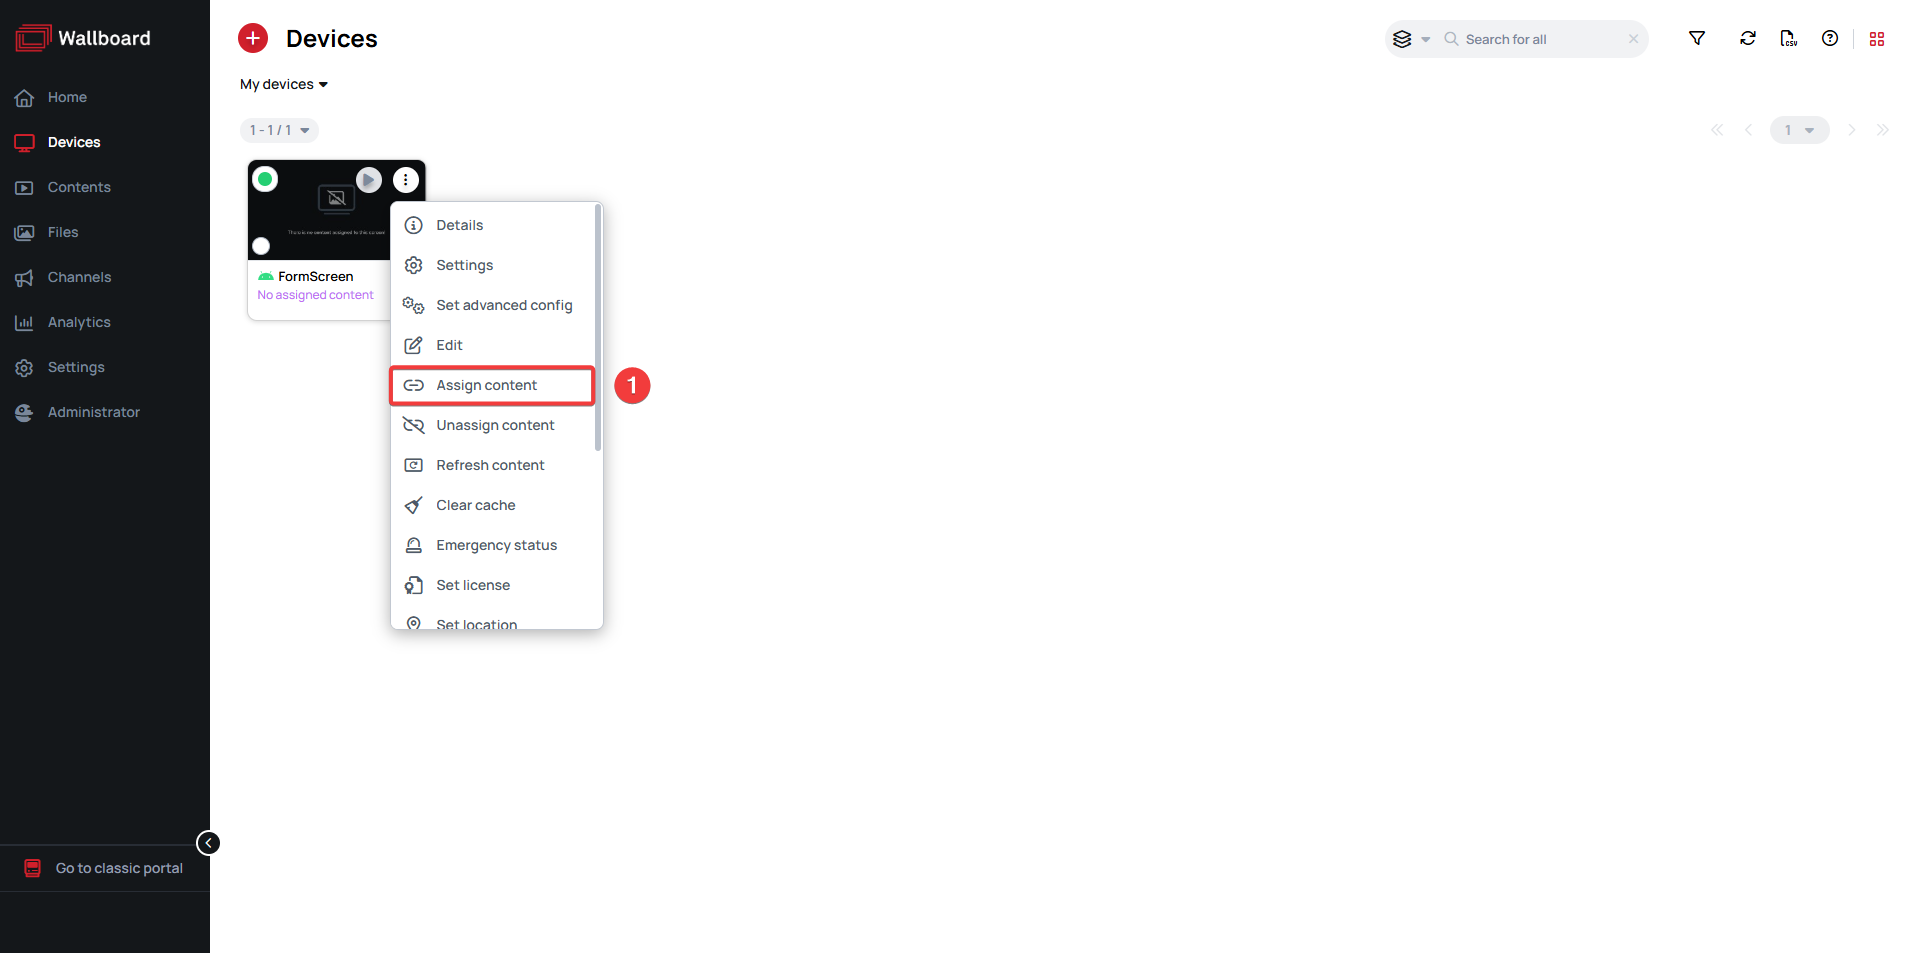
- Look for the content you created previously and select it
- Click Apply
Customizing the Content to Your Branding
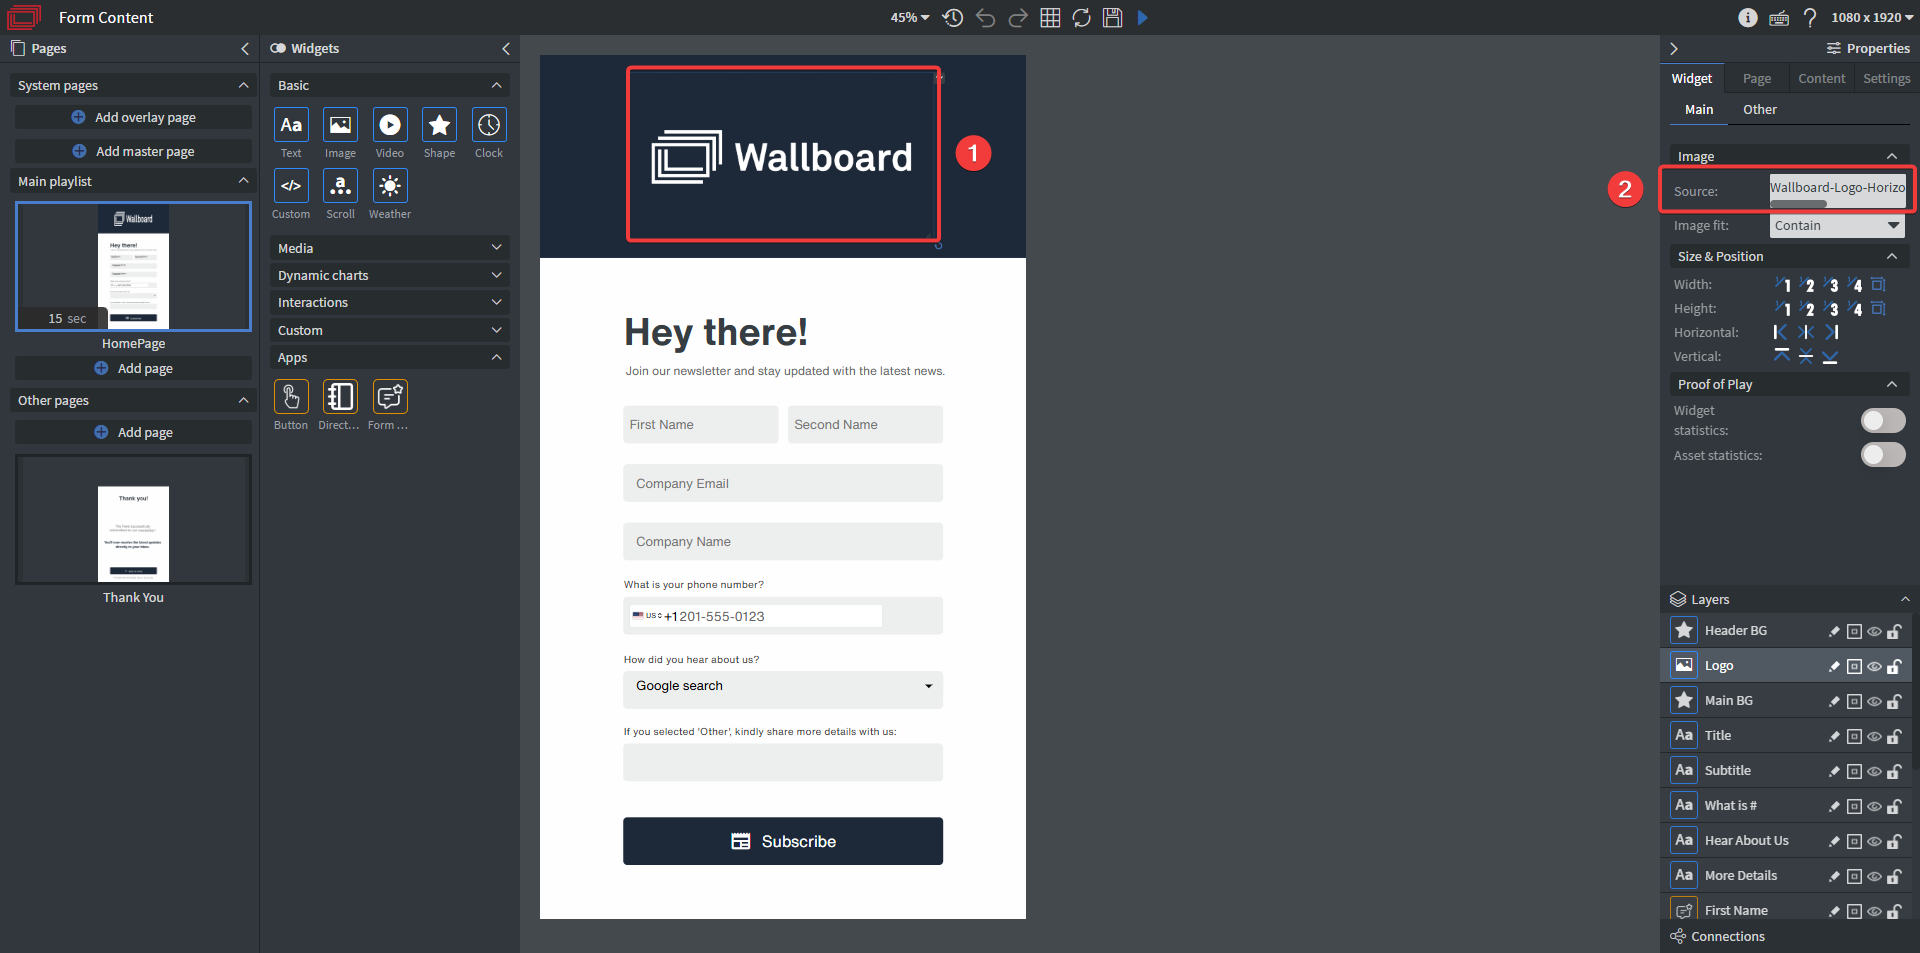
Changing the logo:
- Click on the Wallboard logo
- Click on the Source under the widget's Main settings then choose or upload a new image
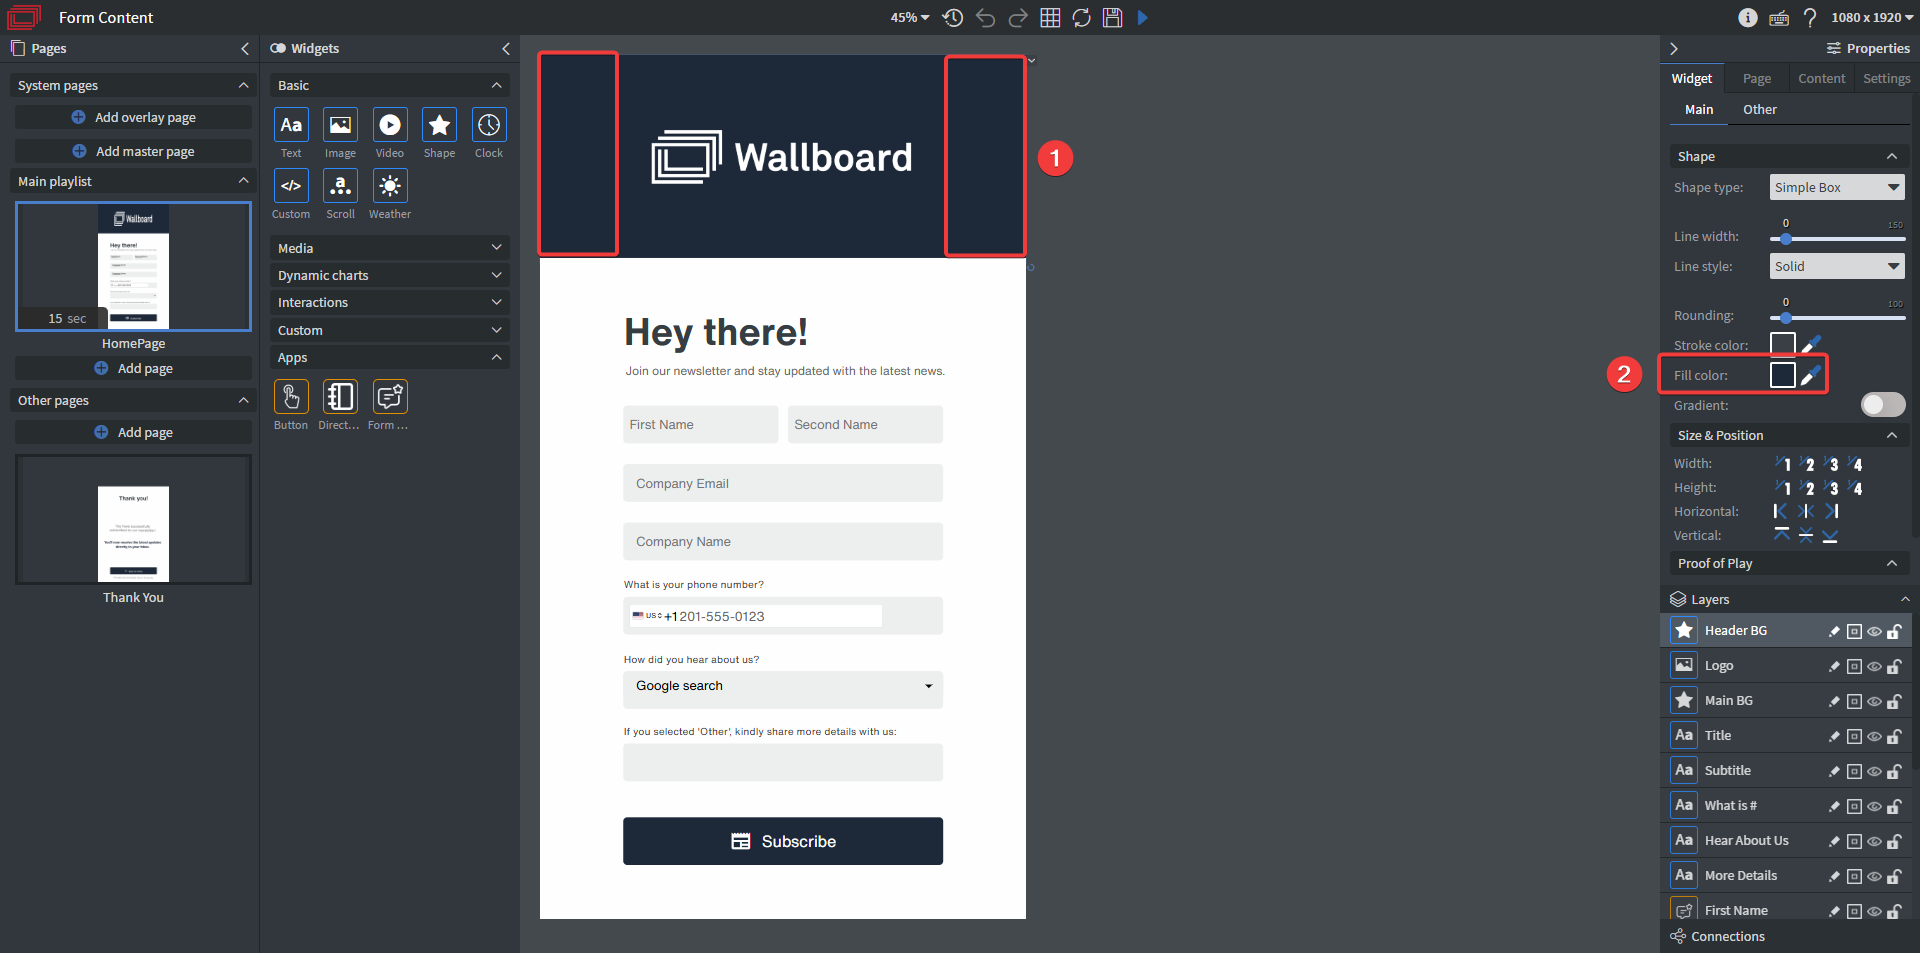
Changing the header color:
- Click on either side of the header
- Click on Fill color under the widget's Main settings then choose a new color for your header, click Select once finished
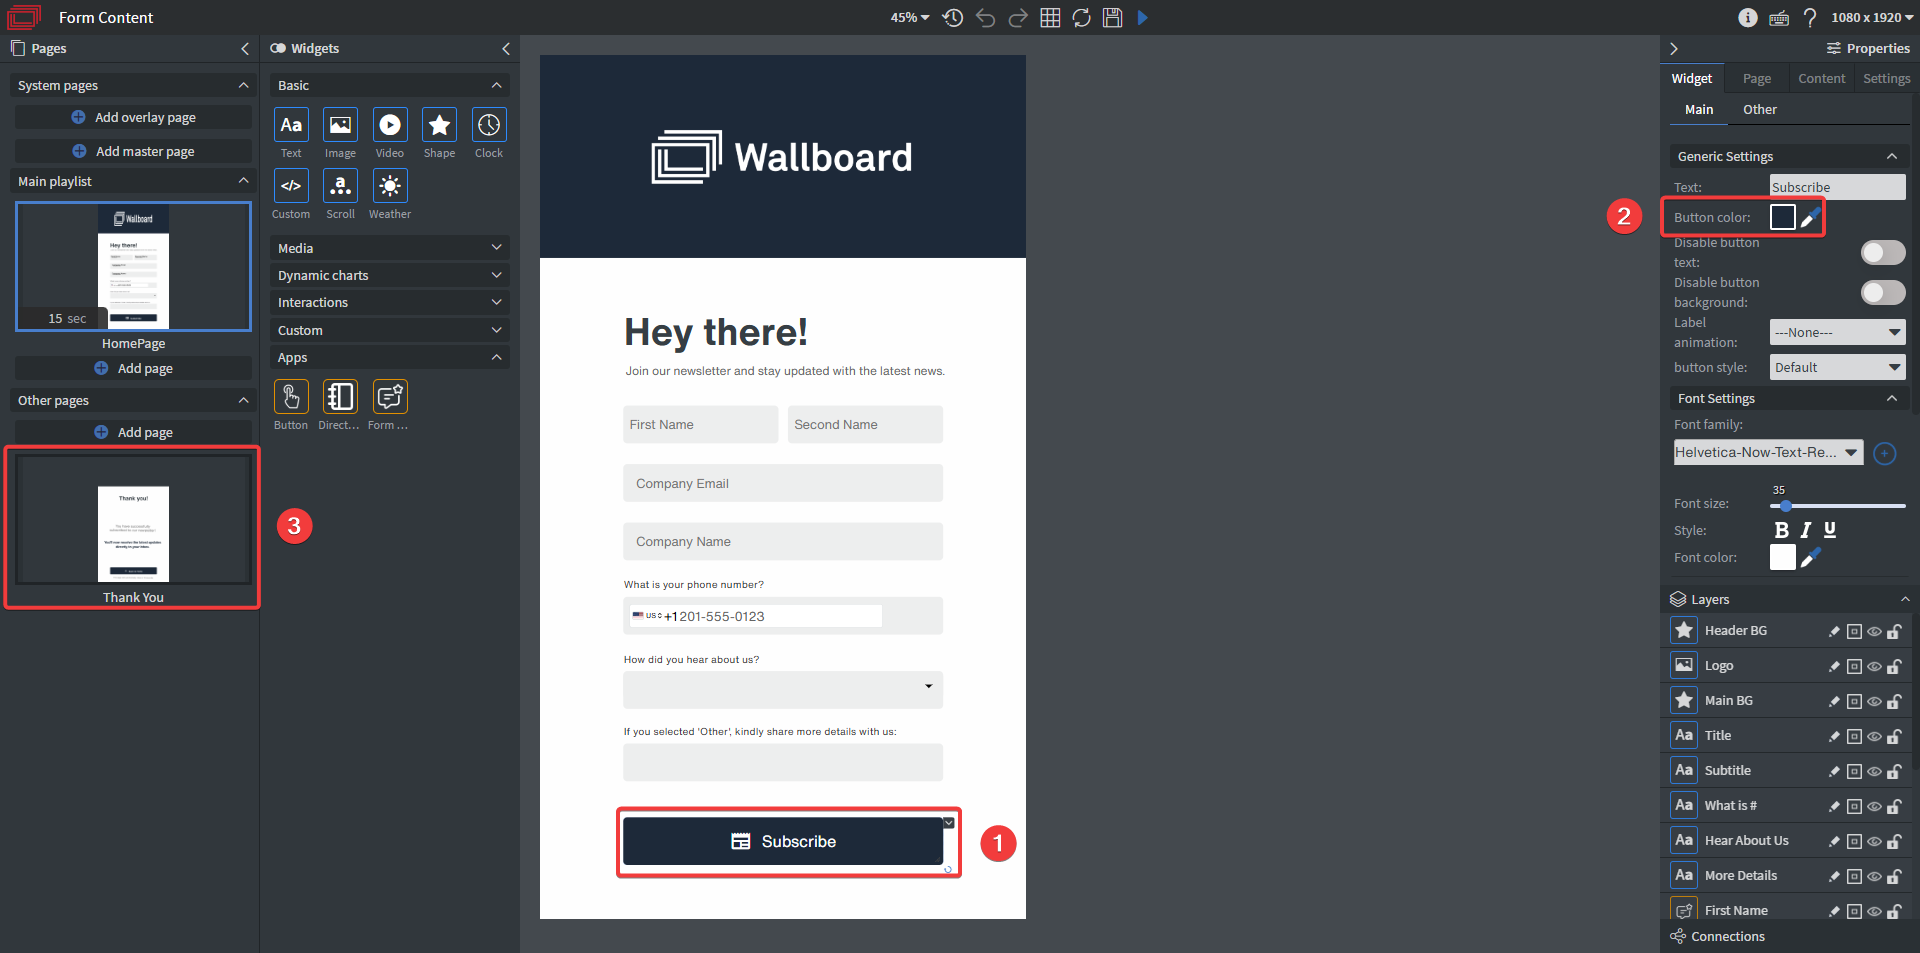
Changing the button colors:
- Click on the Subscribe button
- Click on Button color under the widget's Main settings then choose a new color for your button, click Select once finished
- Repeat the same process on the Thank you page for the Back to home button
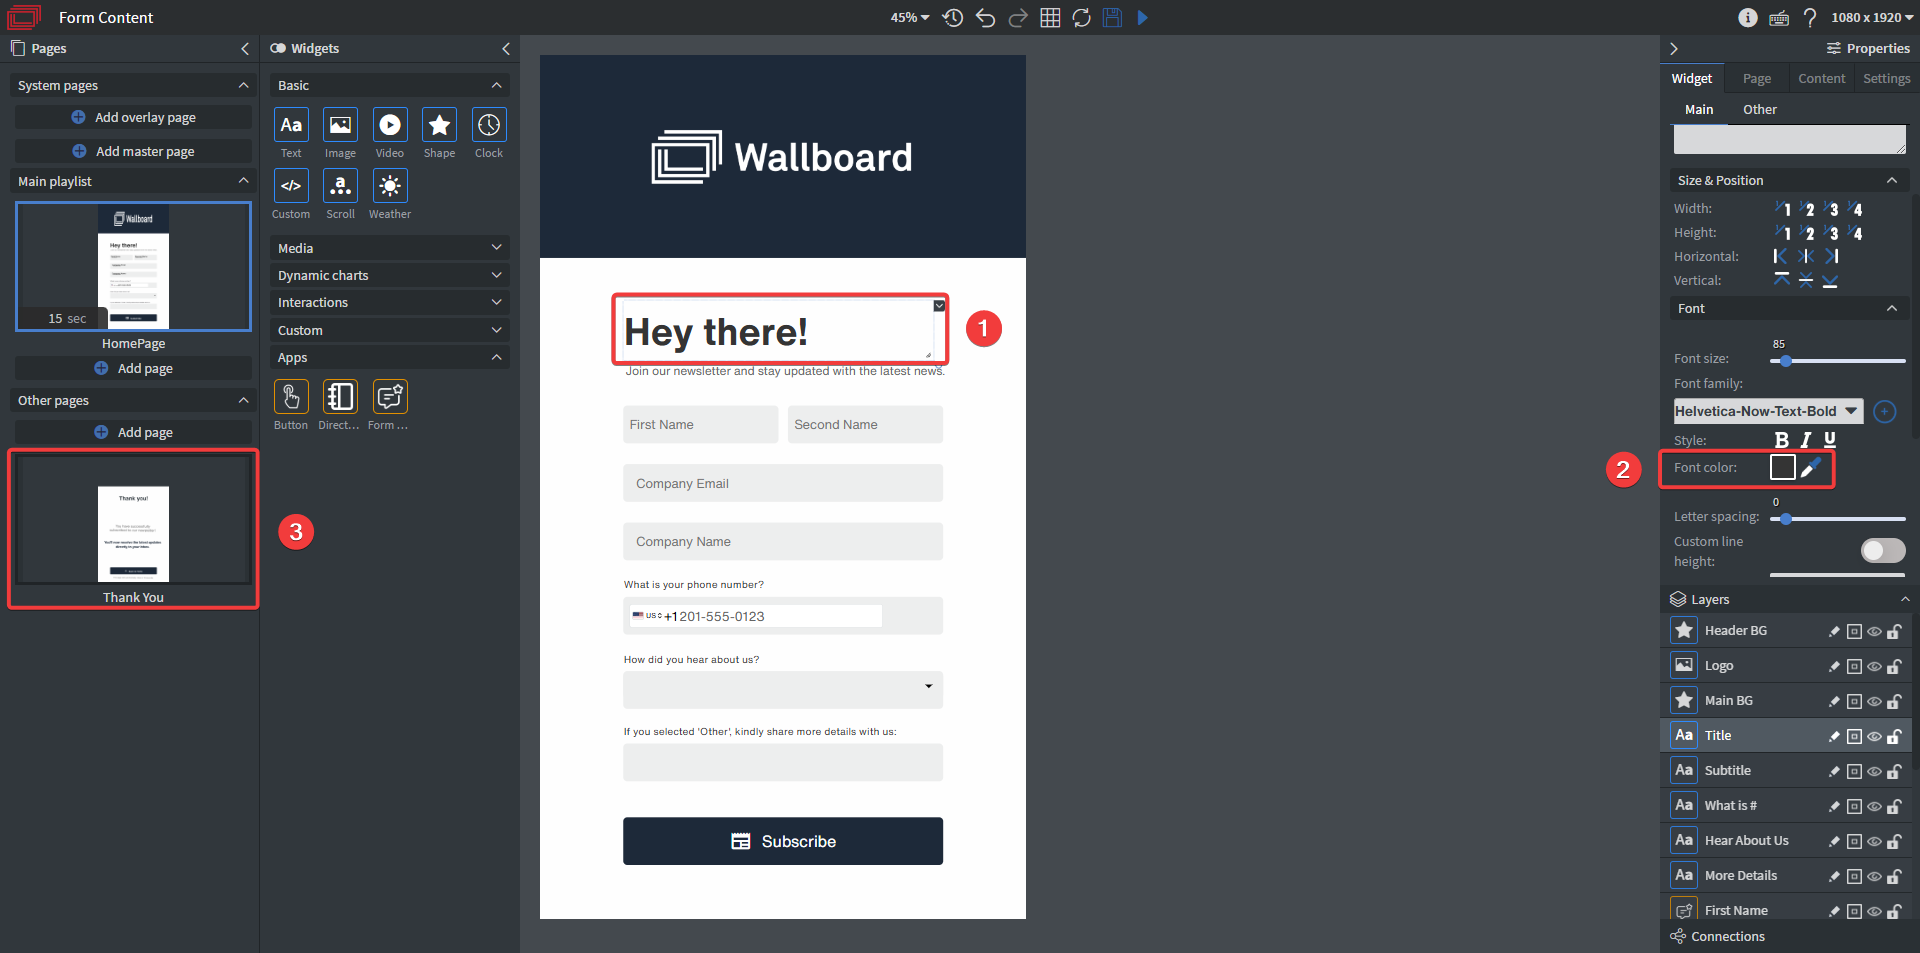
Changing text colors:
- Click on the Hey there! text
- Click on Font color under the widget's Main settings then choose a new color for your text, click Select once finished
- Repeat the same process on the Thank you page for all the texts you want to recolor
Changing the confirmation closeout time:
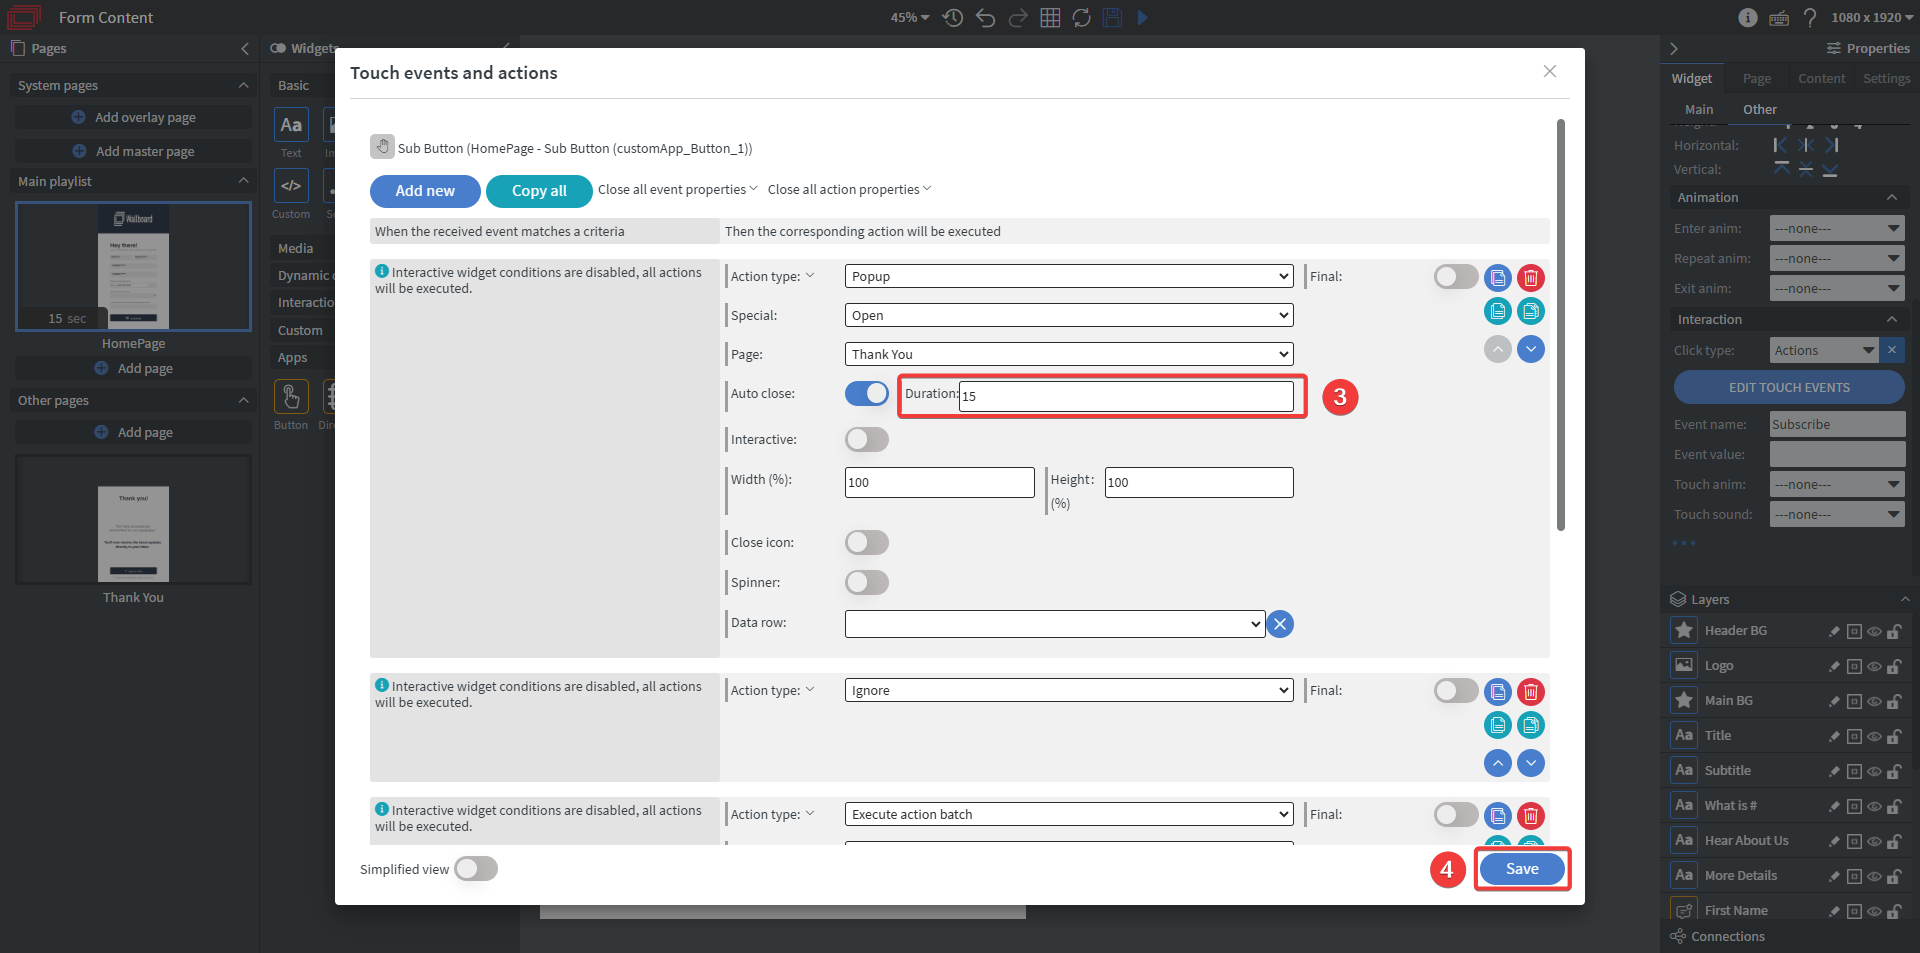
- Click on the Subscribe button
- Click Edit touch events under the widget's Other settings
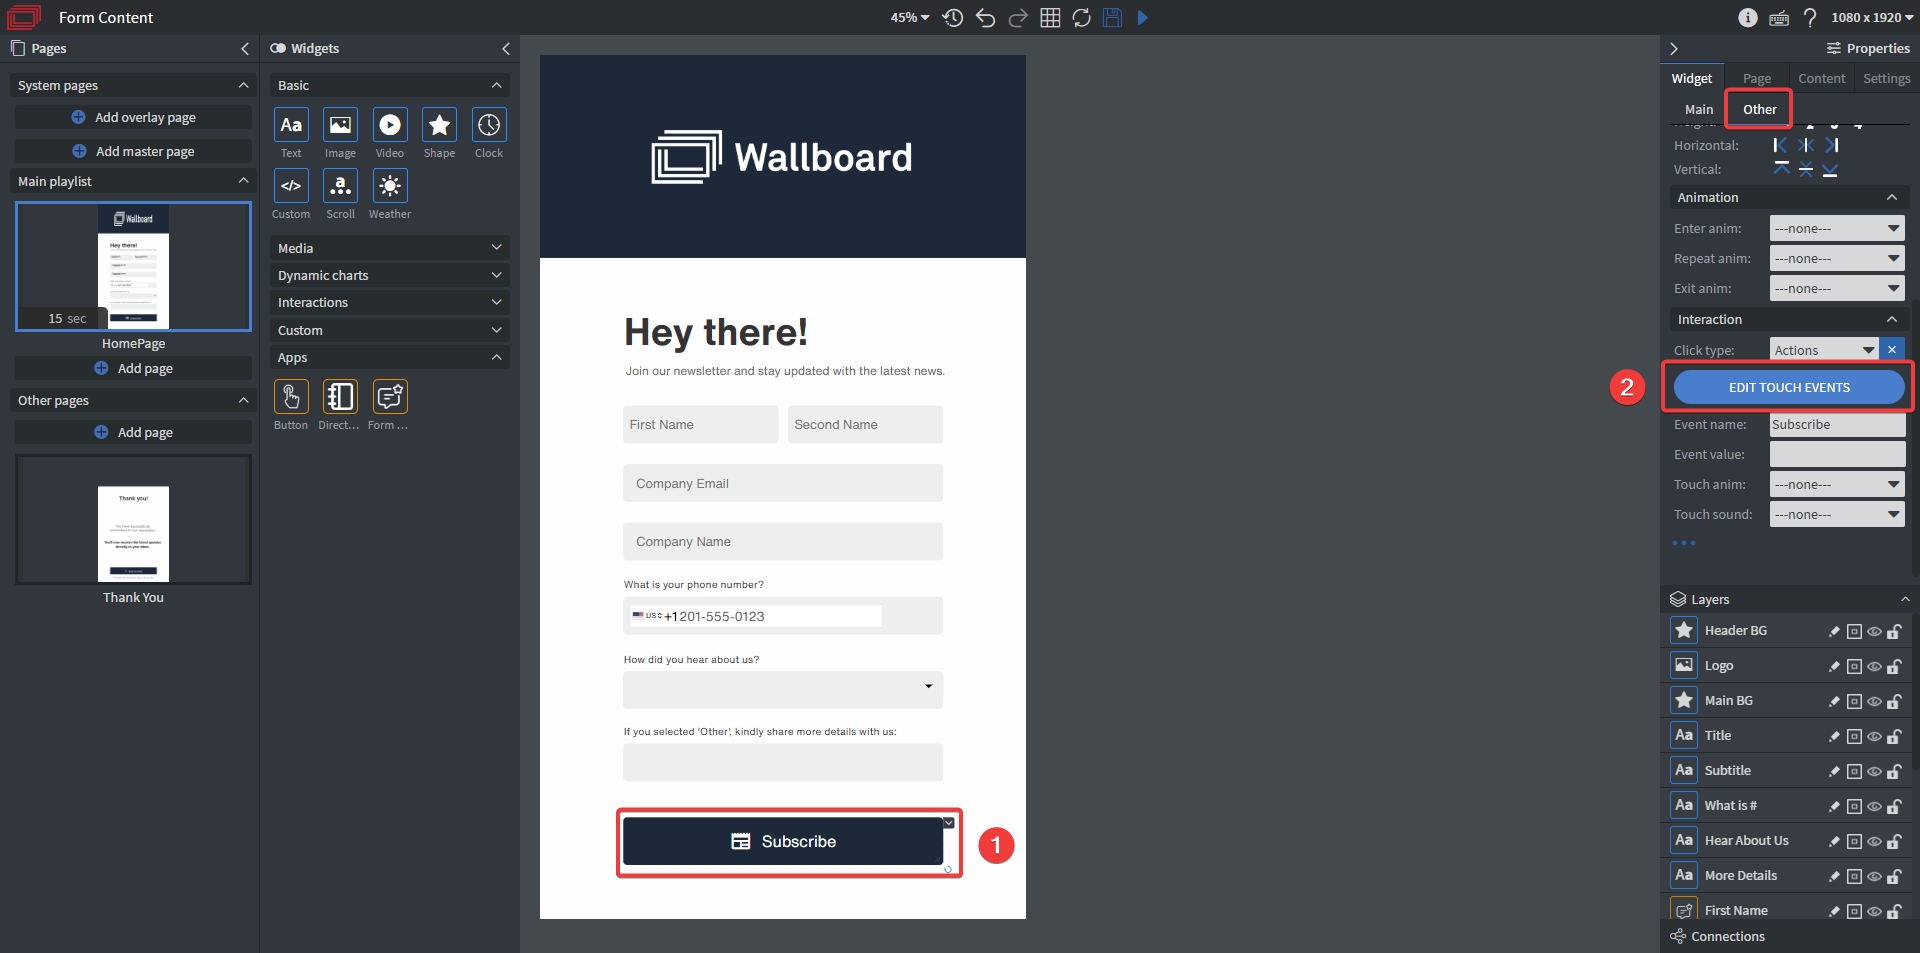
- Change the duration for the Auto close
- Click Save
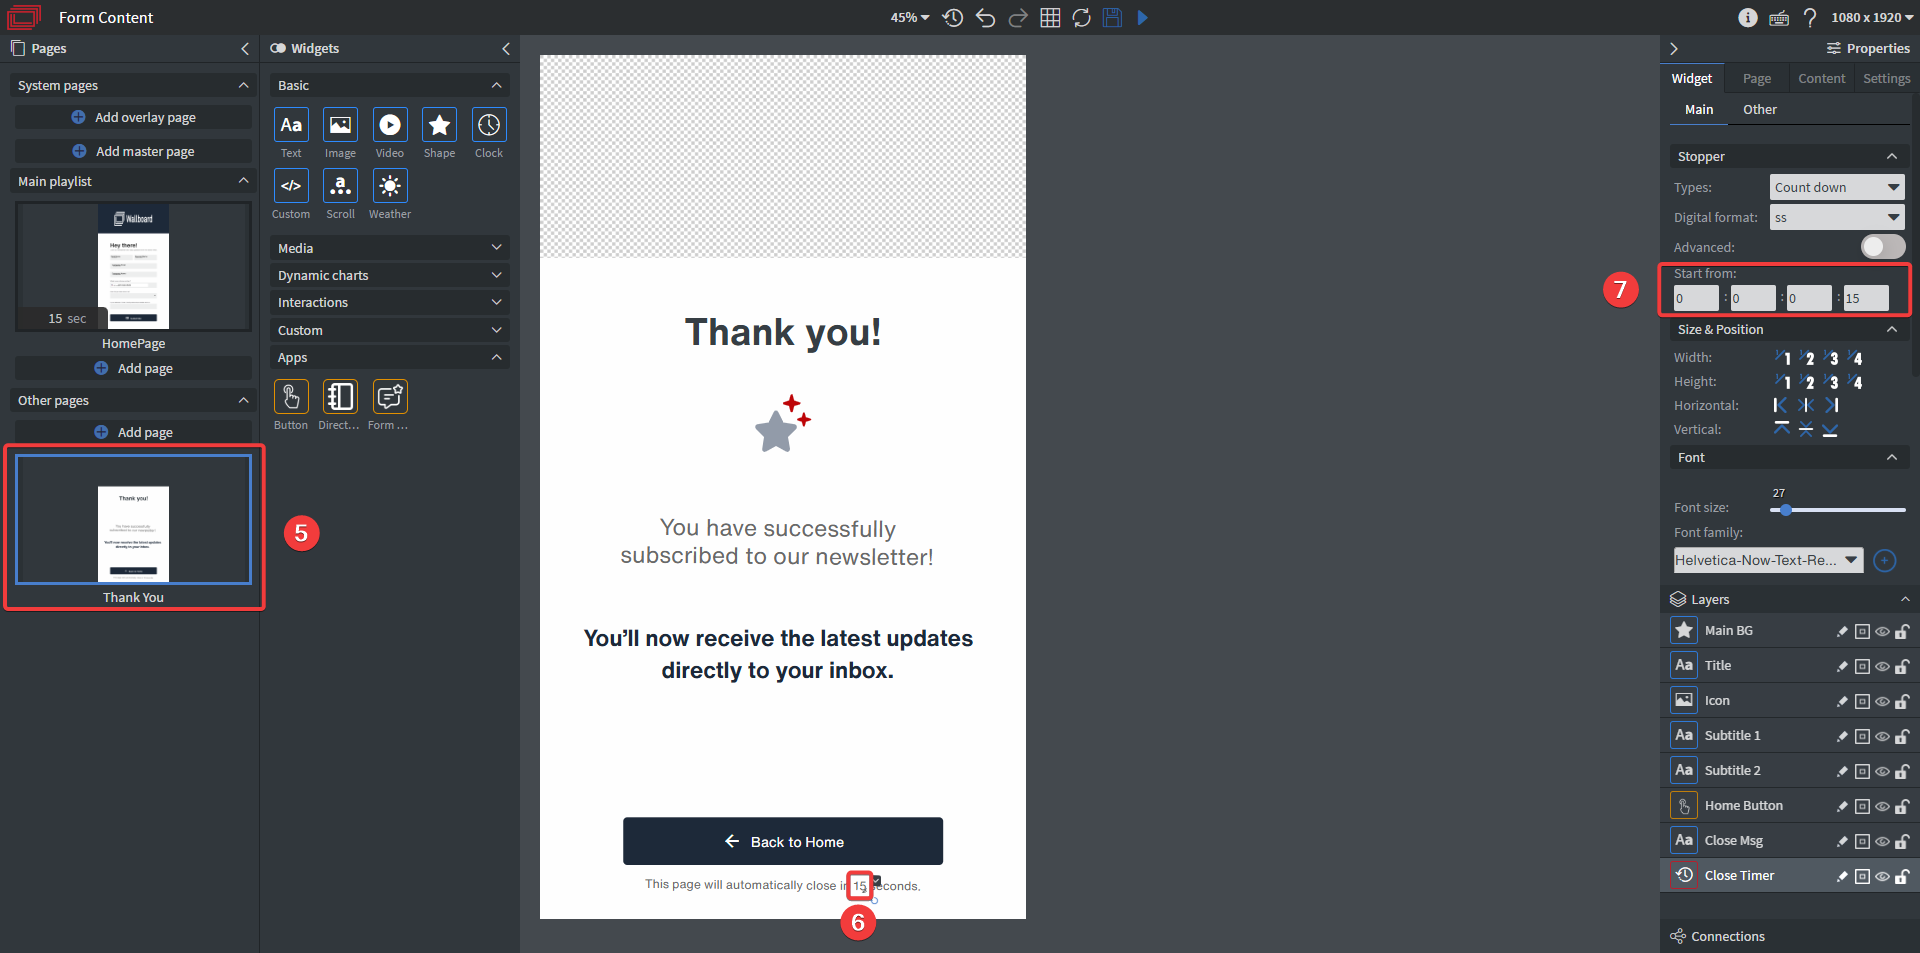
- Go to the Thank You page
- Click on the 15 countdown at the very bottom
- Set the Start from in the widget's Main settings so it matches the time you set at step #3
Watch YouTube tutorial video
Tip!
If you have further questions please do not hesitate to contact us at [email protected]. Happy editing!